Turn learning about pumpkins into an enjoyable and creative experience with our parts of a pumpkin craft activity – a perfect addition to your Thanksgiving crafts for kids. By working on this delightful project, children gain a deeper understanding of the different components of pumpkins.
This engaging hands-on learning activity can be done at home or school. Plus, it’s an excellent way to boost fine motor skills. Young learners not only get engrossed in a hands-on learning activity but also gain a deeper understanding of the parts of a pumpkin.
This pumpkin craft is great for younger kids learning about pumpkins. Fall is the perfect time to incorporate pumpkins into lessons as they are a big part of Halloween as well as Thanksgiving.
This craft helps kids appreciate pumpkins in our traditions while having fun and improving their motor skills. Plus, they’ll learn all about the different parts of a pumpkin!
Benefits of Making a Parts of a Pumpkin Craft
Creating this ‘Parts of a Pumpkin’ craft offers numerous benefits for children. The hands-on activity involves painting, cutting, and gluing different materials, which aids in enhancing fine motor skills.
Each action, whether painting the plate to mimic a pumpkin’s rind or cutting and gluing to add the stem, yarn strings, and vine, requires concentration and hand-eye coordination. This tactic not only nurtures dexterity but also boosts cognitive skills.
Additionally, it substantiates learning about the various pumpkin parts in a creative and tangible way. By physically forming each component, kids can better understand the structure and function of a pumpkin.
This craft caters to various learning styles, accommodating those who learn best through visual or kinesthetic methods.
It is an exciting and effective way to establish connections between the natural world and hands-on learning, making education an immersive experience for children.
This post contains affiliate links. As an Amazon Associate and a participant in other affiliate programs, we earn a commission on qualifying purchases.
Shop some of my favorite craft supplies on Amazon!
More Pumpkin Crafts for Kids
There are countless more craft projects that allow children to express their creativity while learning about the interesting world of pumpkins. Ranging from simple paper crafts to more intricate projects, these crafts can offer a wealth of educational and developmental opportunities.
- 3D Coffee Filter Pumpkin
- Coffee Filter Pumpkin Craft
- Shape Pumpkin Craft
- Jack-o-lantern Pumpkin Tea Light Craft
What Are the Parts of a Pumpkin?
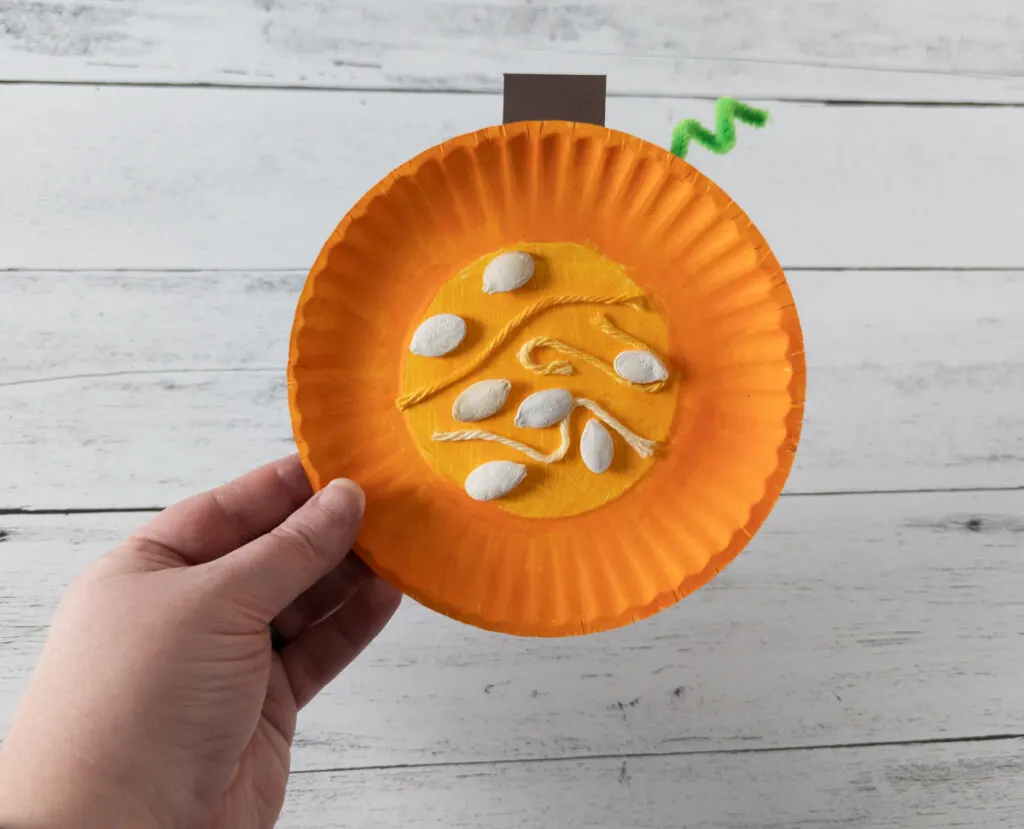
Pumpkins, a hallmark of fall, have several distinct parts. The outer shell, known as the rind, is typically orange, although it can vary in color, and is thick and protective.
Just beneath the rind is the pulp, a fibrous layer that encloses the seeds of the pumpkin. These seeds can be roasted for a delicious snack.
Pumpkins also have a stem, often called the handle, and vines which spring forth from the bottom.
Each of these parts plays an integral role in the life cycle of a pumpkin, contributing to its growth and development.
Parts of a Pumpkin Craft Supplies
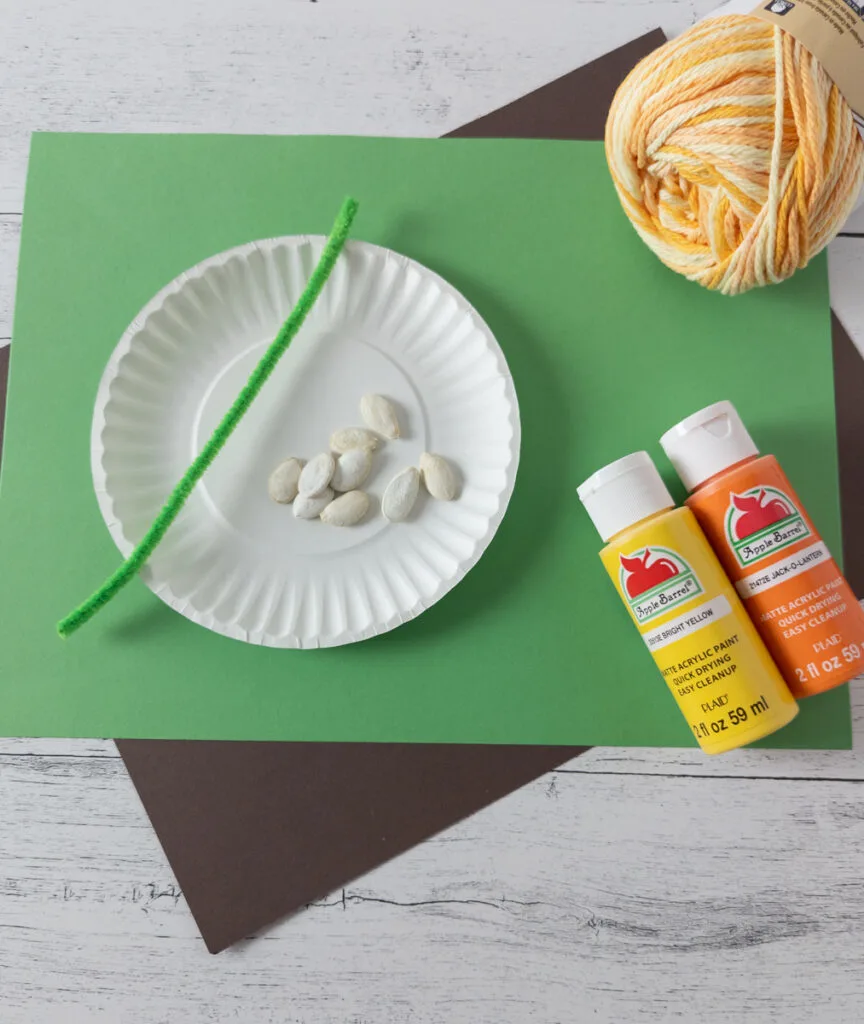
This activity requires a few items, but they are easily obtainable. Here’s what you’ll need:
- Paper Plate: We used a small paper plate for this craft, but any size will work.
- Yarn: You’ll need pieces of yarn for the fibrous strands. Orange or yellow yarn works best, and we used sugar and cream ombre yarn which is a mix of both colors.
- Pumpkin Seeds: If possible, use seeds that are still in the shell. These can be found in most grocery stores. You’ll want a small handful, around six or so, on a small paper plate.
- Paint: Orange and yellow craft paints are needed to create the outer rind and pulp. If you don’t have paint, kids can color their plates instead.
- Construction Paper: Brown or green paper for the stem.
- Chenille Stem: A green pipe cleaner to create the vine.
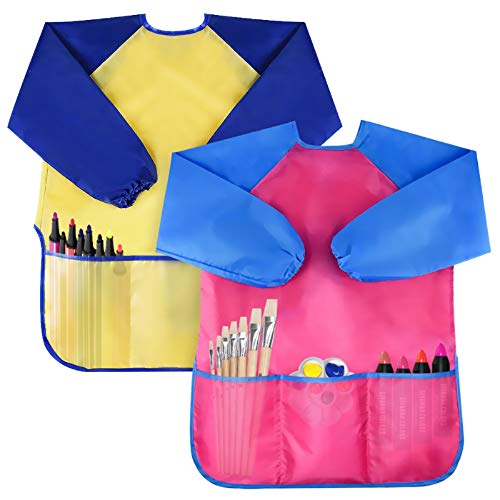
- Glue, scissors, and a paintbrush will also be needed. Regular liquid school glue works well, or you can use a tacky craft glue. It may be a good idea to use an art smock to keep paint off clothing too.
Apple Barrel Acrylic Paint Set, 16 Piece (2-Ounce), Best Colors Count Bassion Pack of 2 Kids Art Smocks, Children Waterproof Artist Painting Aprons Long Sleeve with 3 Pockets for Age 2-6 Years
 AdTech Ultra Low-Temp Cool Tool | Mini Hot Glue Gun for Safe Crafting | Children and Kids | Item #05690 , White
 Aleene’s Turbo Tacky Glue, 4 FL OZ – 3 Pack, Multi
How to Make a Parts of a Pumpkin Craft
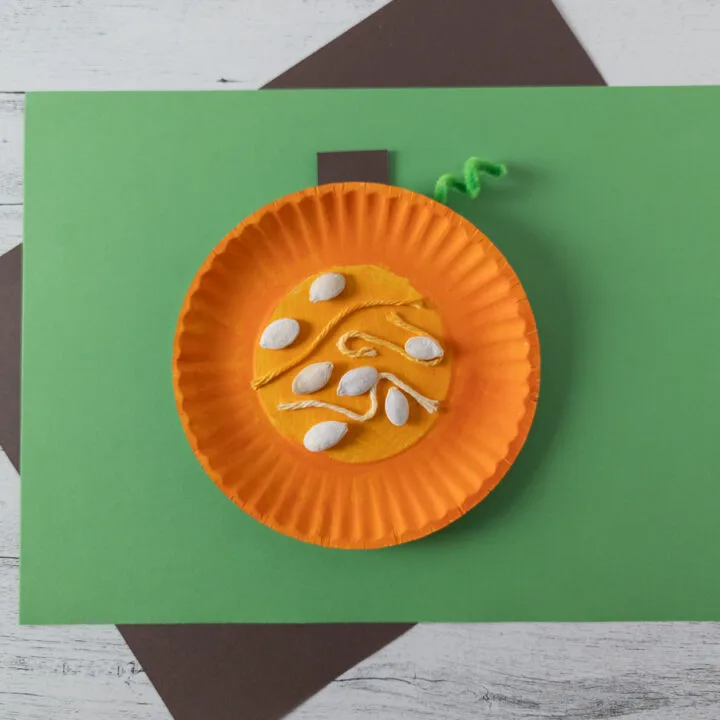
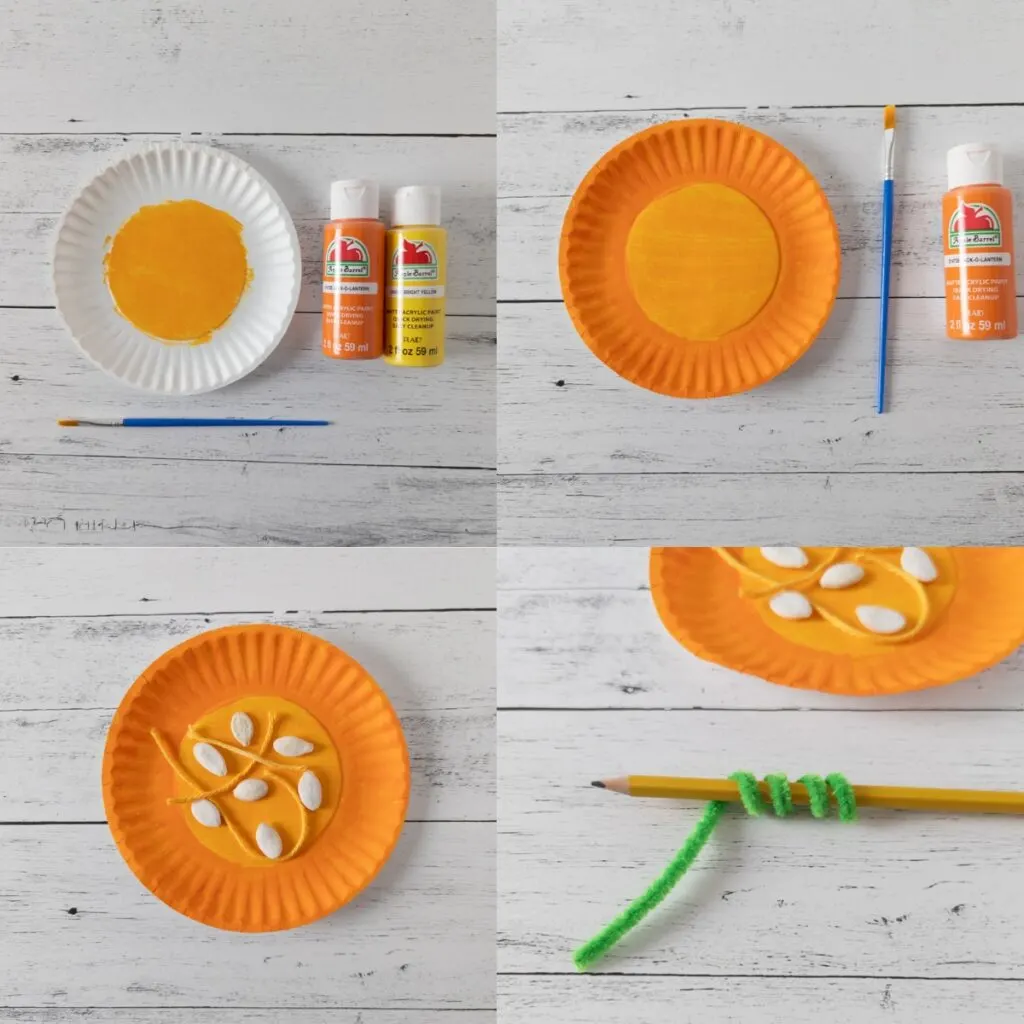
Begin by gathering all the necessary supplies. Mix orange and yellow paint together, then apply it to the center of the plate to represent the pulp.
Next, paint the outer edge of the plate with orange paint to resemble the rind or outer shell. Once the paint is dry, arrange the remaining pieces in your preferred order.
Cut several pieces of yarn, varying their lengths, and glue them into the center area of the plate to mimic the fibrous strands in the pulp.
Place pumpkin seeds on and around the yarn, ensuring the glue has dried before moving the plate.
Use brown paper to cut a rectangle and attach it to the back of the plate, sticking out from the top. This will serve as the stem. Alternatively, you can use green paper for this step.
To create a curly vine, cut a green chenille stem (also known as a pipe cleaner) in half. If you prefer, fold it in half to form a V shape.
Wrap the chenille stem around a pencil or your finger, then glue it to the back of the plate near the stem.
If desired, you can label each part once you have finished.
Ways to Use this Pumpkin Parts Craft
This Parts of a Pumpkin craft can be an engaging hands-on activity in a variety of educational contexts.
During a pumpkin unit study, it can serve as an interactive method to discuss each section of a pumpkin, fostering an understanding of its anatomy.
As a fun science craftivity, children can explore the different aspects of a pumpkin while working on their fine motor skills. It can also be included as a creative task in a classroom art center, encouraging artistic expression.
Alongside our parts of a pumpkin printable activities, it provides a tactile complement to the learning experience.
Furthermore, it can be a wonderful tool when discussing the life cycle of a pumpkin, allowing students to visualize and understand the stages of growth and development.
More Pumpkin Activities for Kids
For additional seasonal and educational fun, consider trying out some of these other pumpkin-themed activities!
One great resource is our printable Pumpkin Size Sorting activity. This hands-on activity provides a fun way for children to understand size comparisons.
Another idea is to gather several different pumpkins and gourds for a fun preschool pumpkin classification and order activity. Kids will be able to examine each gourd and use observation skills to group them in different ways based on their characteristics.
Preschoolers can their enhance fine motor skills and pre-writing abilities with these pumpkin line tracing printables.
Looking for a bit of Halloween fun? Try our Roll a Jack-o-lantern Dice Game. Each roll of the dice adds a new feature to your pumpkin’s face, making every round a unique and exciting experience.
These activities are sure to keep the kids engaged while they learn and celebrate the fall season.
Pumpkin Books for Kids
Adding literature to the pumpkin unit study can enhance children’s understanding and appreciation of pumpkins. It encourages kids to explore pumpkins through stories, nurturing their reading skills and imagination.
Here are four pumpkin-themed books to go with our pumpkin craft activity:
The Runaway Pumpkin by Kevin Lewis: Follow the adventure of a pumpkin that takes off rolling, creating chaos along the way.
Pumpkin Circle: The Story of a Garden by George Levenson: Discover the life cycle of a pumpkin, from seed to harvest, in this captivating book.
Seed, Sprout, Pumpkin, Pie by Jill Esbaum: Learn about the journey of a pumpkin seed as it grows into a delicious pumpkin pie.
Pumpkin Soup by Helen Cooper: Join three friends, a cat, a squirrel, and a duck, in their heartwarming pumpkin soup-making adventures.
These books complement our hands-on pumpkin craft, creating a rich and engaging learning environment.
The Runaway PumpkinPumpkin Circle: The Story of a GardenSeed, Sprout, Pumpkin, Pie (Picture the Seasons)Pumpkin Soup: A Picture Book
Fun Fall Crafts for Kids
Although pumpkins and turkeys are commonly used as fall decorations, there are plenty of fall crafts that kids can create. Here are a few additional ideas to ignite your creativity:
- Acorn Tissue Paper Craft
- Scarecrow Handprint Craft
- Coffee Filter Sunflower Craft
- Paper Plate Scarecrow Craft
- Fall Popsicle Stick Crafts
We hope our hands-on parts of a pumpkin activity not only enables kids to enhance their fine motor skills, but also broadens their understanding of the natural world.
Coupled with our pumpkin-themed book suggestions, kids are set to embark on an engaging learning journey. It’s a creative and educational way to celebrate the season!
Parts of a Pumpkin Craft
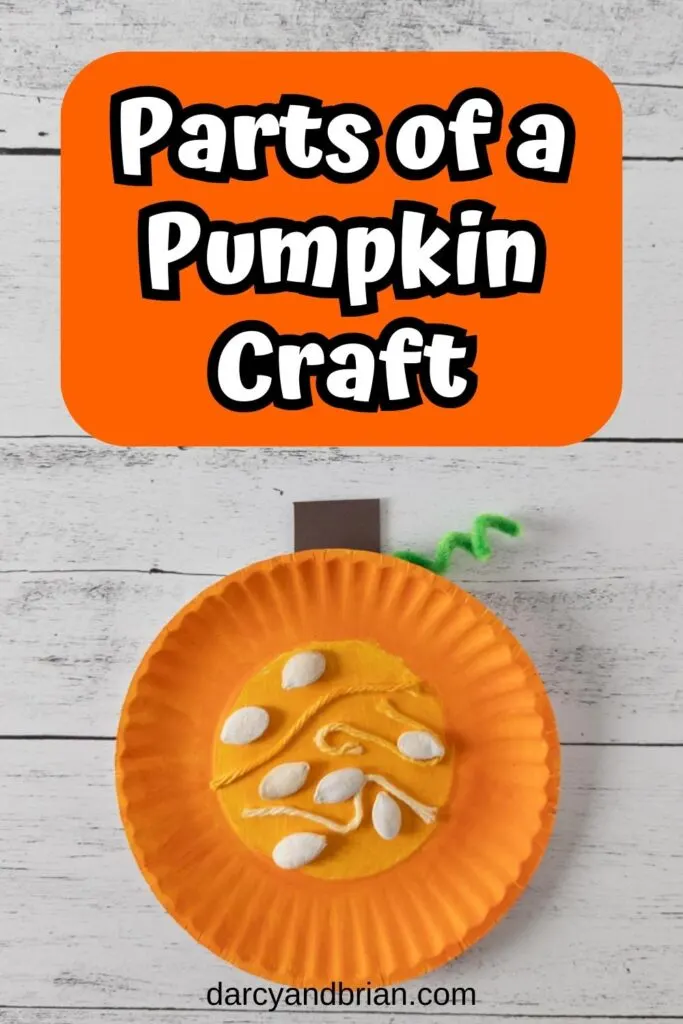
Kids will have fun making this parts of a pumpkin craft while learning about pumpkins!
Materials
- 1 Small Paper Plate
- Yellow or Orange Yarn
- Pumpkin Seeds (about 6)
- Orange and Yellow Paint
- Brown Construction Paper
- Green Chenille Stem
- Glue
Tools
- Scissors
- Paintbrush
Instructions
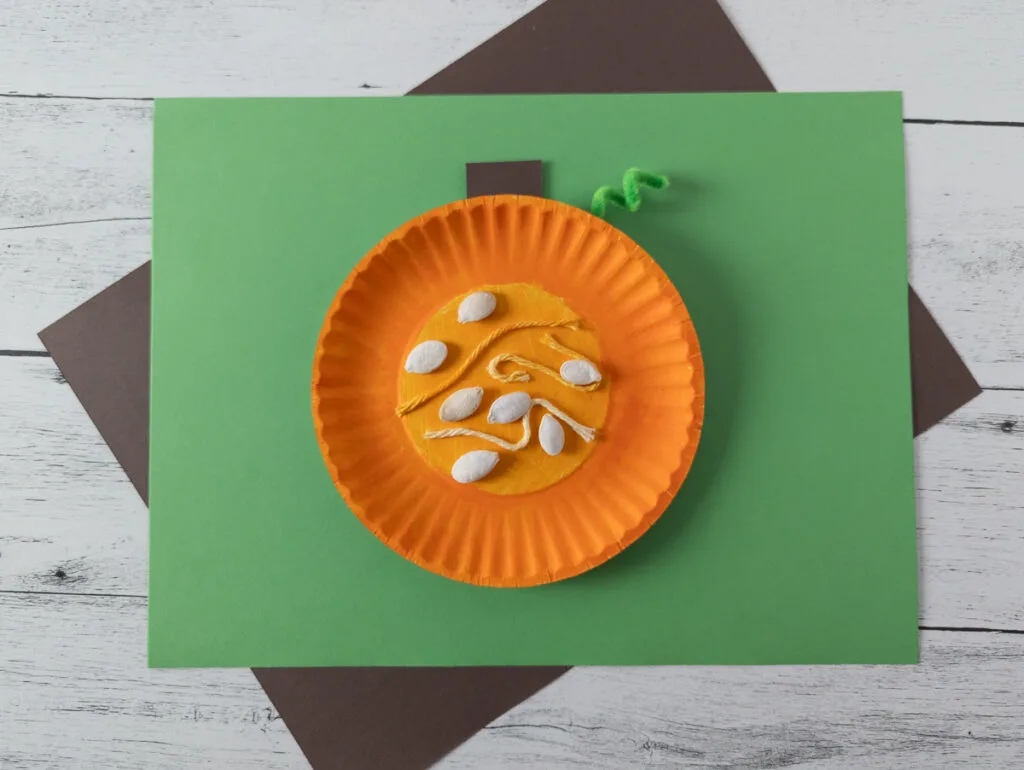
- Start by gathering all of your supplies. Mix orange and yellow paint together and paint the center of the plate. This will represent the pulp.
- Next, paint the outer edge of the plate with orange paint. This is the rind or outer shell.
- Once the paint is dry, you can add the other pieces in the order you prefer.
- Cut several pieces of yarn (these can be varying lengths) and glue them into the center area of the plate. These are the fibrous strands in the pulp.
- Then add the pumpkin seeds on and around the yarn. Allow time to dry before moving the plate around too much.
- Cut a rectangle from brown paper and attach to the back of the plate so it is sticking out from the top. This is the stem (you can also use green paper for this step).
- Now take a green chenille stem (aka pipe cleaner) and cut it in half. If you do not wish to cut it, you can bend it in half to create a V shape. Wrap the chenille stem around a pencil or your finger to create a curly vine.
- Glue the vine to the back of the plate by the stem.
- Once you are done, you can label each part if you wish.
Recommended Products
As an Amazon Associate and member of other affiliate programs, I earn from qualifying purchases.

Darcy is the founder of “Life With Darcy and Brian,” where she combines her love for education, board games, and crafting to create engaging learning experiences for kids. Her creative projects and writing have been featured in outlets like The Toy Insider, CafeMom, Mom.com, Parents.com, Country Living, and The Pioneer Woman.






Beverly
Wednesday 2nd of October 2024
What a cute craft for kids and so many others. Congratulations, you are being featured on TFT. https://eclecticredbarn.blogspot.com/2024/10/all-about-pumpkins-on-tft.html Hugs, Bev
Darcy Zalewski
Monday 7th of October 2024
Thank you so much, Beverly!