

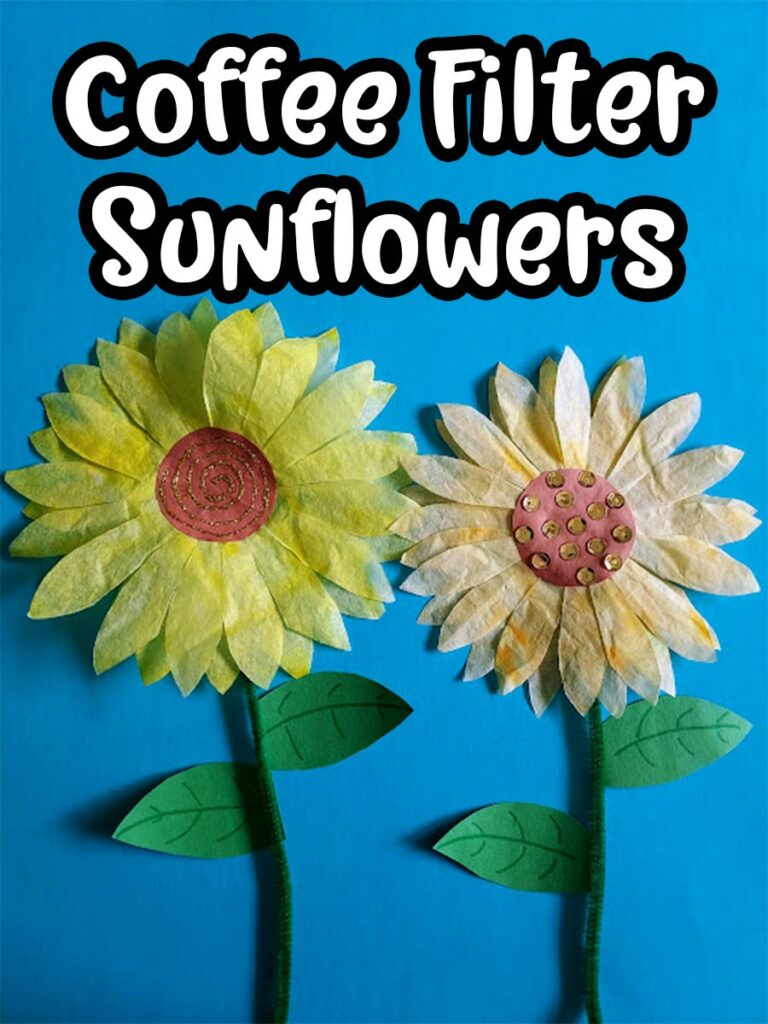
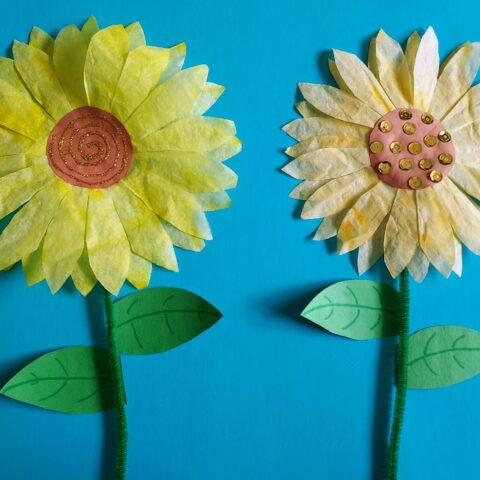
This coffee filter sunflower is the perfect summer craft for kids to make at home, daycare or camp.
These coffee filter crafts for kids are ideal for kindergarten and elementary age children. Preschool age children can also complete this craft with some assistance.
This sunflower craft is fairly easy to make, inexpensive and has so much decorating potential!
Kids will love spraying the coffee filters with water and watching the colors blend too. I love how this method of coloring the coffee filters makes it look like watercolor painting!

Looking for more projects like this? Don’t miss our Coffee Filter Poinsettia Flowers as well as our book of 15 cute coffee filter crafts.
Sunflower Coffee Filter Craft
This coffee filter sunflower craft uses just a few common craft supplies and only takes about 20 minutes to complete (plus additional drying time).
Do this craft at home, as a family, or at a school or summer camp. It’s a quick and easy craft to include in an art center.
Making these coffee filter sunflowers are a fun fine motor activity for preschool and kindergarten children that provides coloring, tracing, cutting and gluing practice.
Older children will also enjoy this craft that they can complete mostly independently.
These may require additional drying time depending on how much water is sprayed on the coffee filter during the blending stage.
It’s important to protect your work surface by placing the coffee filters on top of a craft mat, parchment paper, zippered plastic bag, or even a paper plate before spraying.
If prepping for a large group or if crafting with younger children, I suggest pre-cutting the 2-inch circles (used for the center of the sunflower) out of brown construction paper ahead of time.
For older children, it may also help to have an item ready to trace nearby. We used a cup that had a 2-inch bottom for tracing.

This post contains affiliate links. As an Amazon Associate and a participant in other affiliate programs, we earn a commission on qualifying purchases.
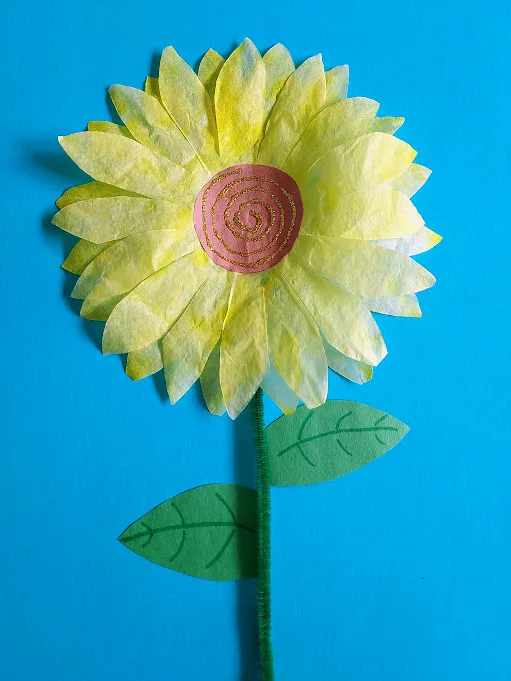
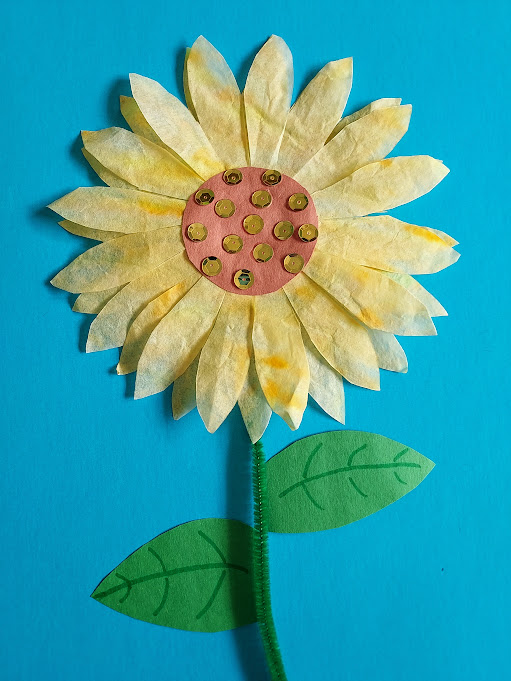
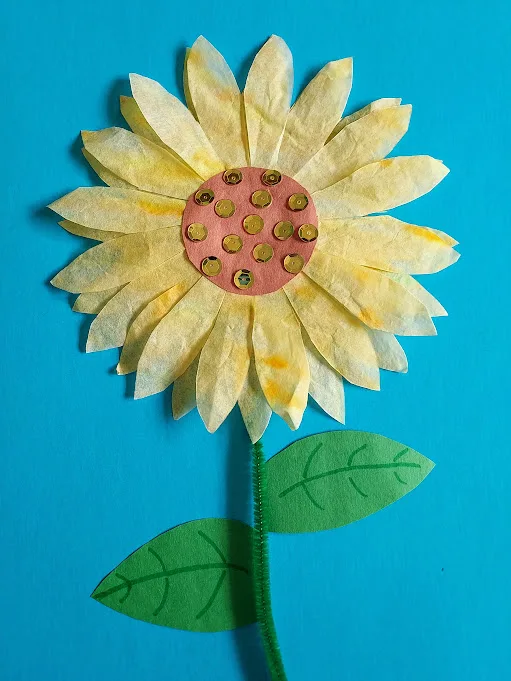
When your sunflower is completely dry, you can create a lovely picture by gluing them on to blue construction paper and adding green chenille stems and green construction paper for the leaves and stem.
You could also glue many sunflowers on a larger poster board for a camp or classroom to display the kids’ artwork.
If you don’t have glitter glue or sequins on hand, you could also use pom poms, beads or even real sunflower seeds to decorate the center of the flowers.
You could also color the centers with markers or crayons, or simply leave them blank.
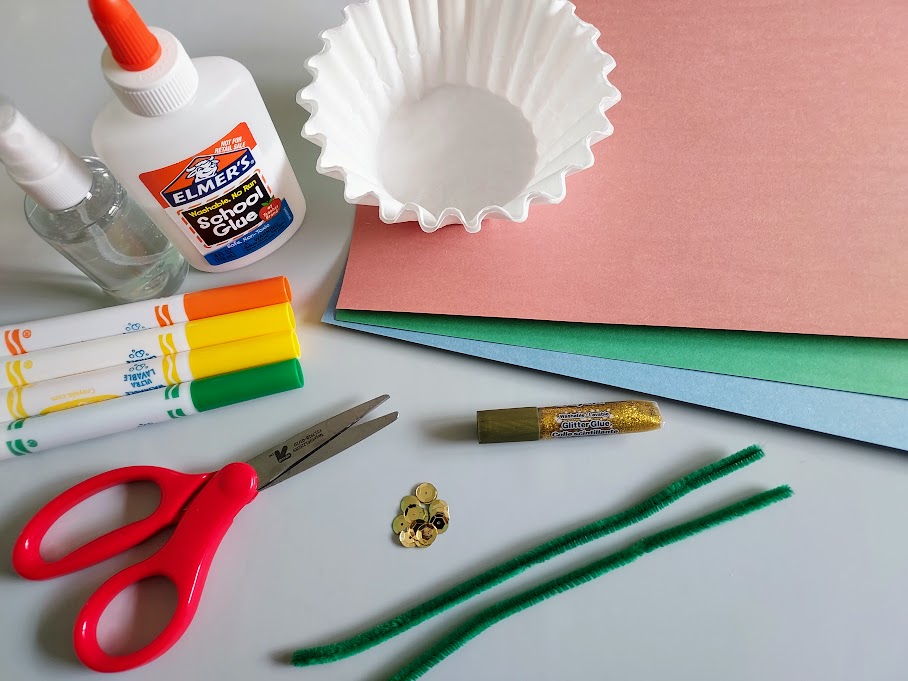
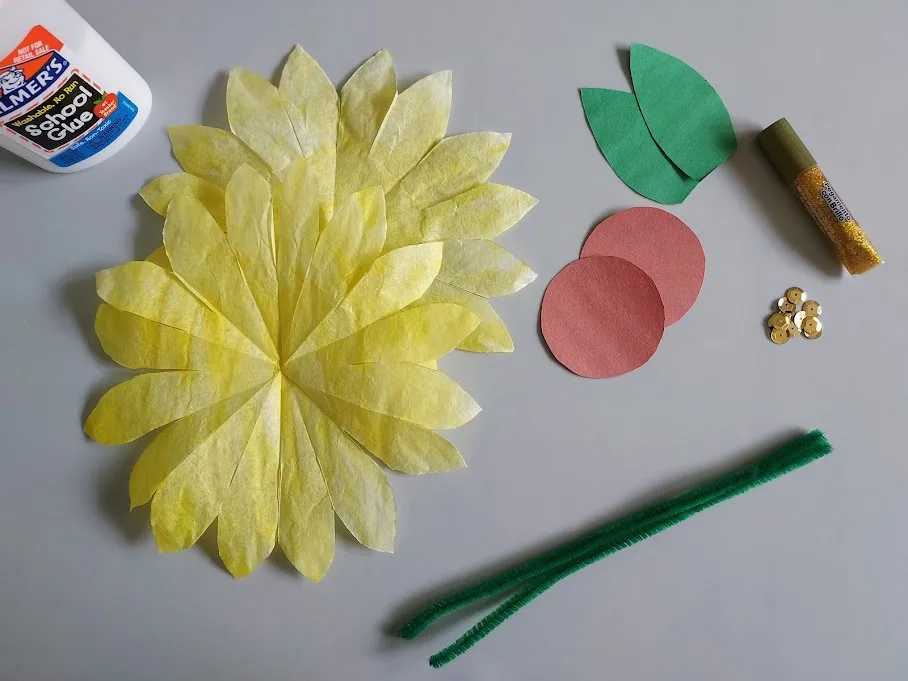
Coffee Filter Sunflower Craft Supplies:
- 2 Round White Coffee Filters
- Washable Markers
- Water Spray Bottle (for color blending)
- Construction paper
- Liquid school glue (white)
- Glitter glue or sequins (optional)
- Scissors
- Cup (or other item for tracing)
- Paper Plate, parchment paper, ziploc bag or craft mat
How to Make Coffee Filter Sunflowers:
Start by flattening out round coffee filters. We used two for one flower.
Draw on them with yellow (or a combination of yellow and orange) washable markers. Lightly color the entire area.

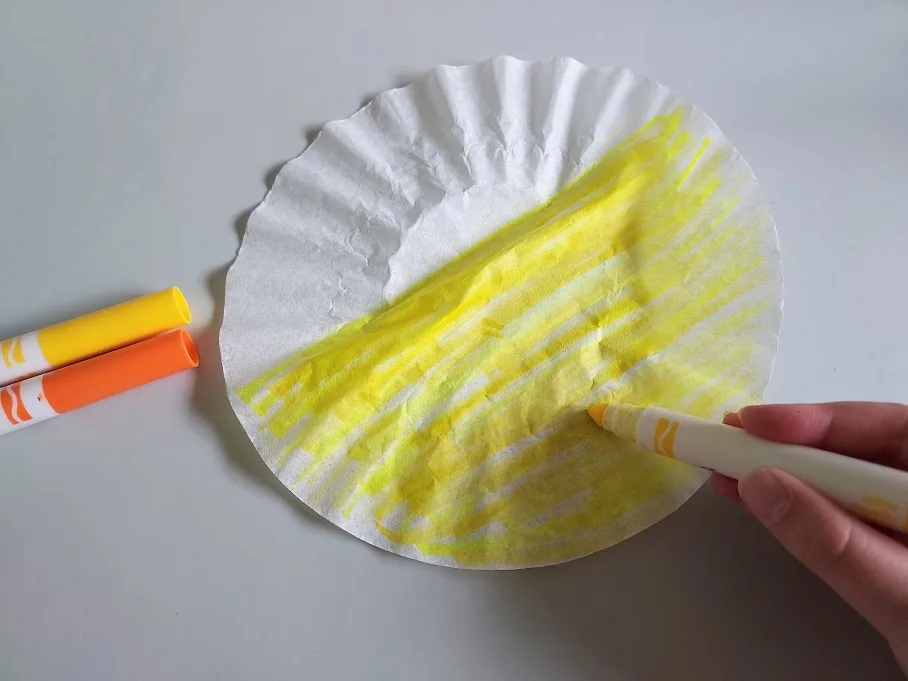
Tip: Coffee filters bleed color because they are so thin. Placing your coffee filter on top of a piece of construction or printer paper while coloring will help protect your work surface.

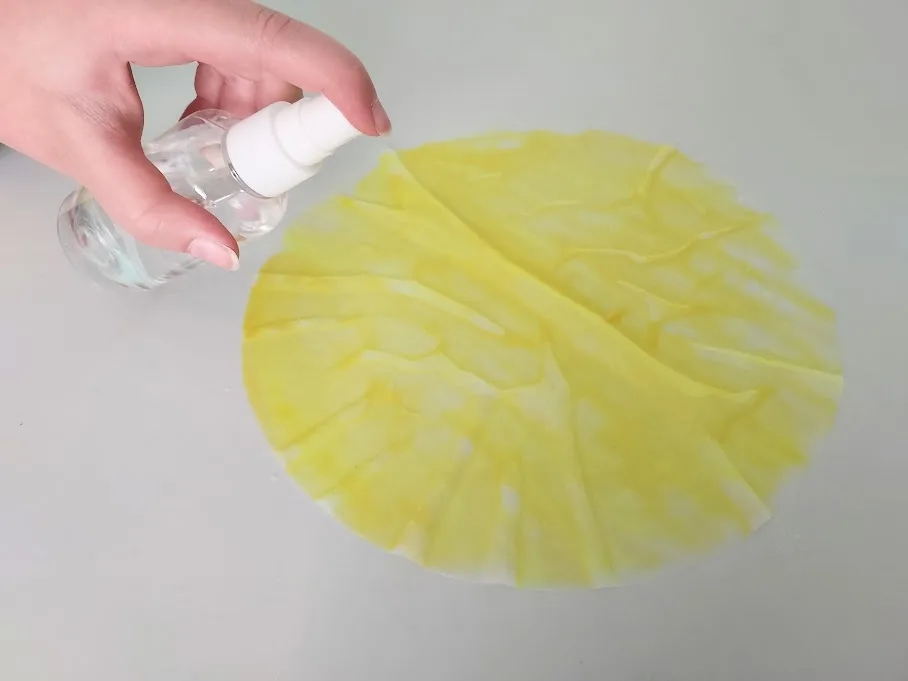
Place the colored coffee filters on a paper plate, sheet of parchment paper, craft mat or large zippered baggie and spray with water. Have fun watching the magic of the colors move and blend! Set aside to dry.
These may require additional drying time depending on how much water is sprayed on the coffee filter during the blending stage.
Once your coffee filter is dry, now it is time to make the petals!
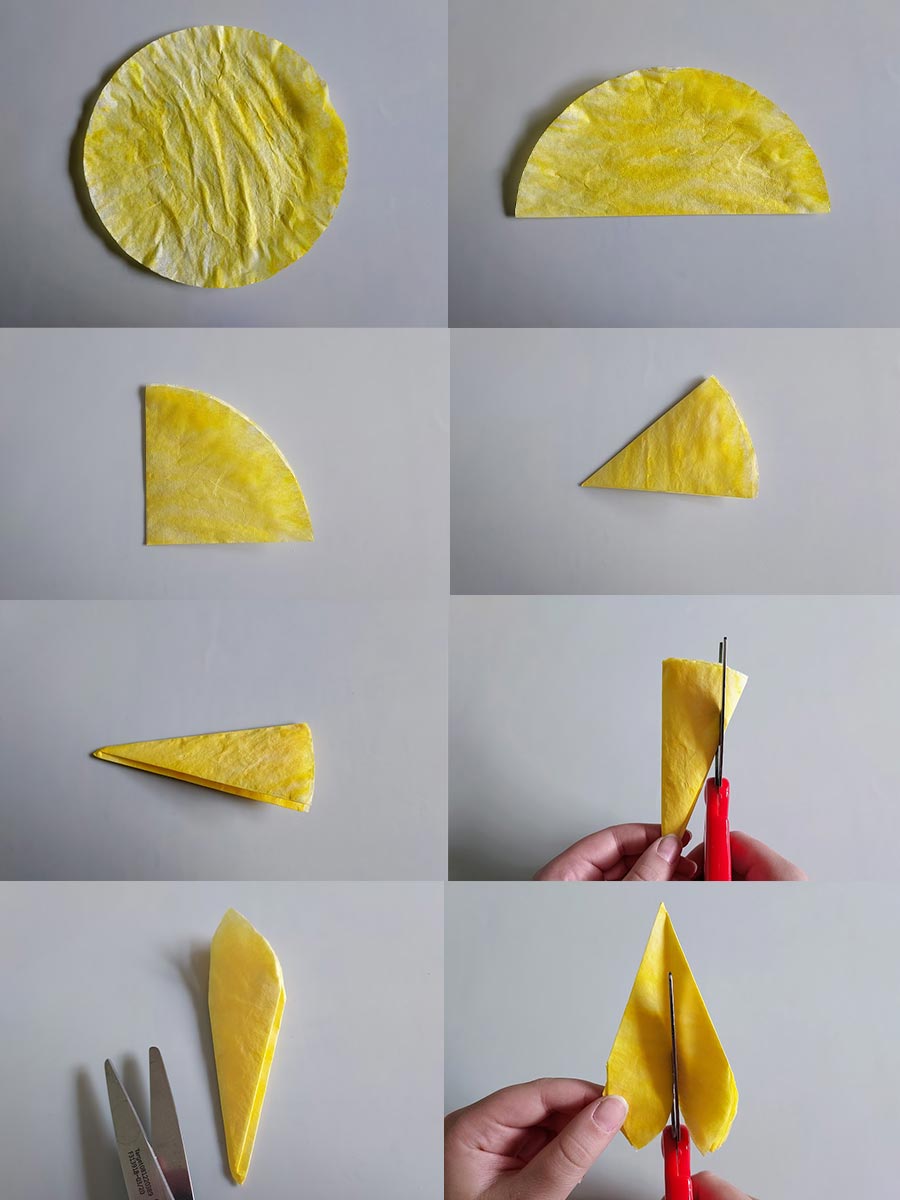
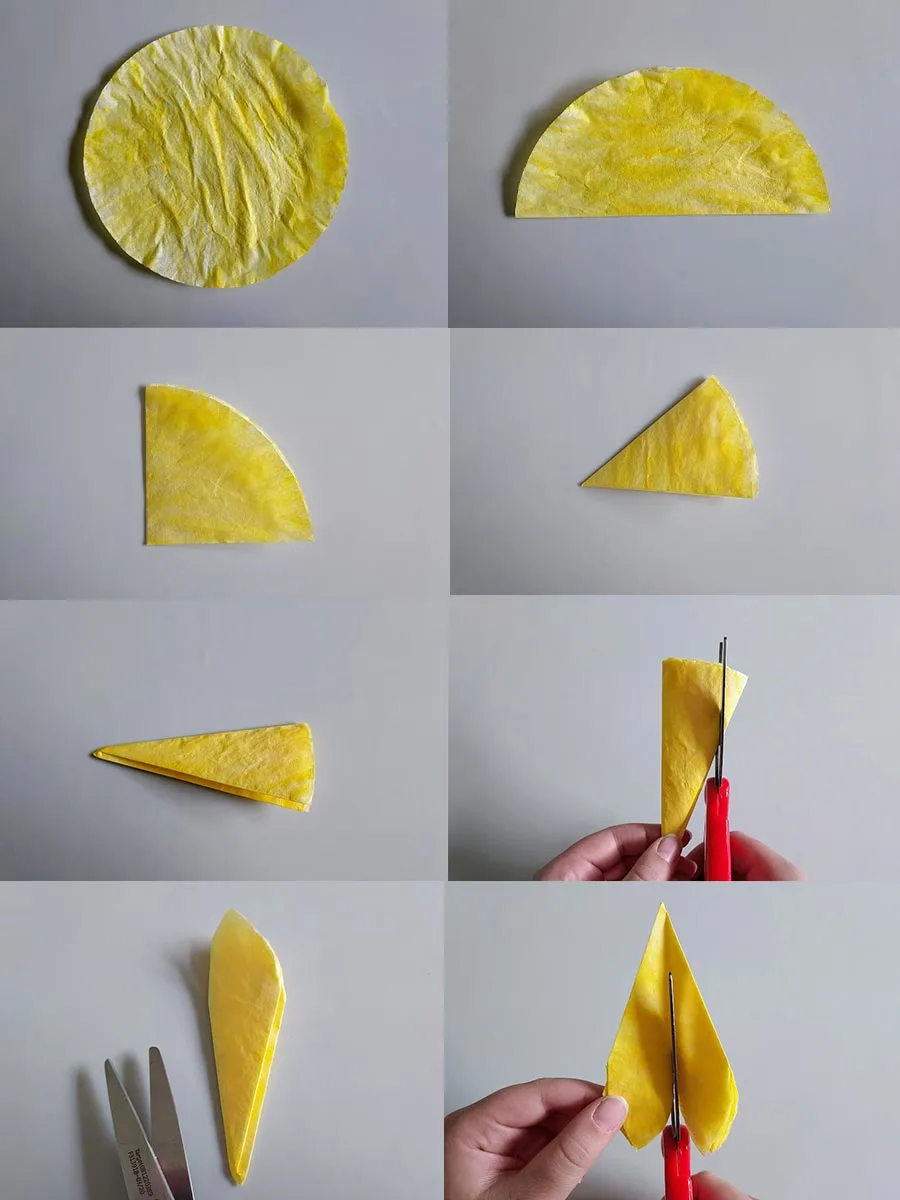
First, begin by folding your coffee filter in half, then in half again and again and again until you have a total of 4 folds (see picture).


Next, make two rounded cuts to create a “petal”-like look.
Finally, begin to unfold your coffee filter, one fold at a time, to cut about half of the way down each of your previous fold lines.
Once all of your cuts are made, complete this process with your second coffee filter.
Next, use your liquid glue to attach both petal-blossoms together, setting them on top of each other and offsetting the petals slightly.

Again, because the coffee filters are so thin, I recommend placing something under them while gluing.
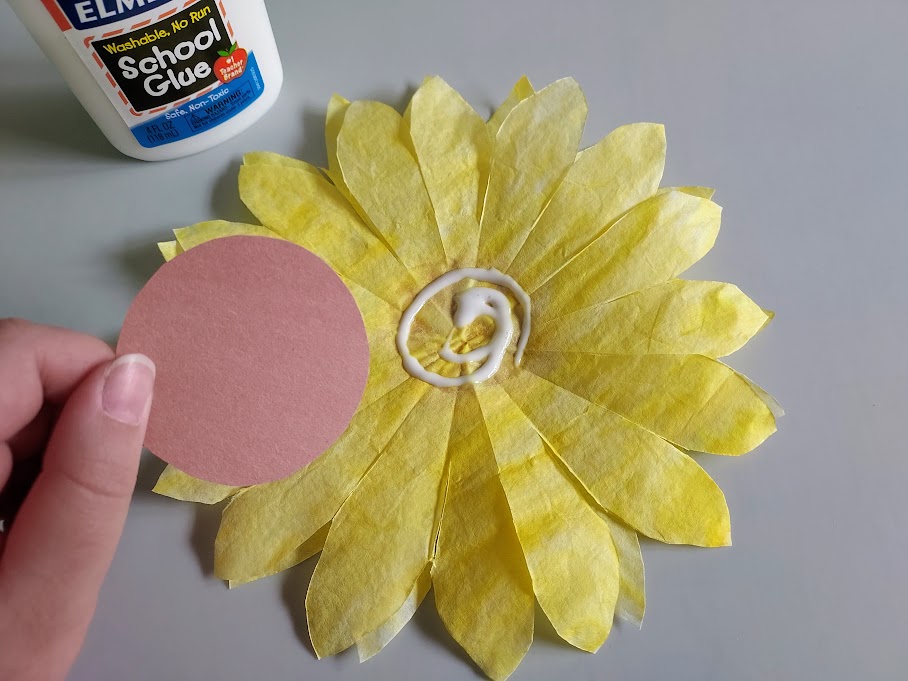
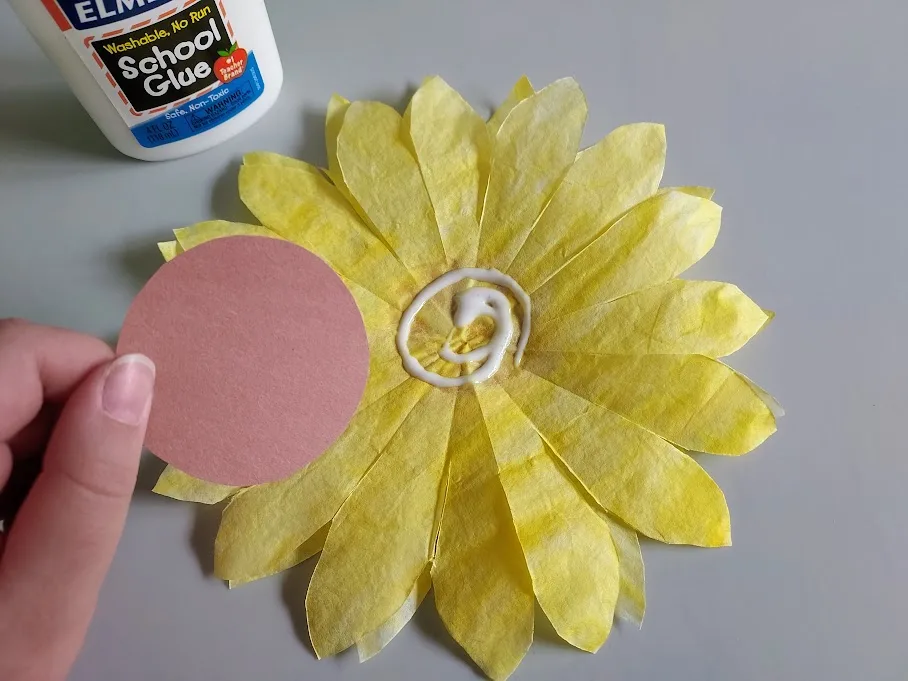
Once the coffee filter blossoms are glued together, take a 2-inch round circle of brown construction paper and glue it onto the center.
Set aside to dry.

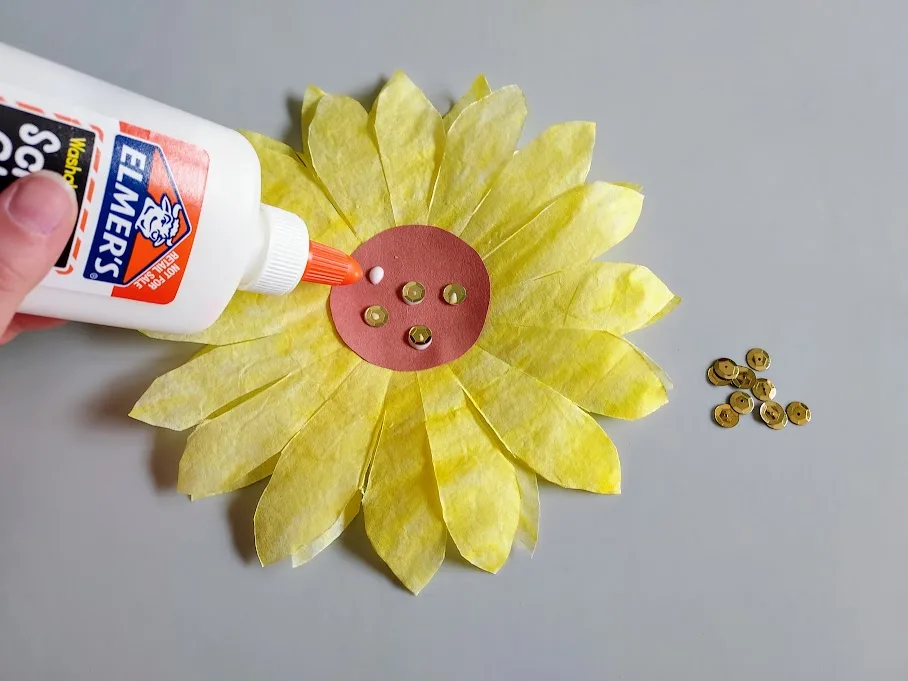
Now you can begin to decorate the center. We used gold glitter glue and sequins.
Allow to dry.
Lastly, if you would like to add a stem and leaves, gather a green chenille stem and a green piece of construction paper. Cut leaf-shapes out of the construction paper and attach both with liquid glue.
More Summer Craft Ideas:
- Coffee Filter Bumble Bee
- Coffee Filter Dragonfly
- Coffee Filter Butterfly
- Felt Flower Bookmarks
- Handprint Sun Paper Plate Craft

Coffee Filter Sunflower Craft
Make a pretty coffee filter sunflower for an easy summer craft for kids.
Instructions
- Start by flattening out round coffee filters. We used two for one flower.
- Draw on them with yellow (or a combination of yellow and orange) washable markers. Lightly color the entire area.
- Place the colored coffee filters on a paper plate, sheet of parchment paper, craft mat or large zippered baggie and spray with water. Have fun watching the magic of the colors move and blend! Set aside to dry.
- These may require additional drying time depending on how much water is sprayed on the coffee filter during the blending stage.
- Once your coffee filter is dry, now it is time to make the petals!
- First, begin by folding your coffee filter in half, then in half again and again and again until you have a total of 4 folds (see picture).
- Next, make two rounded cuts to create a “petal”-like look.
- Finally, begin to unfold your coffee filter, one fold at a time, to cut about half of the way down each of your previous fold lines.
- Once all of your cuts are made, complete this process with your second coffee filter.
- Next, use your liquid glue to attach both petal-blossoms together, setting them on top of each other and offsetting the petals slightly.
- Again, because the coffee filters are so thin, I recommend placing something under them while gluing.
- Once the coffee filter blossoms are glued together, take a 2-inch round circle of brown construction paper and glue it onto the center.
- Set aside to dry.
- Now you can begin to decorate the center. We used gold glitter glue and sequins.
- Allow to dry.
- Lastly, if you would like to add a stem and leaves, gather a green chenille stem and a green piece of construction paper. Cut leaf-shapes out of the construction paper and attach both with liquid glue.
Notes
Coffee filters bleed color because they are so thin. Placing your coffee filter on top of a piece of construction or printer paper while coloring will help protect your work surface.
Before spraying, place the coffee filters on top of a craft mat, parchment paper, zippered plastic bag, or even a paper plate before spraying.
These may require additional drying time depending on how much water is sprayed on the coffee filter during the blending stage.
A. Hager is a lover of books and all things crafty. She enjoys puzzles, board games and puppy snuggling. She is constantly adapting new recipes so her two children with food allergies are able to experience a variety of delicious and fun foods.
Julie
Tuesday 13th of August 2024
What a fun craft, I do love a sunflower. Thank you for sharing with us at Handmade Monday :-)