

Are you looking for easy Christmas crafts for kids to make? This Coffee Filter Holly project is perfect for kids and adults to make fun homemade decorations.
In this project, coffee filters and washable markers transform into a colorful banner. You can create this Coffee Filter Holly Craft in about 30 minutes with coloring and cutting help from the kids.
Personalize it by adding names to the holly leaves with a marker to create a unique family decoration for the holidays!

This post contains affiliate links. As an Amazon Associate and a participant in other affiliate programs, we earn a commission on qualifying purchases.
DIY Christmas Holly Banner Decoration
Homemade Christmas decorations are the best because they are full of memories. I still remember making Christmas ornaments when I was a kid and want to share that feeling with my own children.
This is a fun project for preschool and kindergarten children to make at home or at school. They will love coloring the coffee filters and helping with the tie dyeing process.
My kids love to watch the colors blend and spread through the wet coffee filter paper!
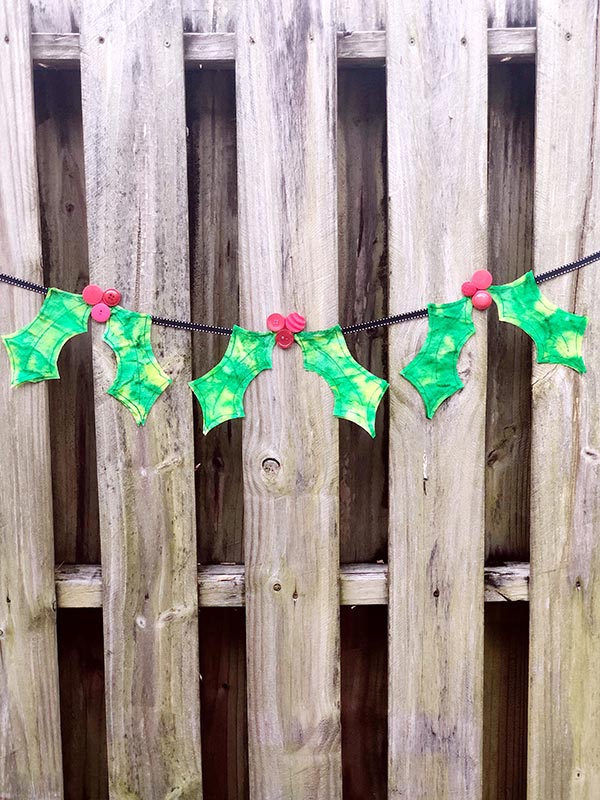
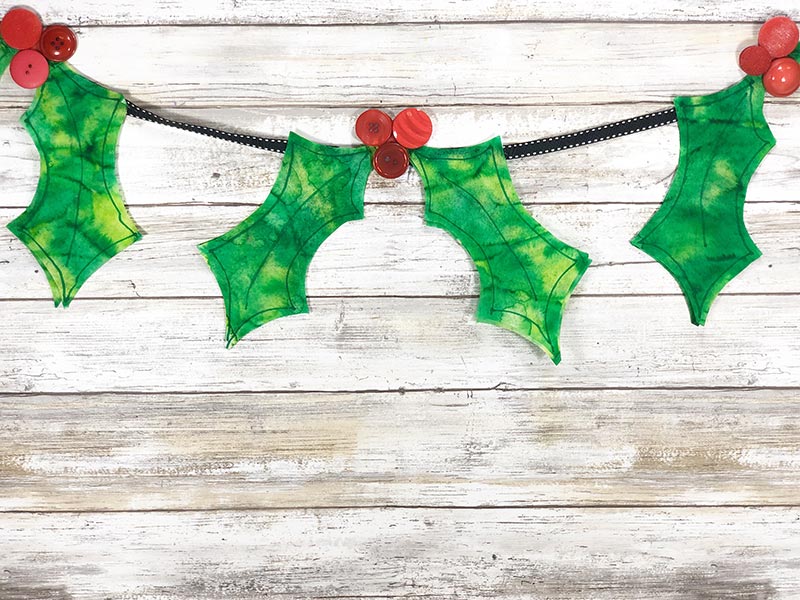
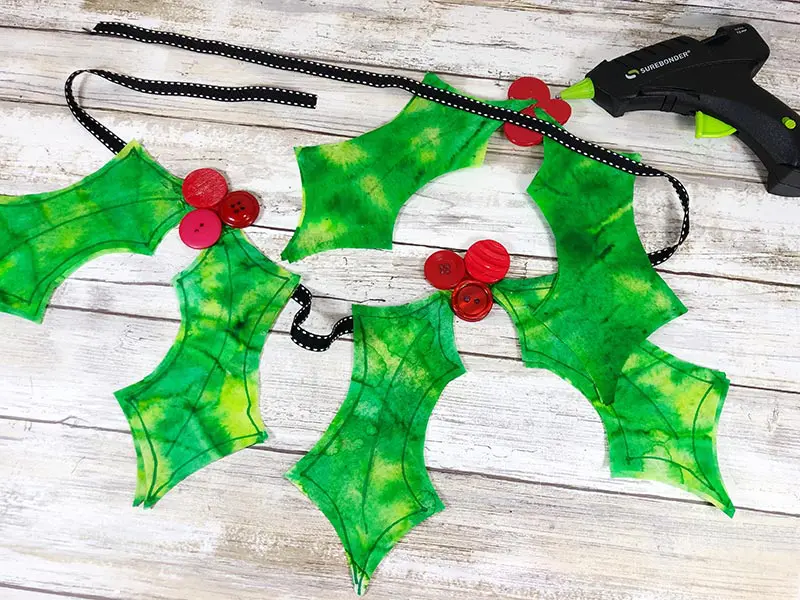
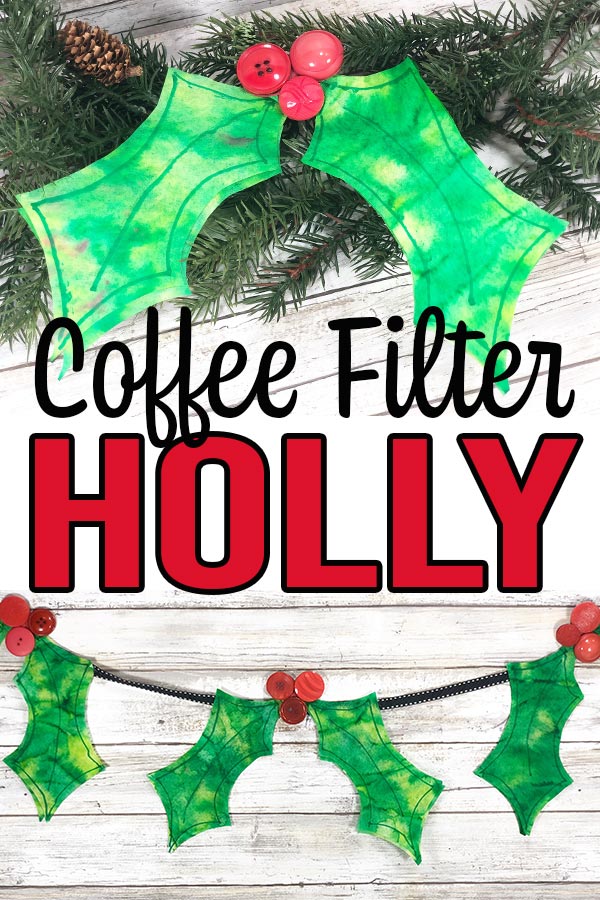
The holly leaves look fantastic when finished. They make bright and colorful Christmas decorations that you can hang up as a banner or as individual ornaments.
Want more coffee filter Christmas crafts? Be sure to check out our Coffee Filter Wreaths, Coffee Filter Poinsettias, Coffee Filter Santas, Coffee Filter Reindeer and Coffee Filter Angels too.

Get 15 easy coffee filter craft tutorials conveniently all in one place for you with our Cute Coffee Filter Crafts digital craft book! Access it on your phone, tablet, or computer any time.
When making these with younger children, you may need to assist with cutting out the holly pieces and assembly.
Older kids may be able to complete this Christmas craft project on their own with adult supervision.
I recommend hot gluing this project, but you could also use a tacky craft glue. Hot glue dries faster and tends to be more durable.
Crayola 588106 Washable Super Tips Markers, Assorted, 20/SetMelitta 600 Coffee Filters, Basket, Pack of 600, 8-12 Cups, WhiteCrayola Ultraclean Broadline Classic Washable Markers (10 Count), (Pack of 2)Mr. Pen- Washable WatercolorsAmazon Basics Basket Coffee Filters for 8-12 Cup Coffee Makers, White, 200 CountTru-Ray Construction Paper, 10 Vibrant Colors, 9


Coffee Filter Holly Supplies:
If you don’t have these materials on hand, you can find them on Amazon, at the Dollar Tree Store (yes even online!), or wherever you prefer to shop for crafting supplies.
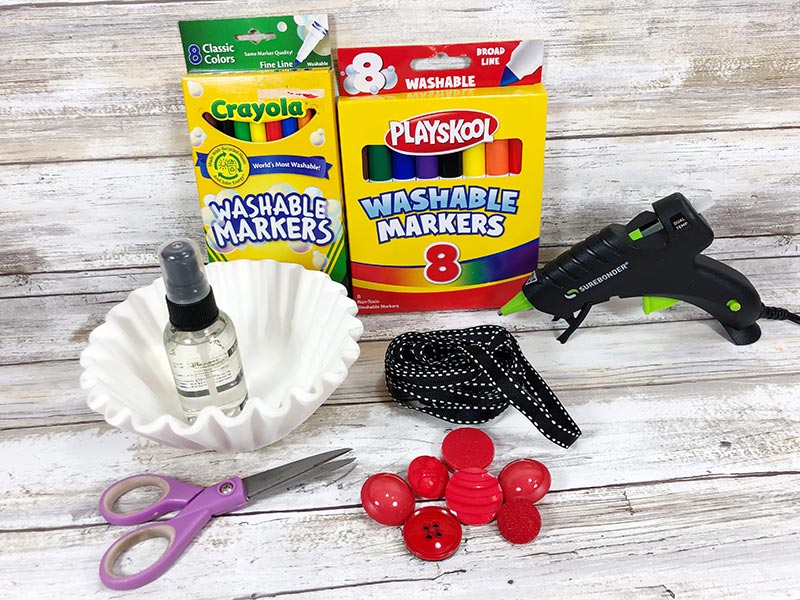

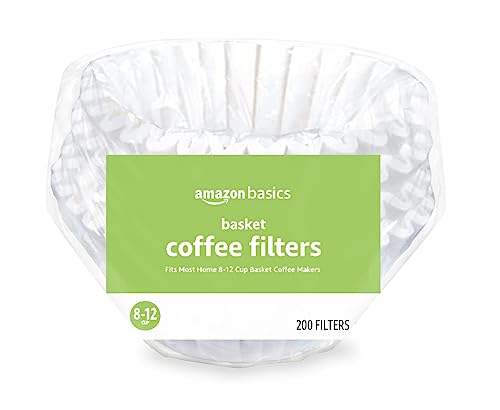
- Round White Coffee Filters
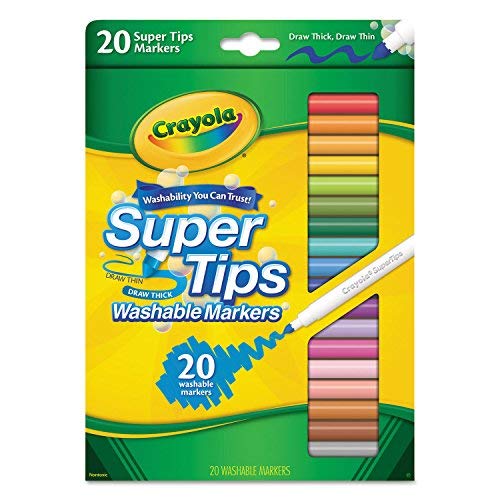
- Washable Markers
- Red Buttons or Pom Poms
- Red Cardstock Paper
- Ribbon – 36” Length
- Holly Leaf Pattern Printable (fill out the form near the end of the post to receive it)
- Glue gun and glue sticks or a Liquid Glue with fine tip applicator (I like this tacky craft glue)
- Water Spray Bottle
- Cookie Sheet or wax paper
- Scissors
- Pencil
You will need 2 coffee filters and 3 red buttons for each holly bunch. I suggest making at least 3 sets for each banner you wish to hang up.
Don’t miss our full list of coffee filter crafts for kids for even more creative ideas!
How to Make Coffee Filter Holly Leaves Banner
First, flatten the round coffee filters. Then color them with several shades of green and yellow washable markers to make a variety of patterns. Organic and random patterns work best for this technique.
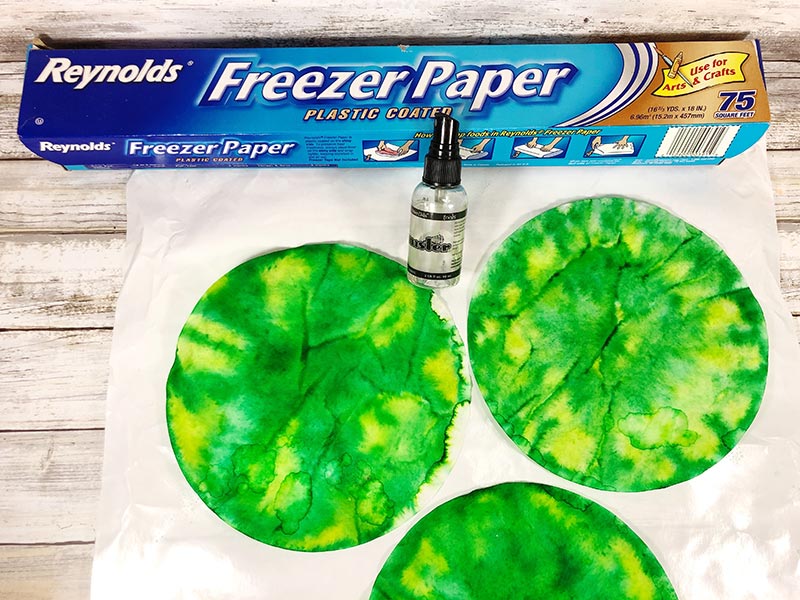

Next, place the colored coffee filters on a cookie sheet or wax paper, then spritz with water to watch the magic! You will need two colored filters for each set of holly. Set aside to dry.
TIP: Place an old towel underneath the wax or freezer paper to protect your work surface.
Print the Holly Leaf Pattern and cut it out OR draw a holly leaf on a plain piece of paper.
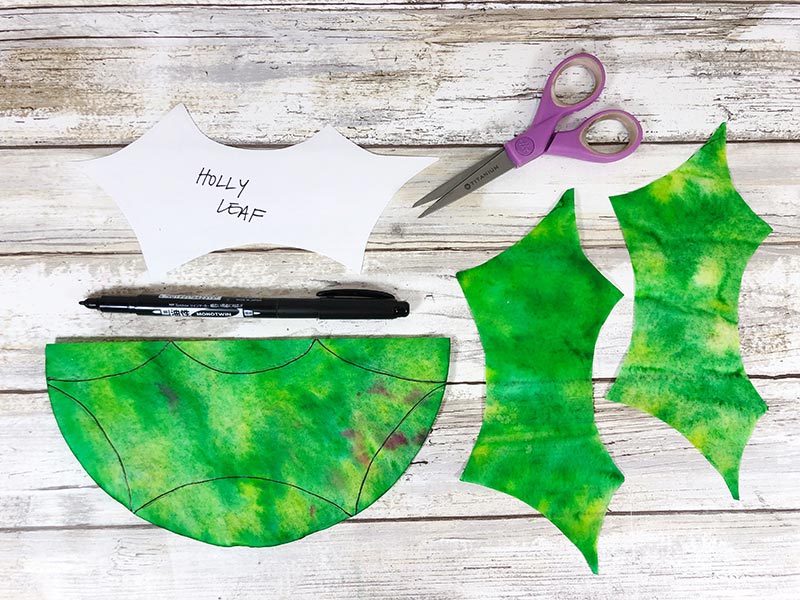

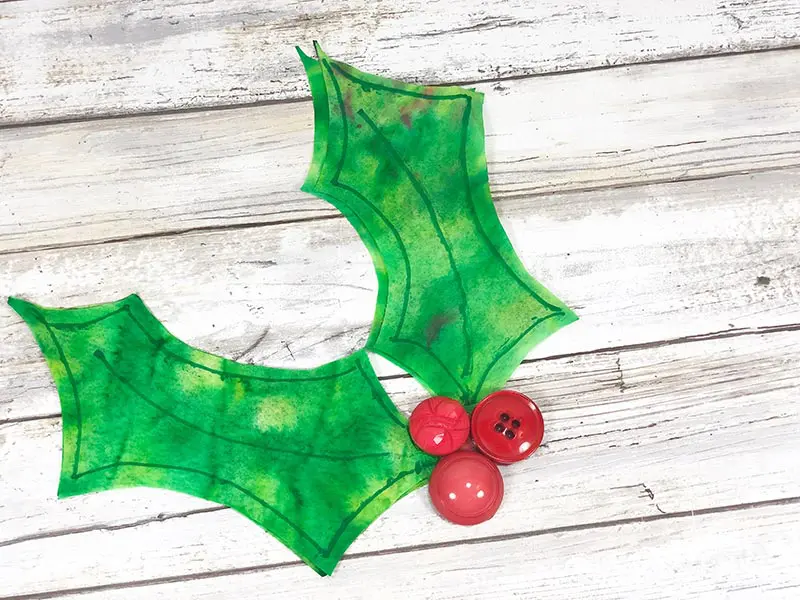
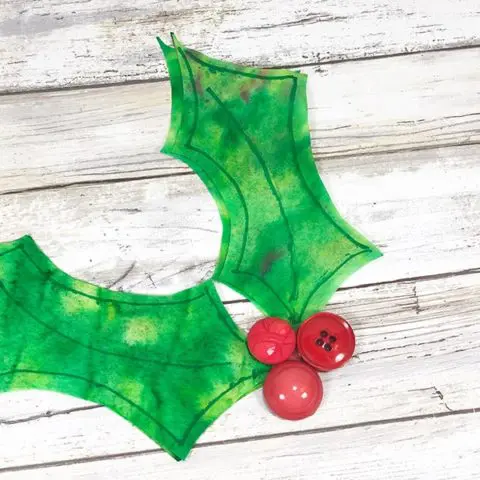
Once dry, fold the colored filters in half, trace the pattern and cut out with scissors. Apply a line of glue to attach the two layers together.
Place a group of three buttons on red cardstock and trace around the buttons with a pencil. Cut the berry bunch out with scissors and then glue the buttons onto the cardstock.
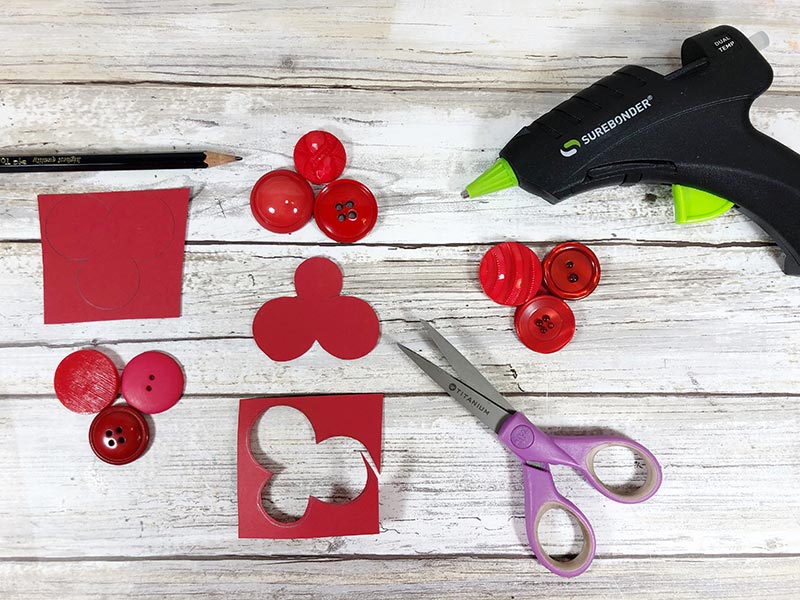
You will need one bunch of berry buttons for each set of holly.
TIP: You may use red pom poms instead of buttons.
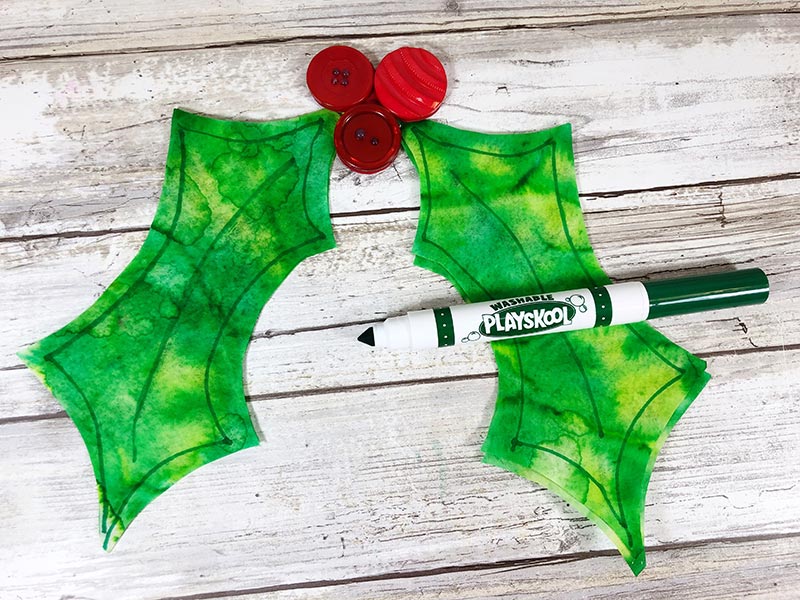
Glue two holly leaves to the back of each berry bunch. Outline each holly leaf with green washable marker.

To finish, attach holly bunches to ribbon with a glue gun, spacing them out in six-inch intervals.
Hang your coffee filter holly garland banner on the wall or along the mantel. If you do not want to create a banner, you can use the individual holly bunches for ornaments and decorative gift wrapping.

To make a holly ornament, use a 10 inch piece of ribbon to glue a loop on the back of each bunch of berries and hang it.
You can also attach the holly to gift bags or as a bow alternative on presents.

How long does it take for the coffee filters to dry?
Overall, this is a fairly quick project to make, aside from the drying time. Depending on the humidity, it can take 1-2 hours for the coffee filters to air dry.
You can also carefully use a hair dryer to help speed up the drying time.
Cute Coffee Filter Crafts eBook
More Coffee Filter Crafts:
- Coffee Filter Angel Ornament
- Coffee Filter Santa
- Coffee Filter Wreath
- Coffee Filter Turkeys
- Coffee Filter Bats
More Christmas Crafts:
- Christmas Tree Ice Cream Cones
- Christmas Tree Lights Craft
- Marshmallow Polar Bear Edible Craft
- Cotton Ball Snowman
- DIY Christmas Ornaments
- Easy DIY Gifts
- 21 Kids Christmas Tree Crafts

Coffee Filter Holly Christmas Craft
This Coffee Filter Holly Christmas craft creates a fun and colorful handmade holiday decoration. Use them to make ornaments or a cute Christmas banner.
Materials
- Round White Coffee Filters
- Washable Markers
- Red Buttons or Pom Poms
- Red Cardstock Paper
- Ribbon – 36” Length
- Holly Leaf Pattern Printable (fill out the form near the end of the post to receive it)
Tools
- Glue gun and glue sticks or a Liquid Glue with fine tip applicator (I like tacky craft glue)
- Water Spray Bottle
- Cookie Sheet or wax paper
- Scissors
- Pencil
Instructions
- First, flatten the round coffee filters. Then color them with several shades of green and yellow washable markers to make a variety of patterns. Organic and random patterns work best for this technique.
- Next, place the colored coffee filters on a cookie sheet or wax paper. Place an old towel underneath the wax or freezer paper to protect your work surface., then spritz with water to watch the magic! You will need two colored filters for each set of holly. Set aside to dry.
- Print the Holly Leaf Pattern and cut it out OR draw a holly leaf on a plain piece of paper.
- Once dry, fold the colored filters in half, trace the pattern and cut out with scissors. Apply a line of glue to attach the two layers together.
- Place a group of three buttons on red cardstock and trace around the buttons with a pencil. Cut the berry bunch out with scissors and then glue the buttons onto the cardstock. You will need one bunch of berry buttons for each set of holly.
- TIP: You may use red pom poms instead of buttons.
- Glue two holly leaves to the back of each berry bunch. Outline each holly leaf with green washable marker.
- To finish, attach holly bunches to ribbon with a glue gun, spacing them out in six-inch intervals.
- Hang your coffee filter holly garland banner on the wall or along the mantel. If you do not want to create a banner, you can use the individual holly bunches for ornaments and decorative gift wrapping.
Notes
You will need 2 coffee filters and 3 red buttons for each holly bunch. I suggest making at least 3 sets for each banner you wish to hang up.
Depending on the humidity, it can take 1-2 hours for the coffee filters to air dry. You can also (carefully) use a hair dryer to help speed it up.


Darcy is the founder of “Life With Darcy and Brian,” where she combines her love for education, board games, and crafting to create engaging learning experiences for kids. Her creative projects and writing have been featured in outlets like The Toy Insider, CafeMom, Mom.com, Parents.com, Country Living, and The Pioneer Woman.
Laura Kelly
Monday 18th of December 2023
I love the creative idea. I hope you will come link up in my party too!
Darcy Zalewski
Wednesday 20th of December 2023
Thank you, Laura!