

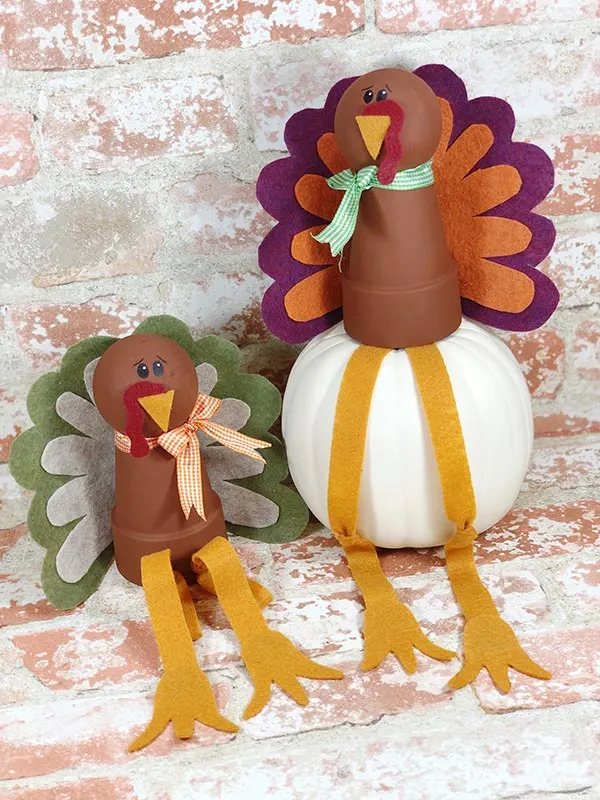
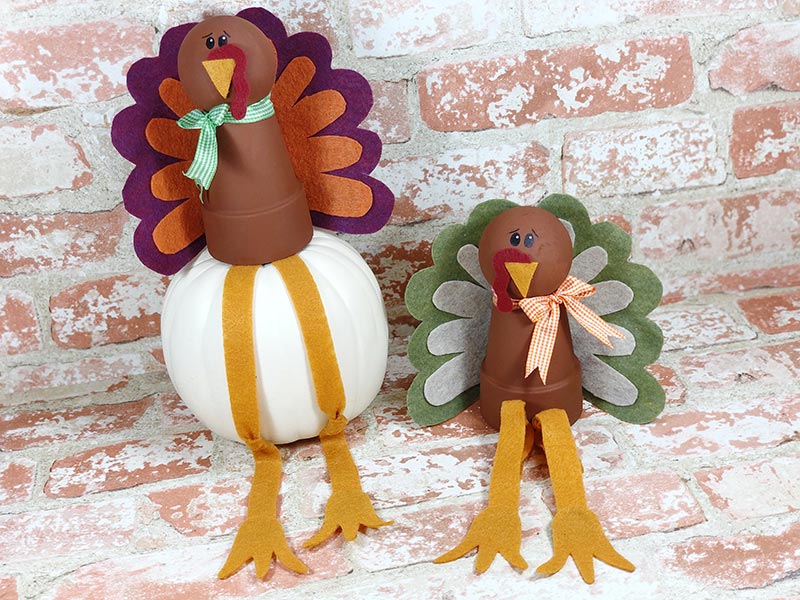
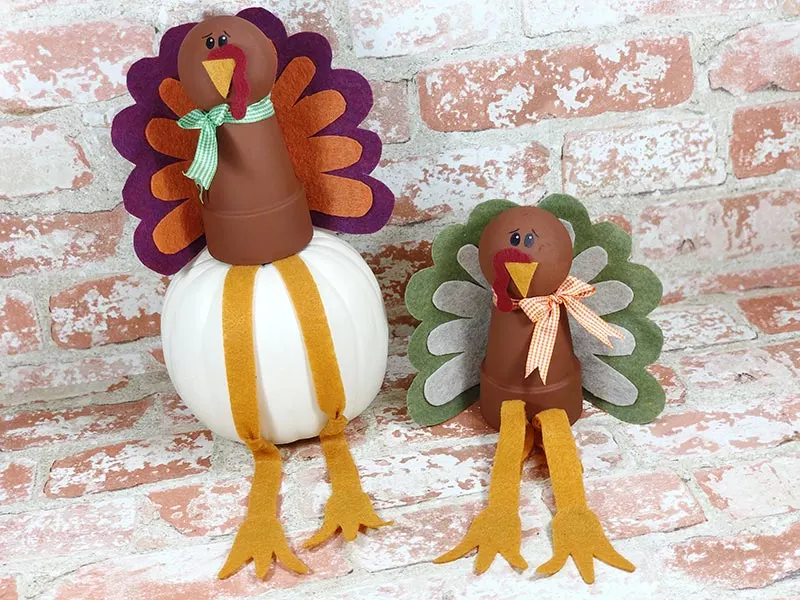
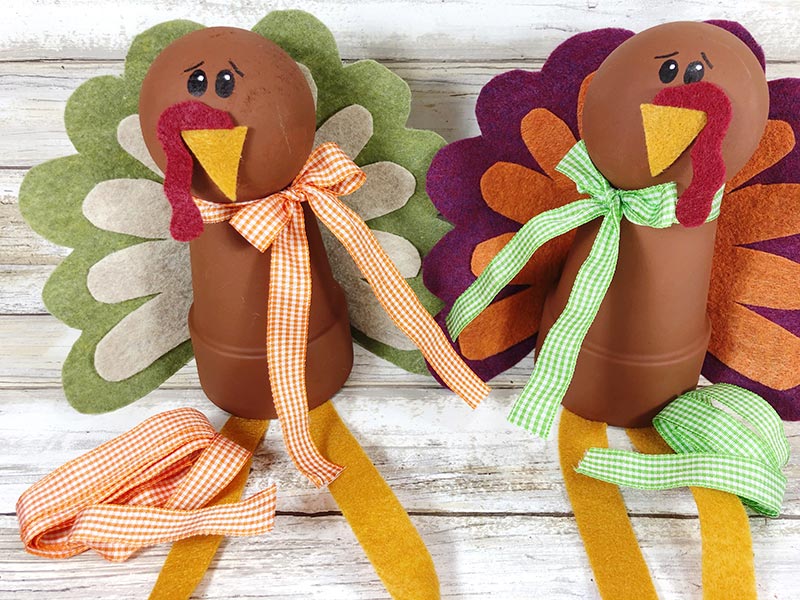
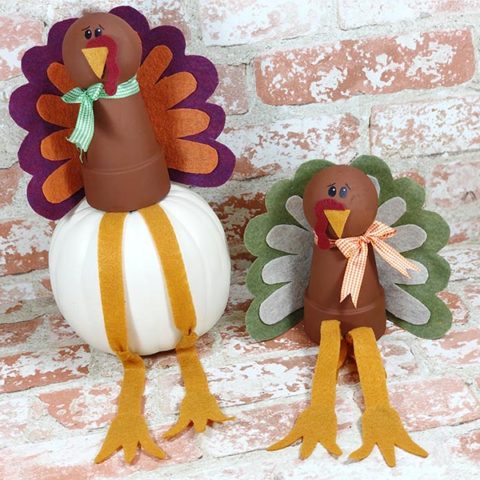
These Clay Pot Turkeys are adorable Thanksgiving crafts for kids to make with adults as a family project
Transform clay flower pots into cute DIY Thanksgiving decorations to place on your favorite shelf throughout fall.
You can create these terra cotta pot turkeys in about 30 minutes. If you are making these with your children, they can help with measuring, tracing, and cutting.

For more Thanksgiving crafts, check out our Coffee Filter Turkeys and even more fun turkey crafts for kids. You may also like our clay pot reindeer ornament and clay pot Christmas tree bell ornament.
Flower Pot Turkey Craft Project
Clay flower pots aren’t just for gardening and can be used to make fun craft projects like our Kawaii Halloween Flower Pots.
I love that overall this is a simple project to make cute homemade turkey decor.
It’s a great Thanksgiving craft for adults and older kids since you’ll want to use a hot glue gun to assembly everything.
If you want to work on these with younger children they can still help too!
This post contains affiliate links. As an Amazon Associate and a participant in other affiliate programs, we earn a commission on qualifying purchases.
Shop some of my favorite craft supplies on Amazon!
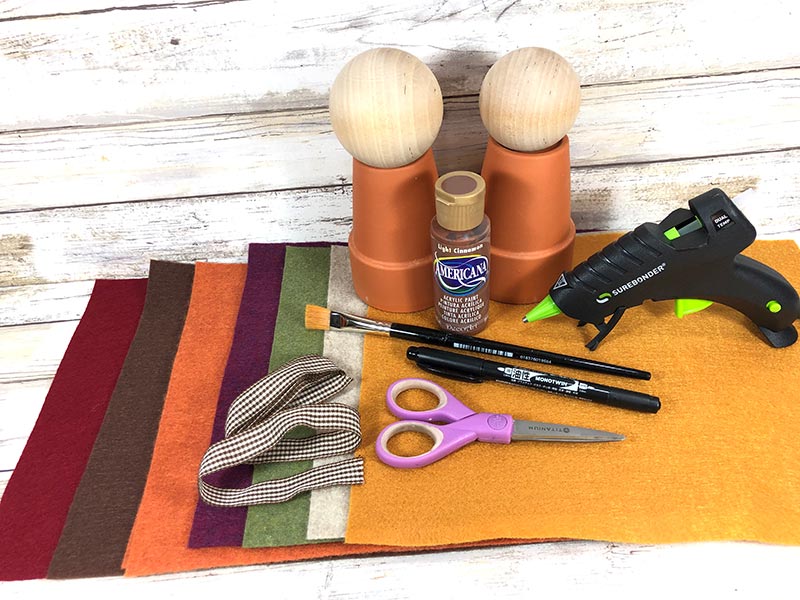
Turkey Clay Pot Craft Supplies:
These supplies are to make a pair of turkeys, but you can make however many you would like. Also, if you don’t have the exact colors available, that’s OK too!
- Printable Turkey Pattern (fill out the form at the end of this post to receive it for free)
- 2 Clay Pots – 4” flower pots are recommended
- Brown Acrylic Craft Paint
- Craft Felt in Gold, Burgundy, Prickly Purple, Sandstone, Olive, Pumpkin (you can find packs of craft felt in assorted colors on Amazon)
- 2 Wooden Ball Knobs 2 ½ inch size
- White Gel Pen
- Ribbon – Gingham Green and Orange
- Glue Gun and Glue Sticks
- Paint Brush
- Scissors
- Black Permanent Marker
- Pencil
- Straight Pins
- Ruler

How to Make Flower Pot Turkey Decorations:
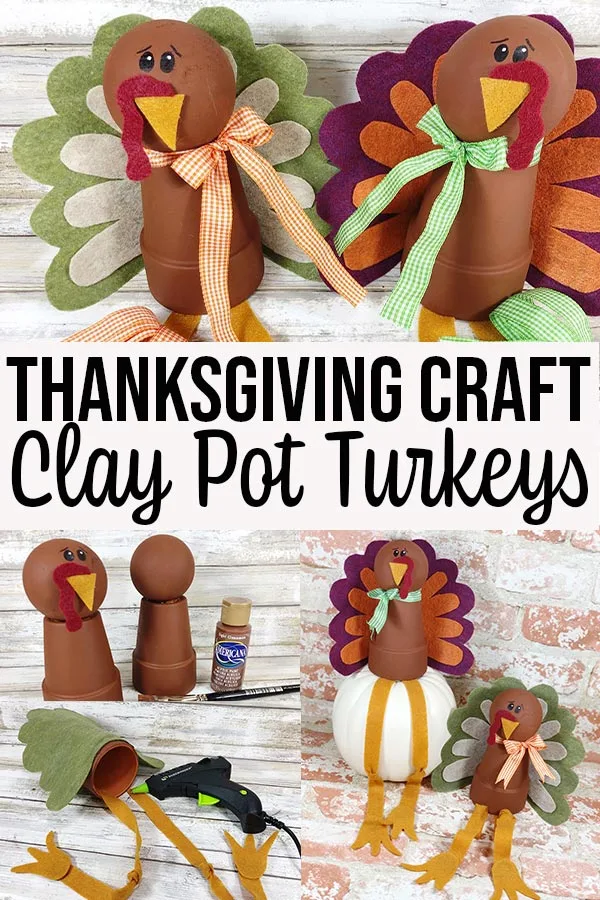
Start by gathering all of your supplies and removing stickers from the bottom of the clay pots. Also download the turkey pattern, print it, and cut it out.
Give the terra cotta pots and wooden ball knobs a basecoat with the milk chocolate acrylic craft paint. Let it dry for about 30 minutes then apply a second coat if necessary.
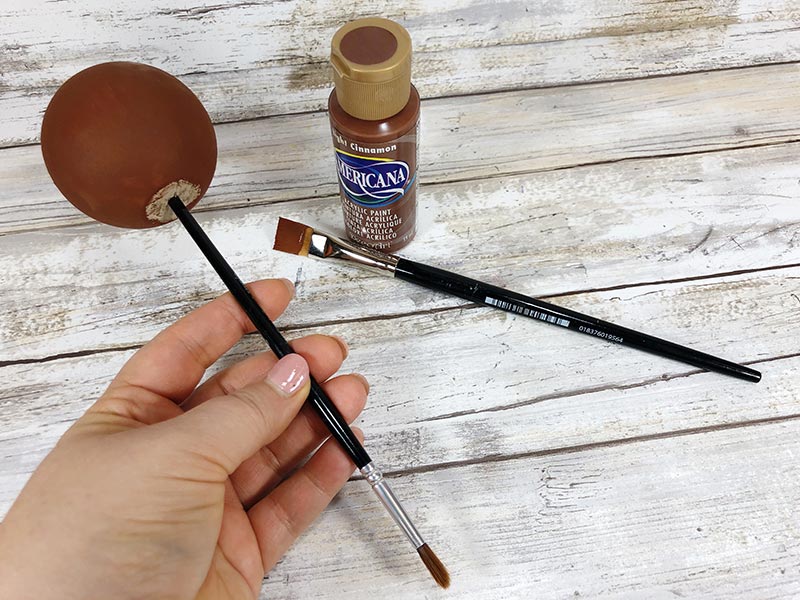

Painting Tip: Place the ball knobs on the end of a paint brush handle to paint the entire surface without holding it and getting paint all over your fingers.
Flip the clay pot upside down and attach the ball knob head to the clay pot body with hot glue.
Trace beak patterns on gold felt and snood patterns on burgundy felt and then cut out.
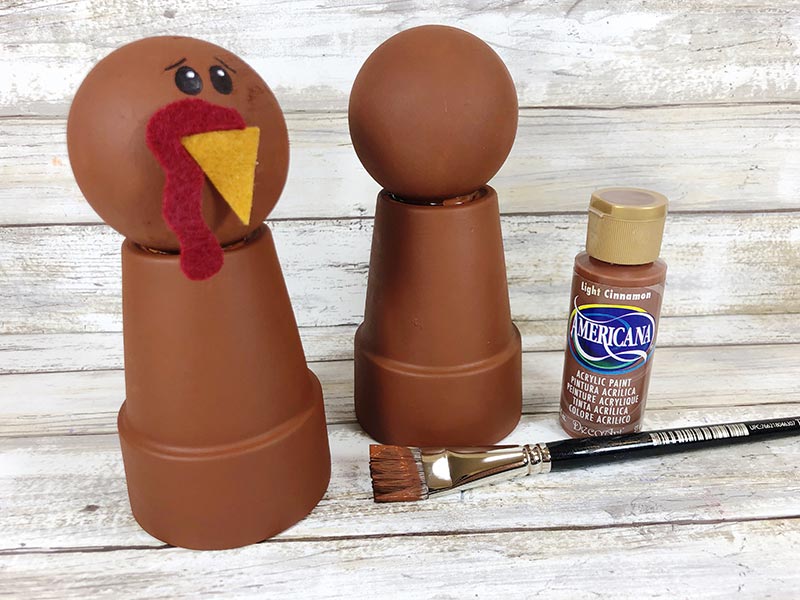

(Did you know the red fleshy part that hangs over the beak is called a snood and the red part on the turkey’s neck is called a wattle?)
Glue beak and snood to the turkey head with hot glue. Draw eyes and eyebrows with black permanent marker and then use the white gel pen to add highlights to the eyes.
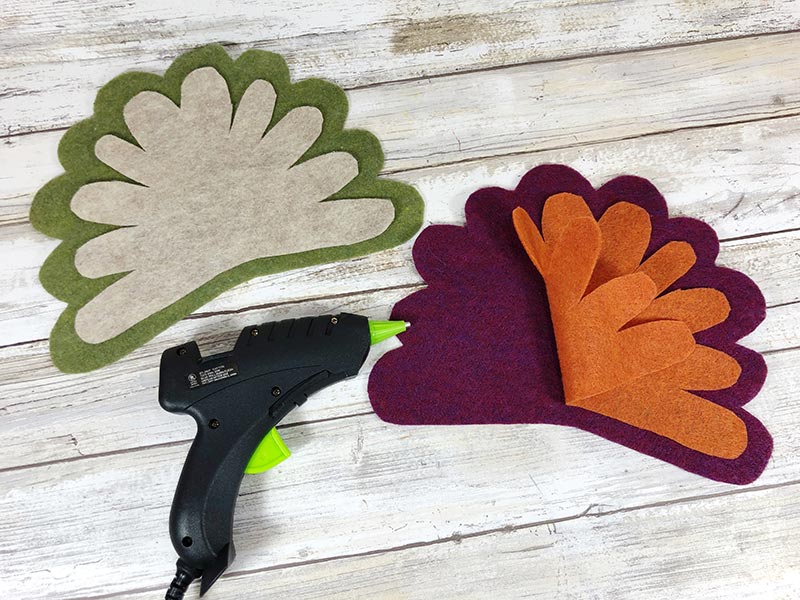
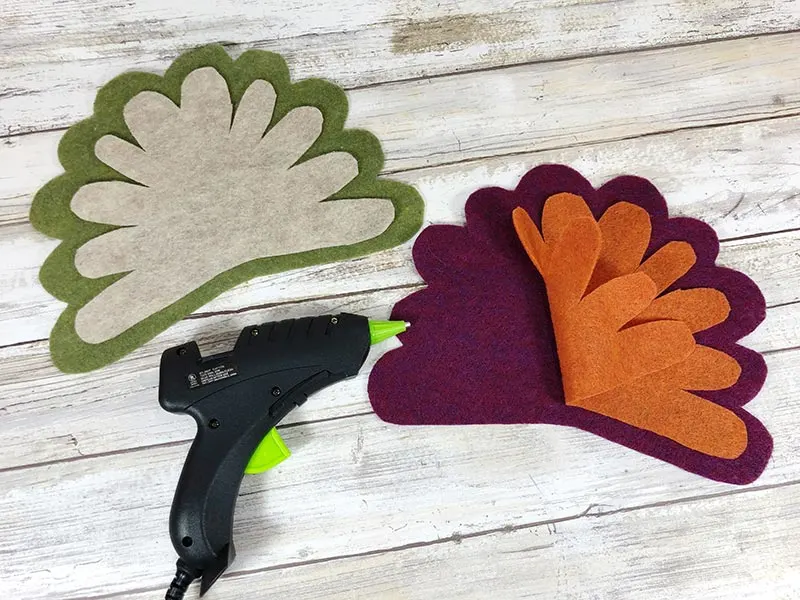
Place the large and small turkey feather patterns on top of the craft felt and pin them in place with straight pins. You can either cut them out or trace the pattern first, then cut.
Glue small turkey feathers on top of the large turkey feathers.
Measure and cut four turkey legs 12 inches long by 1 inch wide. Knot each leg loosely in the center. Trace and cut out four turkey feet and attach them to the bottom of each leg with hot glue.
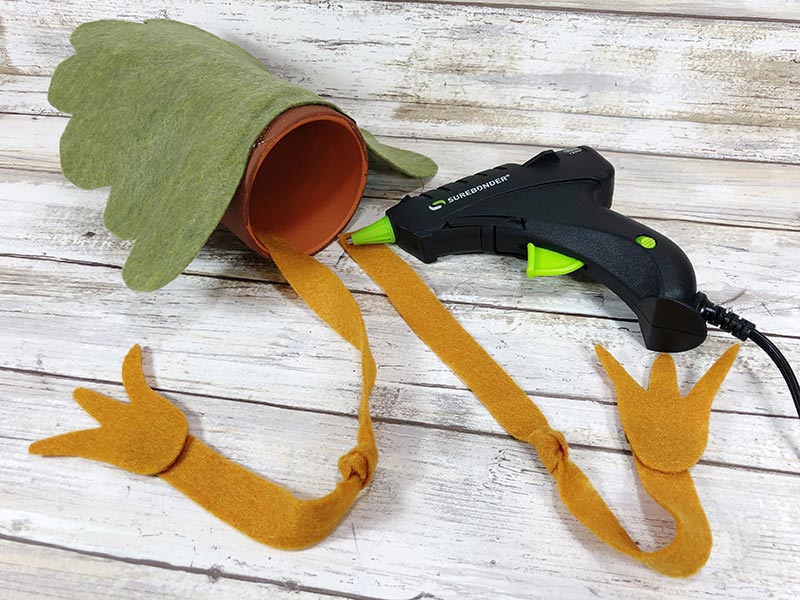

Hot glue the feathers on the back of the turkey body flower pot. Then attach the legs to the inside bottom center of the turkey body with hot glue.

Measure a 12 inch length of gingham ribbon and tie in a bow around the turkey’s neck. Trim the ends into a fishtail by cutting a small triangle out of each end.
Tru-Ray Construction Paper, 10 Vibrant ColorsDarice 1000 Pcs Popsicle StickMulti-Color Pom Poms, 1200pcs Assorted Size & ColorCrayola Mini Twistables Crayons (50ct), Crayons for Toddlers, 3+Elmer’s All Purpose Glue Sticks, WashableFiskars Training Scissors for Kids 3+ with Easy Grip (3-Pack) – Toddler Safety Scissors


More Thanksgiving Ideas:
- 25 DIY Fall Pumpkin Decorations
- Printable Gratitude Game
- Thanksgiving Printables for Kids
- Turkey Treat Box Craft
- 10 Savory Stuffing Recipes
- Thanksgiving Dinner Menu Ideas

Thanksgiving Turkey Clay Pot Craft
Transform clay flower pots into cute turkey decorations with this Thanksgiving craft project.
Materials
- Printable Turkey Pattern (fill out the form at the end of this post to receive it for free)
- 2 Clay Pots – 4” flower pots are recommended
- Brown Acrylic Craft Paint
- Craft Felt in Gold, Burgundy, Prickly Purple, Sandstone, Olive, Pumpkin (you can find packs of craft felt in assorted colors on Amazon)
- 2 Wooden Ball Knobs 2 ½ inch size
- White Gel Pen
- Ribbon – Gingham Green and Orange
Tools
- Glue Gun and Glue Sticks
- Paint Brush
- Scissors
- Black Permanent Marker
- Pencil
- Straight Pins
- Ruler
Instructions
- Download the turkey pattern, print it, and cut it out.
- Remove any stickers from the bottom of the clay pots before painting.
- Give the terra cotta pots and wooden ball knobs a basecoat with the milk chocolate acrylic craft paint. Let it dry for about 30 minutes then apply a second coat if necessary.
- Flip the clay pot upside down and attach the ball knob head to the clay pot body with hot glue.
- Trace beak patterns on gold felt and snood patterns on burgundy felt and then cut out.
- Glue beak and snood to the turkey head with hot glue.
- Draw eyes and eyebrows with black permanent marker and then use the white gel pen to add highlights to the eyes.
- Place the large and small turkey feather patterns on top of the craft felt and pin them in place with straight pins. You can either cut them out or trace the pattern first, then cut.
- Glue small turkey feathers on top of the large turkey feathers.
- Measure and cut four turkey legs 12 inches long by 1 inch wide. Knot each leg loosely in the center.
- Trace and cut out four turkey feet and attach them to the bottom of each leg with hot glue.
- Hot glue the feathers on the back of the turkey body flower pot.
- Attach the legs to the inside bottom center of the turkey body with hot glue.
- Measure a 12 inch length of gingham ribbon and tie in a bow around the turkey’s neck. Trim the ends into a fishtail by cutting a small triangle out of each end.
Notes
Painting tip for the wooden ball knobs: Place the ball knobs on the end of a paint brush handle to paint the entire surface without your fingers getting in the way. Drying times may vary.


Darcy is the founder of “Life With Darcy and Brian,” where she combines her love for education, board games, and crafting to create engaging learning experiences for kids. Her creative projects and writing have been featured in outlets like The Toy Insider, CafeMom, Mom.com, Parents.com, Country Living, and The Pioneer Woman.
pat
Saturday 23rd of October 2021
it is something i can do with the neighborhood kids. just so- they get their parents in wanting to make some for their holidays. thanks so- much for all your easy patterns.
Darcy Zalewski
Wednesday 27th of October 2021
I'm so glad you enjoy our crafts, Pat! I hope everyone has fun making these for the holidays :)
Jackie
Friday 13th of November 2020
What a cute idea! The turkeys are adorable!