

This is a sponsored conversation written by me on behalf of Cricut. The opinions and text are all mine.
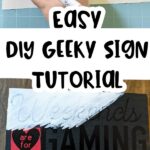
Decorate your computer gaming room with fun DIY signs. This is an easy Cricut project to make and you’ll want to create more once you finish the first sign!
For this project, I used my Cricut Explore Air 2 to cut vinyl to use on a blank wooden sign and found the perfect spot in our computer room to hang it when done. This project pairs well with our DIY Headphone Station.
More Gaming Ideas
Love gaming? From geeky Cricut projects to board game suggestions, we have ideas to keep family gaming fun and entertaining.
- 101 Board Games for Family Game Night
- 7 Educational Benefits of Minecraft
- DIY Dice Bag of Holding
- Dragons & Dice custom hoodies
- List of Free Printable Games for Kids
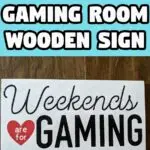
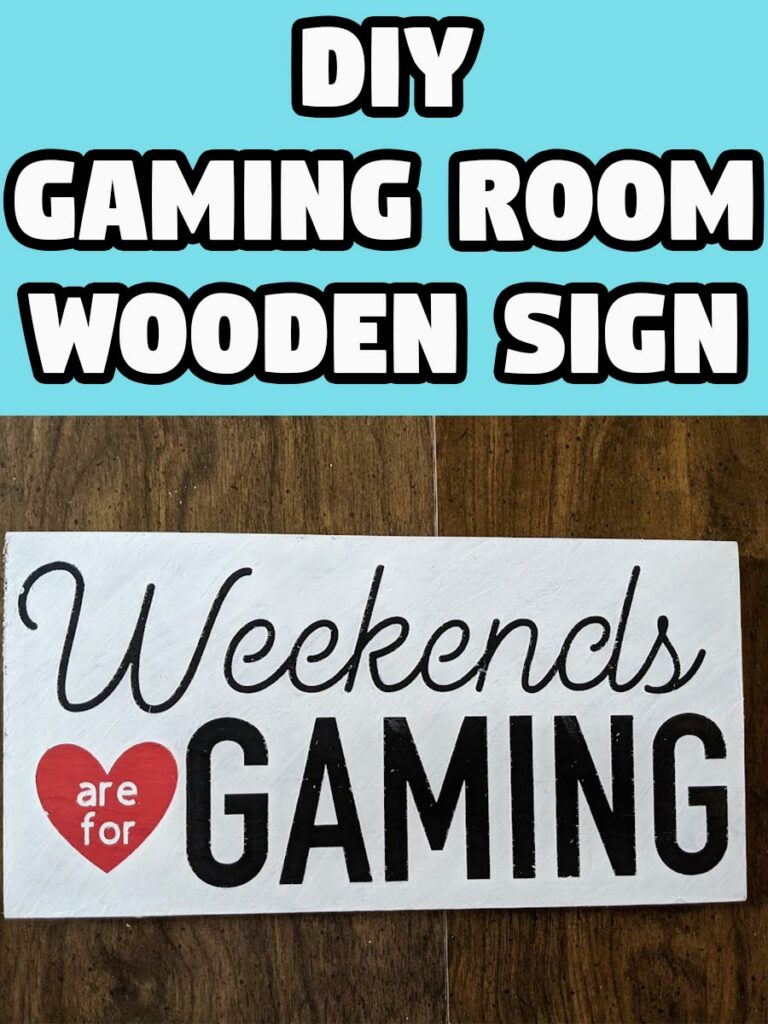
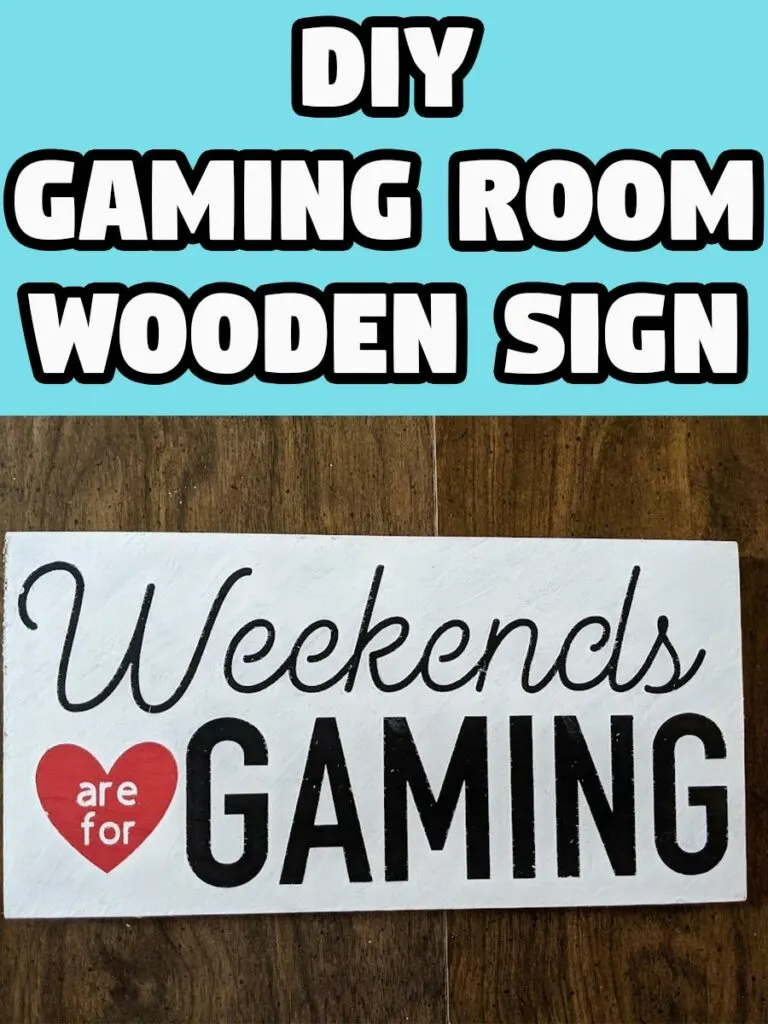
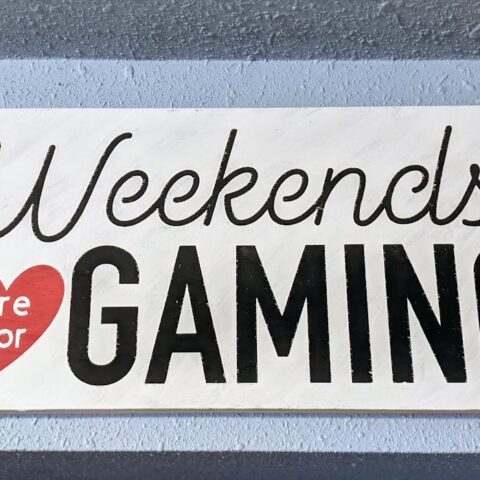
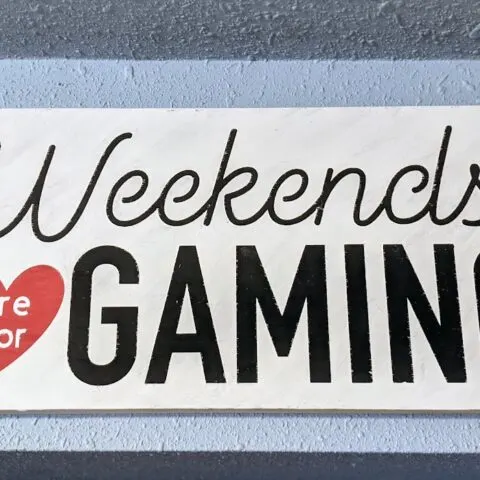
DIY Computer Gaming Room Wooden Sign
Part of our computer room has geeky decor – such as gaming posters and our Pops collection, but there isn’t a lot around the computer desks.
There’s this little bit of wall along the ceiling above the family computer where my children do schoolwork and play video games. I’ve never quite known what to do with that space and decided it’d be the perfect spot for a homemade sign.
This post contains affiliate links. As an Amazon Associate and a participant in other affiliate programs, we earn a commission on qualifying purchases.
I browsed the available designs in Cricut Access and decided to make a text based sign with a gaming theme.
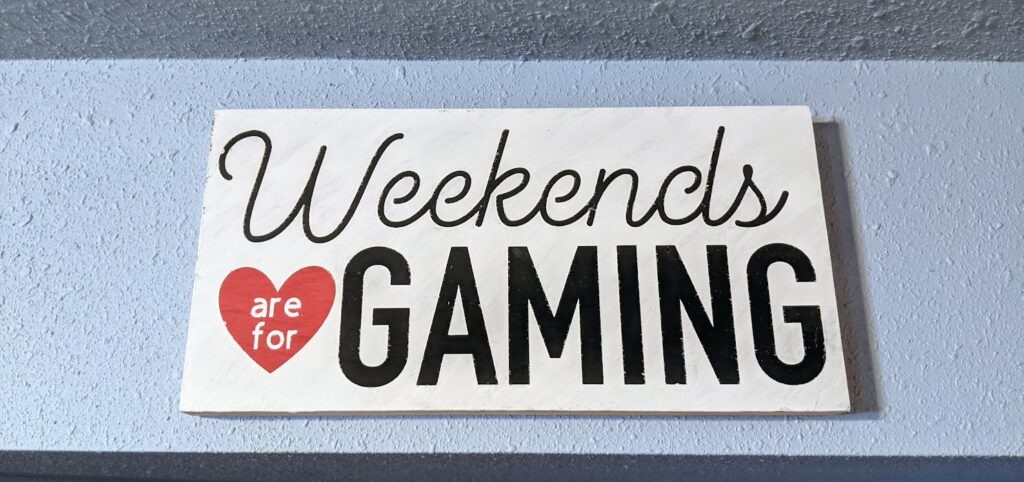
My kids look forward to the weekends because it means extra screen time (after they finish chores, of course). So, I wanted it to say, weekends are for gaming.

This project works with either removable vinyl or permanent vinyl. You can either paint a blank wood sign and apply permanent vinyl onto it or use removeable vinyl like a stencil for crisper text when hand painting it.
I decided to use the vinyl like reversible stencil and love the way my handmade gaming sign turned out!
Gaming Room Sign Craft Supplies:


- Weekends Are For Gaming Sign Design
- Cricut Machine (I used the Cricut Explore Air 2)
- Machine Mats
- Vinyl (any kind, I used black removable vinyl)
- Transfer Tape
- Weeding tool
- Blank wooden sign
- Acrylic Craft Paint
- Paint brushes
How to Make a Computer Gaming Room Sign:
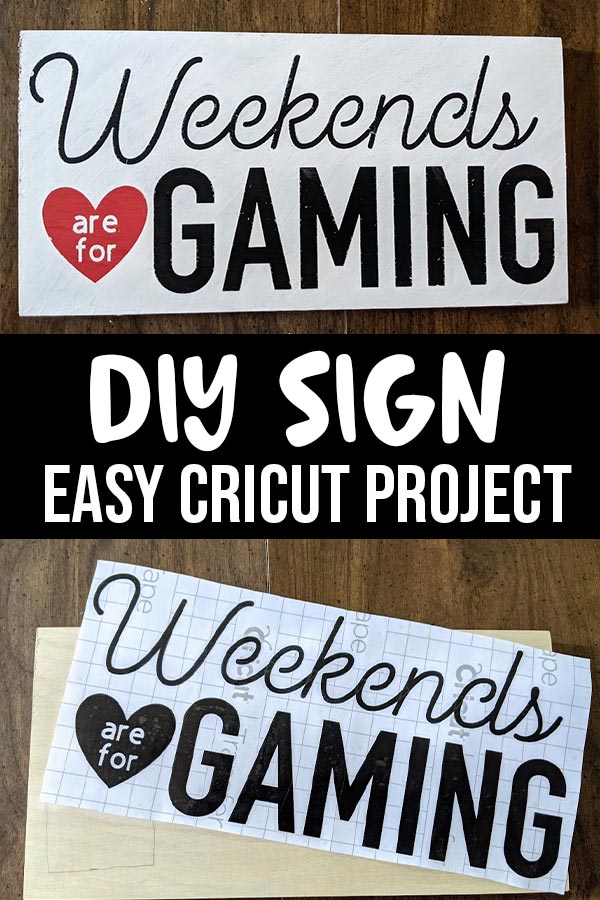
First, start by deciding where you want to hang your sign and determine what size you want it to be. My wooden sign is 6 inches by 12 inches.
You can create your own design or use my Weekends Are For Gaming design for your DIY game room sign. Click customize to resize it or alter the text as needed, such as using different fonts.
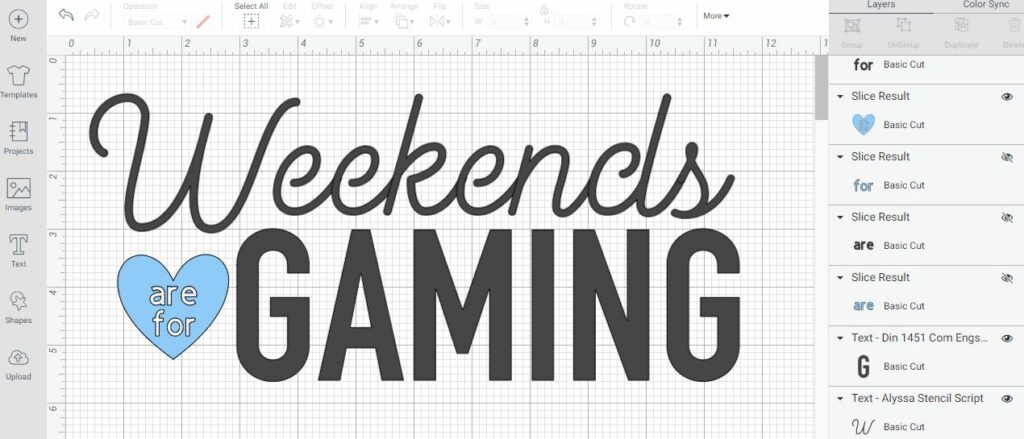
Once you are done tweaking it, select the entire design and click “attach” so everything cuts in place how you’ve arranged it.

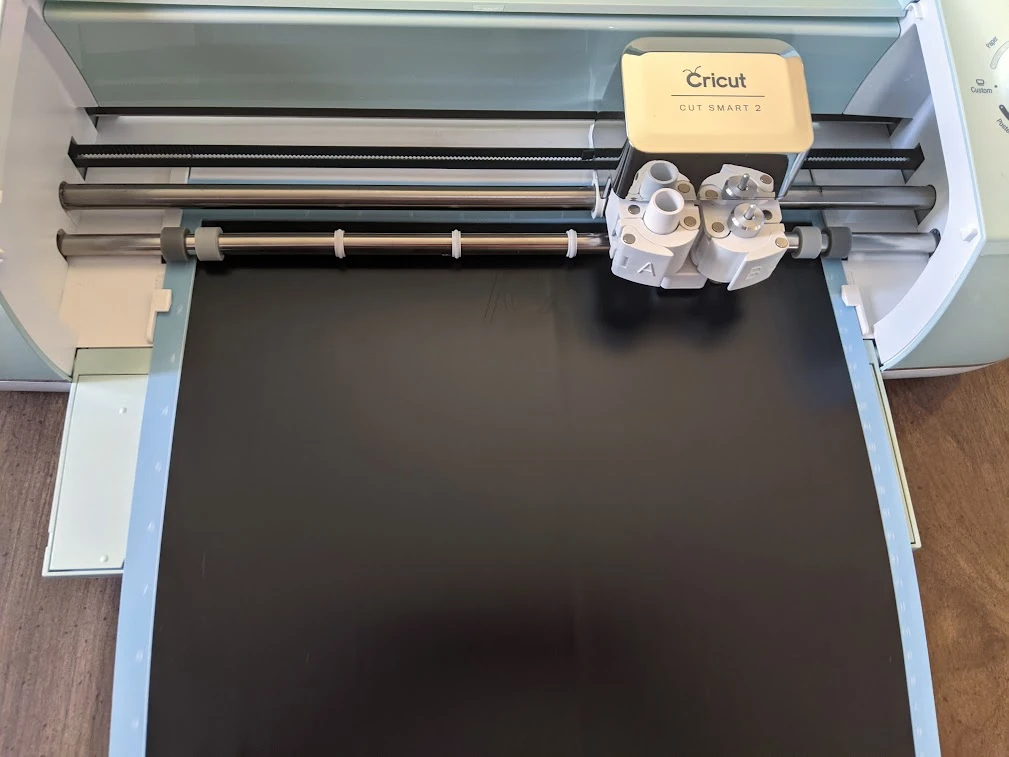
When you are ready to cut the design, click “Make It.” Place your choice of vinyl with the color side up on a machine mat. Follow the directions to load your mat and begin cutting the design.
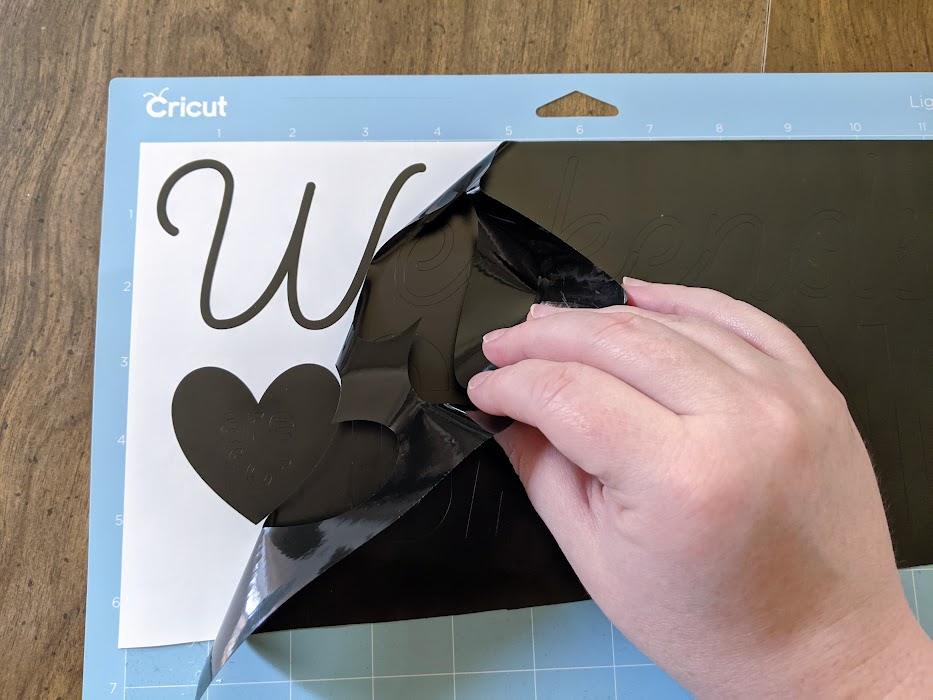

After unloading the mat, remove the excess vinyl from around the design. Starting at the corner, gently pull it away from the liner at about a 45 degree angle. I kind of pull it back while also gently rocking my hand side to side.
Use care when pulling off excess vinyl around thinner letters and designs.
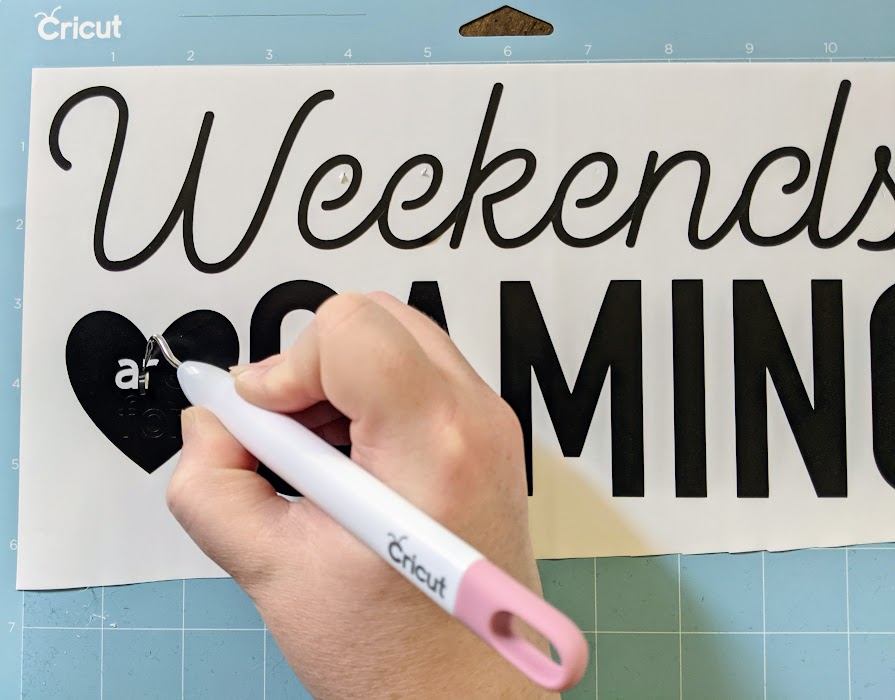

Then use your weeding tool to remove the small inner pieces in the text and the heart.
Measure and cut your transfer tape (use StrongGrip Transfer Tape if you use glitter vinyl) and place it over the weeded design. Use a scraper tool to remove air bubbles and go over the design to make it stick to the transfer tape.
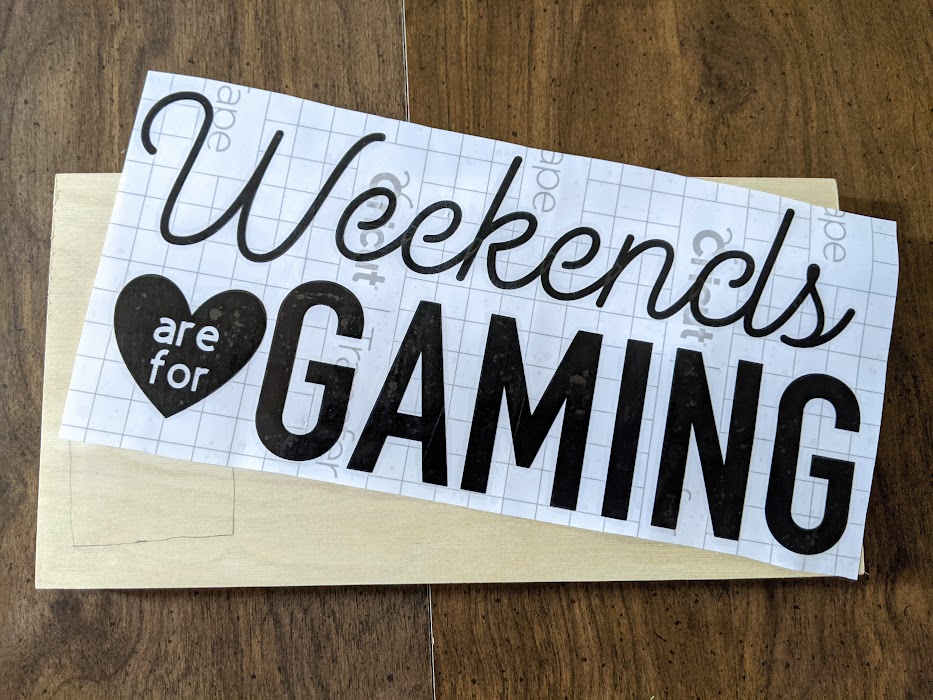

Check the positioning on the sign and mark any places you may want to paint different colors.
Since I wanted to reveal a red heart when removing the vinyl after painting, I marked off the area around where the heart would be positioned.

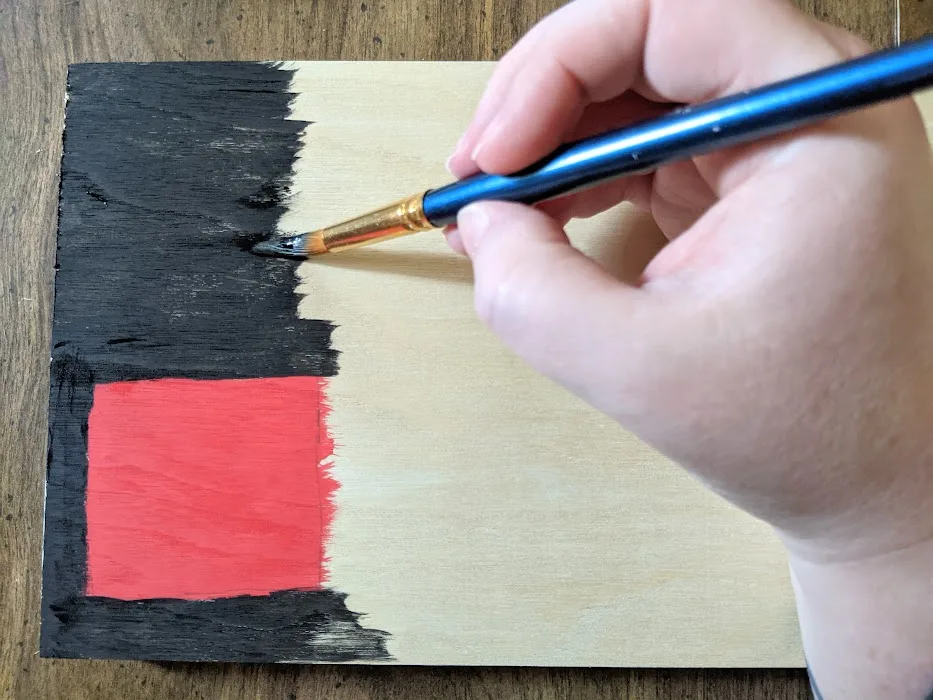
Then paint your base coat. I knew I wanted my letters to be black and the heart red, so I painted the blank wood sign black and red.
Now, carefully peel back the transfer tape to lift the vinyl design from liner.

Position the transfer tape where you want the vinyl words to go and apply it to the sign. Press the transfer tape down in the center and smooth it outwards, then use the scraper tool to go over it really well. Gently peel away the transfer tape.
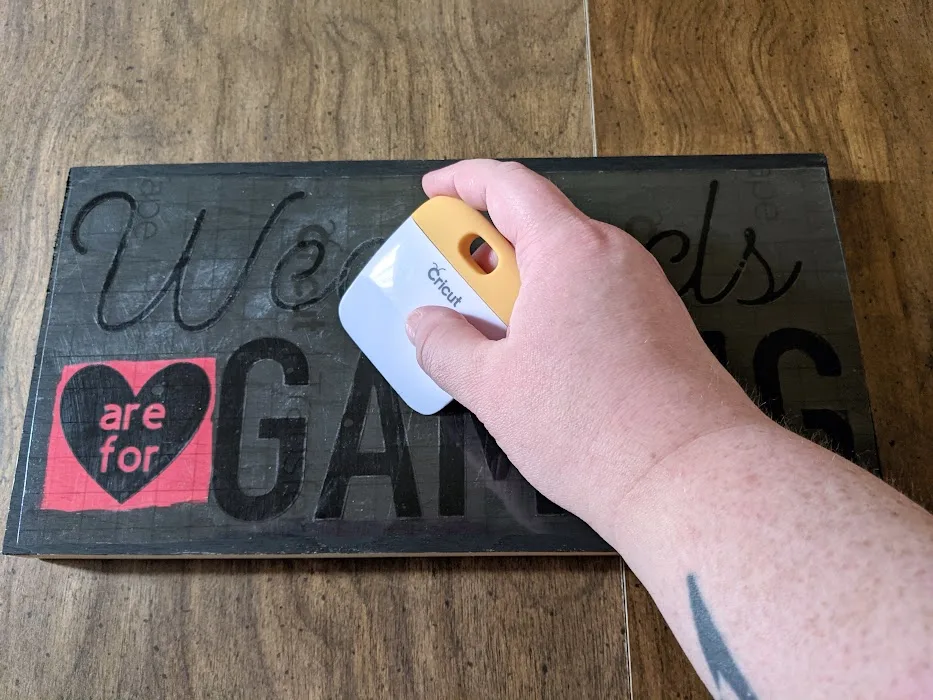
If you are making your sign with permanent vinyl applied to the painted wood sign, then you can hang it up at this point. Otherwise, it is time to paint over the removable vinyl design!
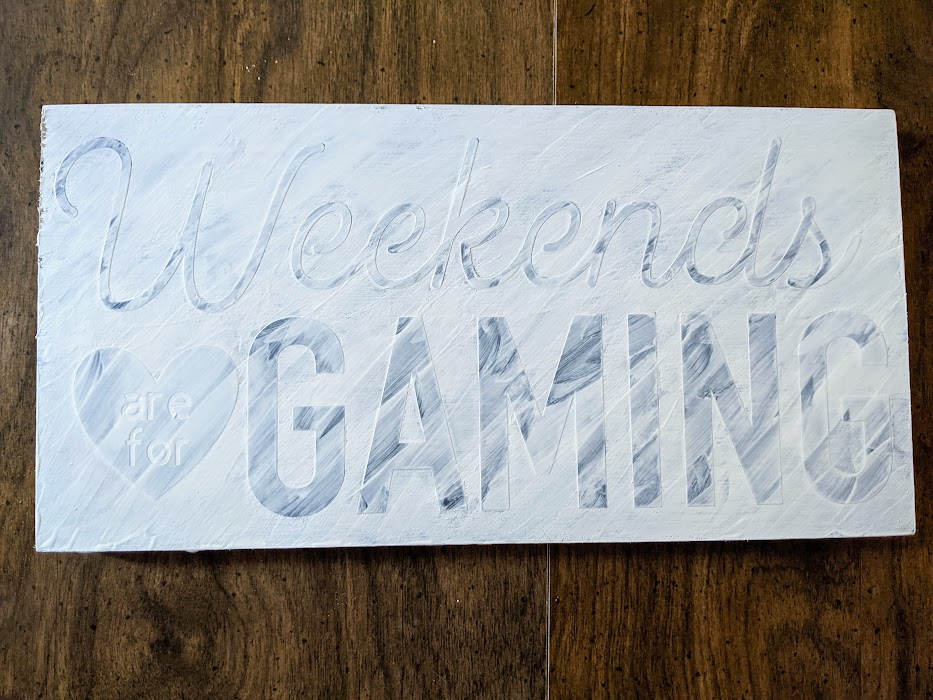
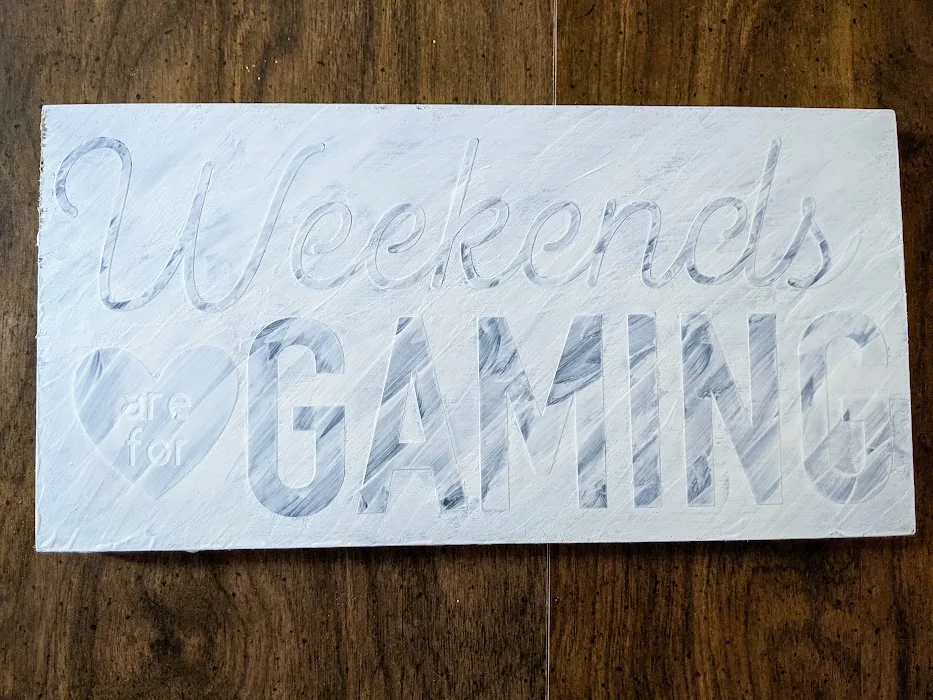
Paint using the final color you want on your sign. I painted mine white.


Once the entire sign has been painted, use a weeding tool and tweezers to carefully lift and remove the vinyl design.
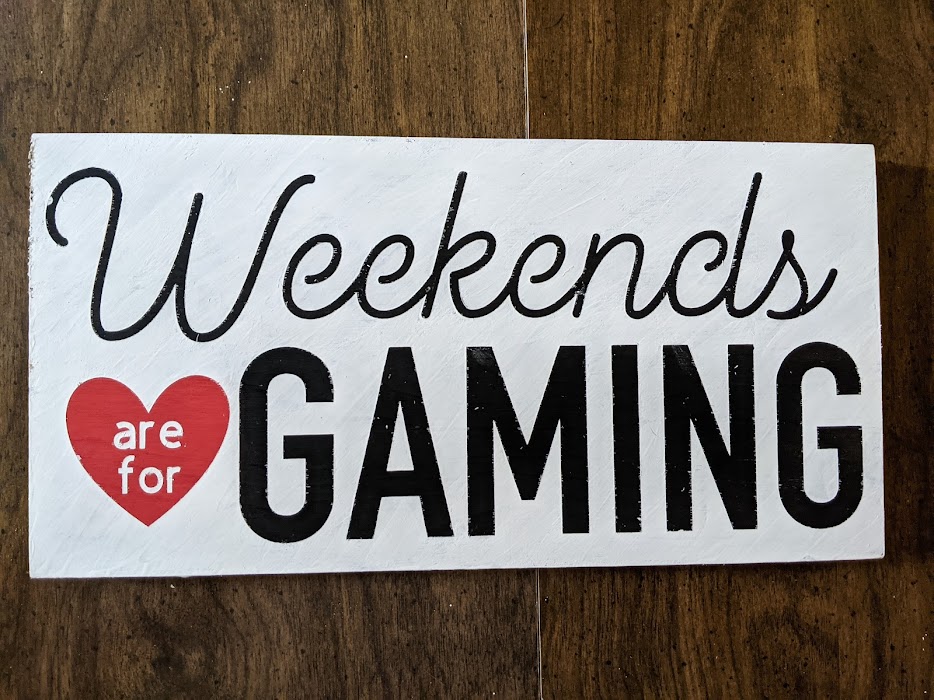

It works as a nice reverse stencil, revealing the base coat underneath the vinyl design.
Finally, hang your Weekends Are For Gaming sign up in your computer gaming room and enjoy!


More Cricut Projects:
- Cutout Birthday Card
- Frog Paper Bag Puppet
- DIY I Love School custom teeshirt
- Gaming Room Headphone Station
- DIY Dalmatian Halloween Costume
Weekends Are For Gaming Sign Cricut Project
Learn how to use your Cricut to make your own DIY Weekends Are For Gaming sign to hang in your computer gaming room.
Materials
- Weekends Are For Gaming Sign Design
- Blank wooden sign
- Vinyl (any kind, I used black removable vinyl)
- Transfer Tape
- Acrylic Craft Paint
Tools
- Cricut Machine (I used the Cricut Explore Air 2)
- Machine Mats
- Weeding tool
- Paint brushes
Instructions
- You can create your own design or use my Weekends Are For Gaming design for your DIY game room sign. Click customize to resize it or alter the text as needed, such as using different fonts.
- Select the entire design and click “attach” so everything cuts in place how you've arranged it.
- Click "Make It." Place your vinyl color side up on a machine mat. Follow the directions to load your mat and begin cutting the design.
- Remove excess vinyl and weed your project.
- Use transfer tape and place it over the weeded design.
- Check the positioning on the sign and mark any places you may want to paint different colors.
- Paint your base coat. I wanted black lettering and a red heart, so I painted the blank wood sign black and red first.
- Carefully peel back the transfer tape to lift the vinyl design from liner.
- Position the transfer tape where you want the vinyl words to go and apply it to the sign. Peel away the transfer tape.
- If you are making your sign with permanent vinyl applied to the painted wood sign, then you can hang it up at this point. Otherwise, it is time to paint over the removable vinyl design!
- Paint using the final color you want on your sign. When you are finished painting, use a weeding tool and tweezers to carefully lift and remove the vinyl design.
Recommended Products
As an Amazon Associate and member of other affiliate programs, I earn from qualifying purchases.


Darcy is the founder of “Life With Darcy and Brian,” where she combines her love for education, board games, and crafting to create engaging learning experiences for kids. Her creative projects and writing have been featured in outlets like The Toy Insider, CafeMom, Mom.com, Parents.com, Country Living, and The Pioneer Woman.