
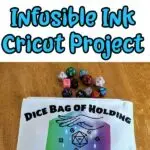
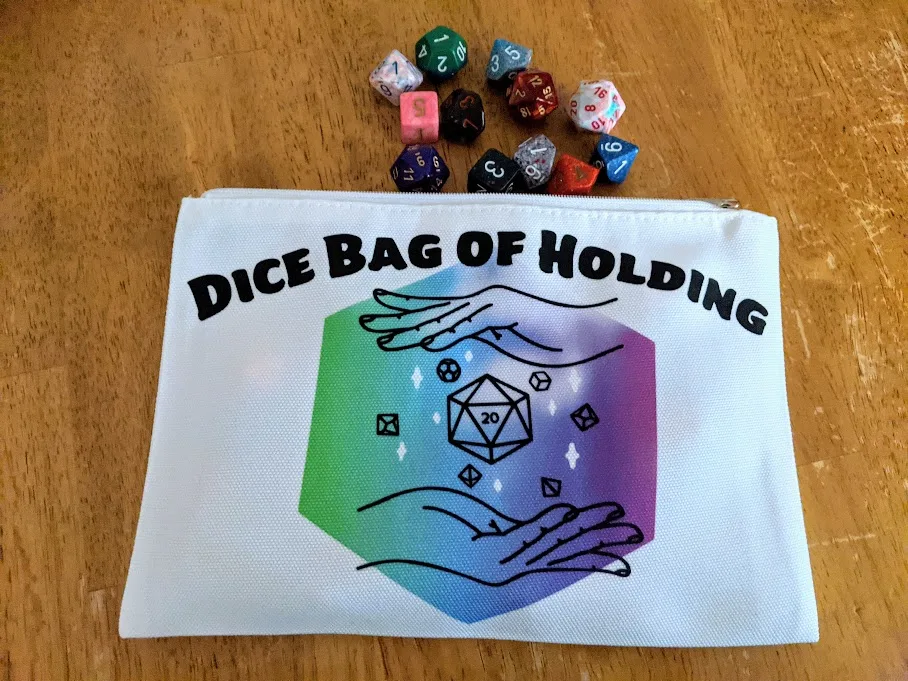
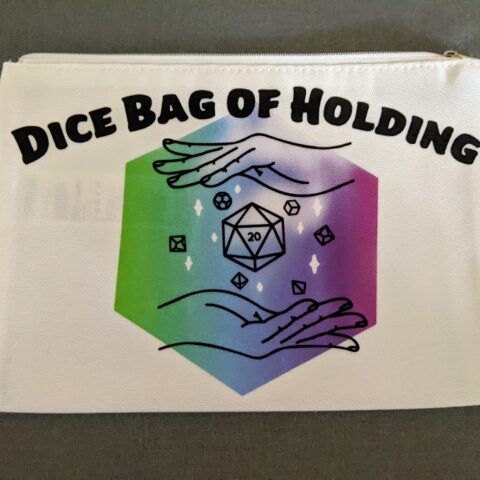
Do you have a lot of dice like I do? Then you’ll want to make your own Dice Bag of Holding! It’s a great beginner Cricut project that uses infusible ink and iron-on vinyl.
Crafting with my Cricut and brainstorming creative projects is something I enjoy immensely.
So I greatly appreciate that Cricut provided some of the supplies used in this project as well as the Brightpad Go to make weeding my projects easier. Pair this with a custom Dragons & Dice Hoodie Cricut project!

This post contains affiliate links. As an Amazon Associate and a participant in other affiliate programs, we earn a commission on qualifying purchases.
Dice Games for Kids
Make one of these cute dice bags to hold all the dice they need to play their favorite games. From roleplaying to printable math games, there are plenty of games to enjoy!
- Cloud Roll and Color Dice Game
- Hero Kids RPG (similar to D&D but simpler for younger kids)
- Roll a Cupcake Printable Game
- Patriotic Stars Roll and Cover Math Game
DIY Dice Bag Using Cricut Infusible Ink
My friends and I regularly get together to play an ongoing tabletop roleplaying game (TTRPG) on Saturdays. So, I’ve been inspired to make geeky themed items with polyhedral dice (and dragons too).
There’s one thing we all have in common: we are always looking at more dice.
Don’t ever let anyone tell you that you only need one set of dice to play D&D. It’s perfectly normal to want ALL THE DICE.
Since my dice collection is ever growing, I thought it’d be fun to make a fun dice bag.


I knew I wanted to use the rainbow infusible ink transfer sheet I had, so I decided it would be the background. While searching through the available designs in Cricut Access, I came across this pair of hands with various dice. It felt like a good fit.
After that, I just needed to find a font I liked and gave the “Dice of Bag Holding” text a bit of a curve.
Then I sized the design to fit on the smaller cosmetic bag blank from Cricut. If I made this again, I’d either put it on the larger bag or make the text a little smaller. Being too close to the zipper made it tougher to apply good even heat.
After I applied the infusible ink, I noticed a section didn’t apply all the way, but I had already peeled it off the bag. I decided it didn’t look too bad and left it.
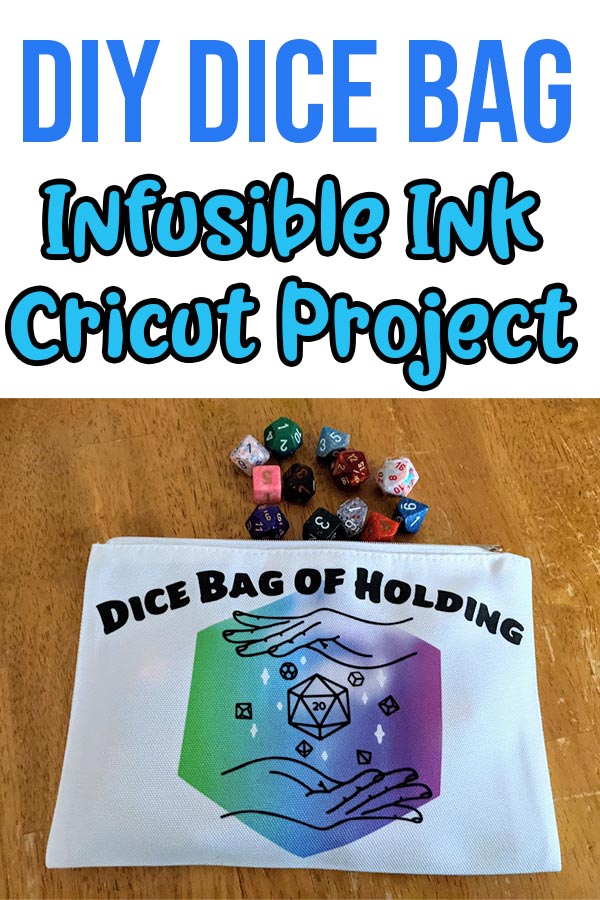
To help with weeding my project, I used the new BrightPad Go, a cordless, rechargeable craft light box.
It made it a lot easier to see the cut lines on the infusible ink sheet. The last time I made something with infusible ink, I had a hard time seeing where I needed to weed.

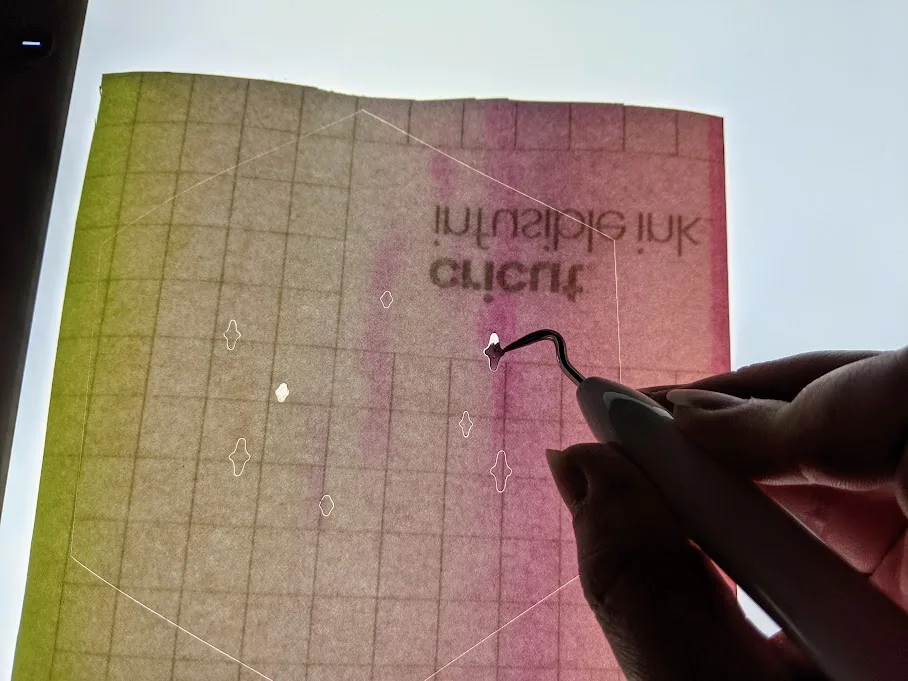
I love how lightweight my BrightPad Go is and it’s durable too. There are five brightness settings and it is helpful to adjust those depending on the material you are working with.
If you’ve ever held your design up to the light or tilted it trying to find your cut lines – you want to check one of these out!
Dice Bag of Holding Project Supplies:

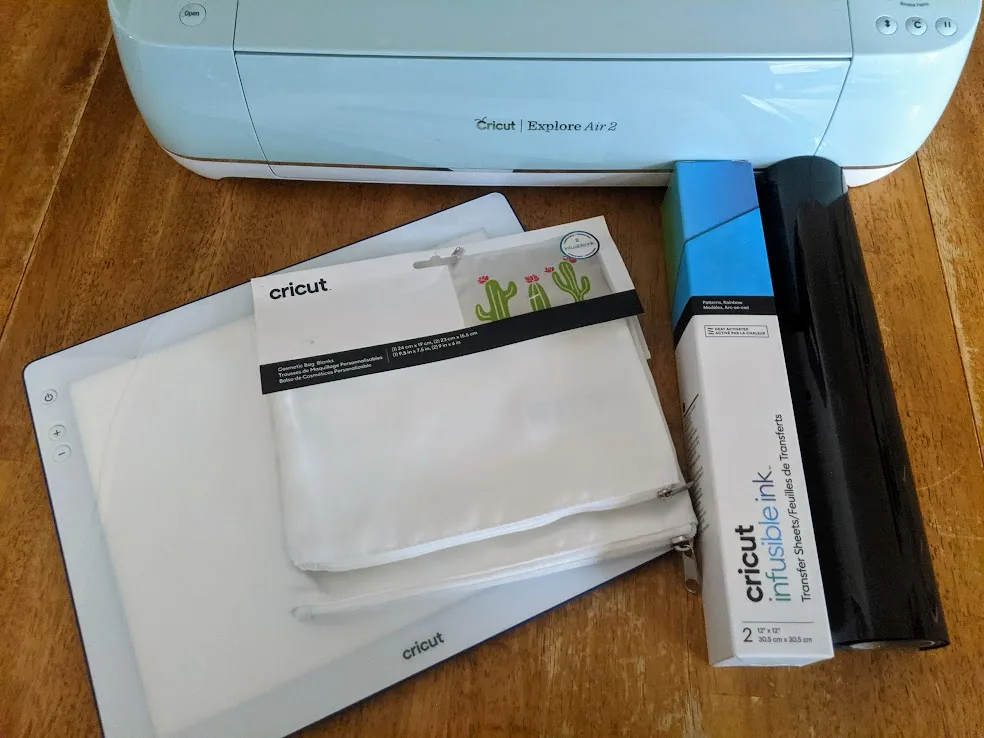
- Dice Bag of Holding Design
- Cricut Machine (I used the Cricut Explore Air 2)
- Machine Mats
- Rainbow Infusible Ink Transfer Sheet
- Black Everyday Iron-On Vinyl
- Cosmetic Bag Blank
- Weeding tool
- EasyPress 2 9×9
- EasyPress Mat
- BrightPad Go
How to Make a Dice Bag of Holding With Your Cricut:
You can create your own design or use my Dice Bag of Holding Design. Click customize to resize it and alter the text as needed.


I ungrouped the inserted image of the hand with dice in order to slice the “sparkles” out of the infusible ink hexagon.
Next I selected different colors for each section of the design that would be in a different material.
When you are ready to cut the design, click Make It. Then click to toggle Mirror ON for both the iron-on vinyl and infusible ink since it is an iron-on project.

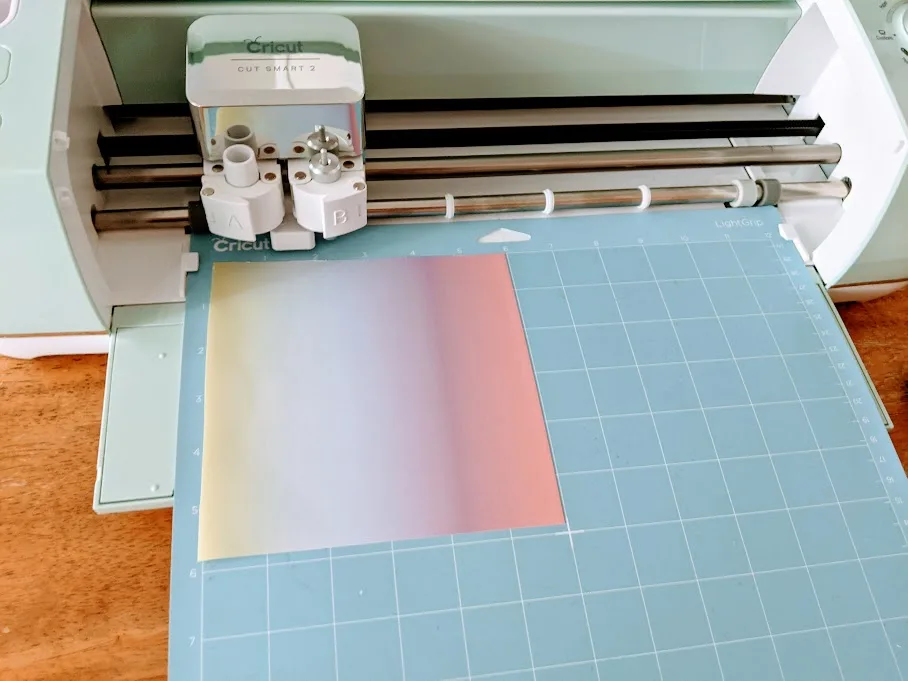
Place your choice of iron-on vinyl shiny side down and place infusible ink transfer sheet ink side up on a machine mat. Follow the directions to load your mats and cut the design.
Once the designs are done cutting, unload the mat. Then remove the excess iron-on from around the design. Start from the corner and gently pull it away from the liner at about a 45 degree angle. I kind of pull it back while also gently moving my hand side to side.
Then use your weeding tool to remove the small inner pieces in the text and design images. Use the BrightPad Go to make weeding your projects easier.
Start with your Infusible Ink Transfer Sheet layer, then the iron-on vinyl layer.

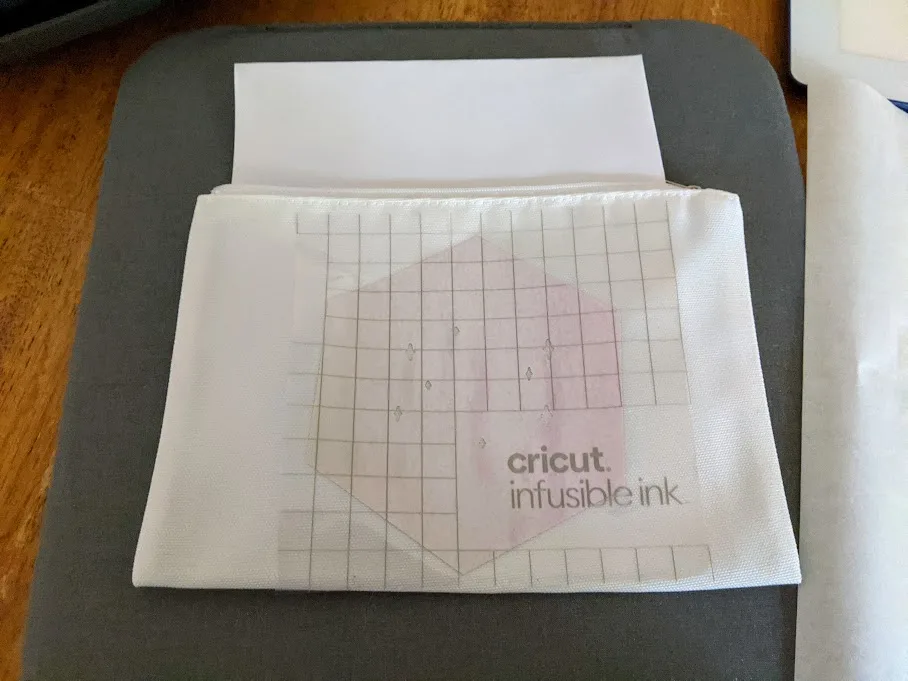
Make sure to put a piece of cardstock inside the cosmetic bag to prevent ink from bleeding through. Always use a clean sheet of butcher paper large enough to cover the area of the EasyPress.
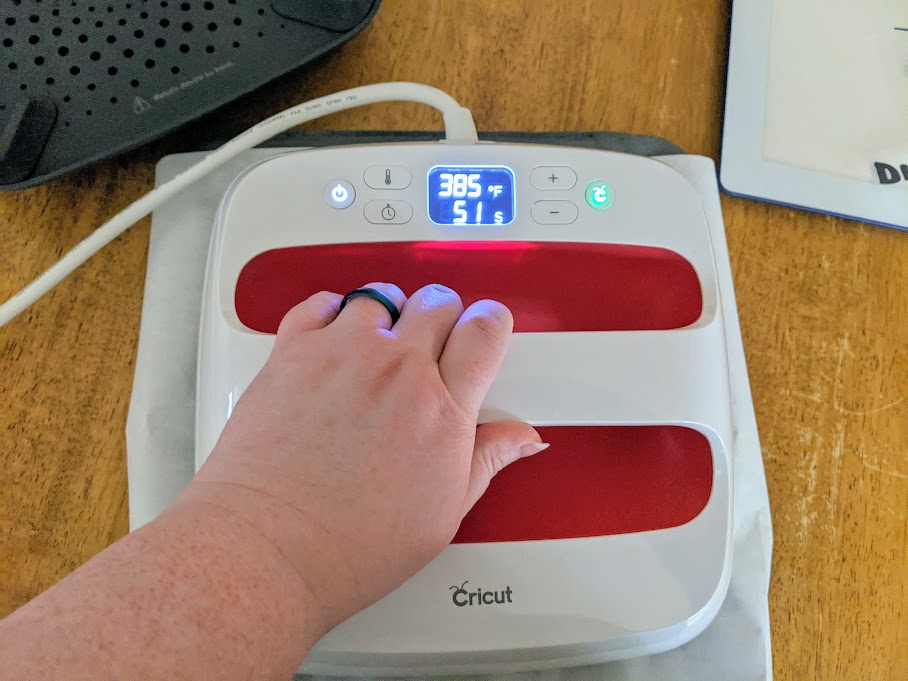

Use the Cricut Heat Guide to apply the iron on materials using the EasyPress 2.
Select the type of material you are using for your design, your base material, and whether you are using an EasyPress Mat or folded towel underneath your project.
It tells you what temperature to set the EasyPress 2, how long to preheat the base material, how long to set the press timer for, and if it needs to be warm or cool when peeling off the transfer liner. (I almost always cool peel.)

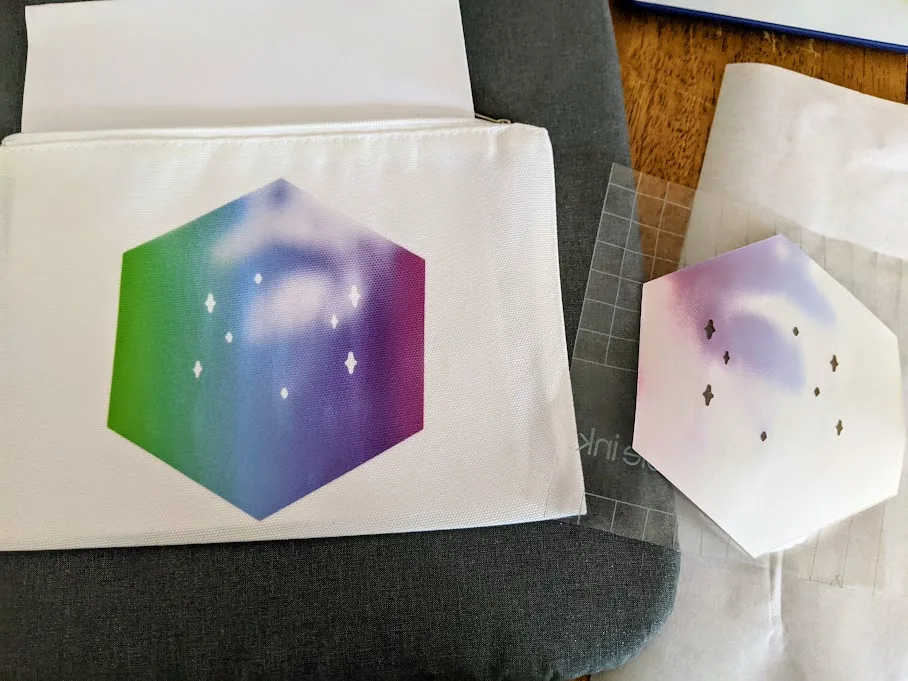
Once the infusible ink layer has been applied and the liner peeled away, then apply the heat transfer vinyl layer on top of it. I ended up cutting the text section apart from the dice hands in order to arrange everything better on the bag.
Finally, cool peel the transfer liner off and fill the bag with dice. You are ready for game night!

More Cricut Projects:
- Weekends Are For Gaming Sign
- DIY Dalmatian Halloween Costume
- Gaming Room Headphone Station
- Haunted House Halloween Card
- Cutout Birthday Card

Dice Bag of Holding Infusible Ink Cricut Project
Make your own DIY Dice Bag of Holding with your Cricut using infusible ink and heat transfer vinyl.
Materials
- Dice Bag of Holding Design
- Rainbow Infusible Ink Transfer Sheet
- Black Everyday Iron-On Vinyl
- Cosmetic Bag Blank
Tools
- Cricut Machine
- Machine Mats
- Weeding tool
- EasyPress 2 9×9
- EasyPress Mat
- BrightPad Go
Instructions
- You can create your own design or use my Dice Bag of Holding Design. Click customize to resize it and alter the text as needed.
- Next I selected different colors for each section of the design that would be in a different material.
- Click Make It then toggle Mirror ON for both the iron-on vinyl and infusible ink since it is an iron-on project.
- Place your iron-on vinyl shiny side down and place infusible ink transfer sheet ink side up on a machine mat. Follow the directions to load your mats and cut the design.
- Unload the mat and remove the extra iron-on from around the design.
- Weed the small inner pieces from the iron on design.
- Carefully weed the infusible ink design. It works better to "crack" the paper and lift it away.
- Use theCricut Heat Guide to apply the iron on materials to the blank bag.
- Select the type of material you are using for your design, your base material, and whether you are using an EasyPress Mat or folded towel underneath your project.
- Follow the directions for heat, length of pressing time, and peel temperature.
- Start with your Infusible Ink Transfer Sheet layer, then the iron-on vinyl layer.
- Make sure to put a piece of cardstock inside the cosmetic bag to prevent ink from bleeding through. Always use a clean sheet of butcher paper large enough to cover the area of the EasyPress.
- Once the infusible ink layer has been applied and the liner peeled away, then apply the heat transfer vinyl layer on top of it.
- Finally, cool peel the transfer liner off and fill the bag with dice. You are ready for game night!
Recommended Products
As an Amazon Associate and member of other affiliate programs, I earn from qualifying purchases.


Darcy is the founder of “Life With Darcy and Brian,” where she combines her love for education, board games, and crafting to create engaging learning experiences for kids. Her creative projects and writing have been featured in outlets like The Toy Insider, CafeMom, Mom.com, Parents.com, Country Living, and The Pioneer Woman.