

This is a sponsored conversation written by me on behalf of Cricut. The opinions and text are all mine.
Have you wondered about using the Cricut Explore Air 2 and what you could make with it?
I’m so excited to be working with Cricut and share my experience using this machine with you. Plus share fun craft projects, like this DIY I Love School shirt that you can make too.
I received my Cricut machine and supplies just before Christmas and have been taking the past couple weeks to learn how to use it and make a few different projects including handmade cards, party decorations, and t shirts.
In this post, I’m going to briefly go over what the Cricut Explore Air 2 is and how it works, what you need, and some beginner tips.
I’m also going to show you how to make an easy cutout birthday card that is perfect as a first project.

This post contains affiliate links. As an Amazon Associate and a participant in other affiliate programs, we earn a commission on qualifying purchases.
Cricut Explore Air 2 Review and Getting Started Tips
If you are feeling overwhelmed or a little intimidated about learning how to use your new Cricut machine, then you are in the right place. Learning something new can be exciting and overwhelming, but we can do this together!
I’ve wanted a Cricut cutting machine for a few years, but wasn’t sure how much I’d actually use it because I didn’t fully understand its capabilities. Now, I wish I’d gotten one sooner!
Years ago, pre-kids, I was into scrapbooking (though my hobby was probably buying supplies rather than creating pages).
I don’t have any prior experience using a cutting machine like the Cricut Explore Air 2. The closest thing I ever had, was a manual die cutting and embossing machine.
What do you need to get started with a Cricut
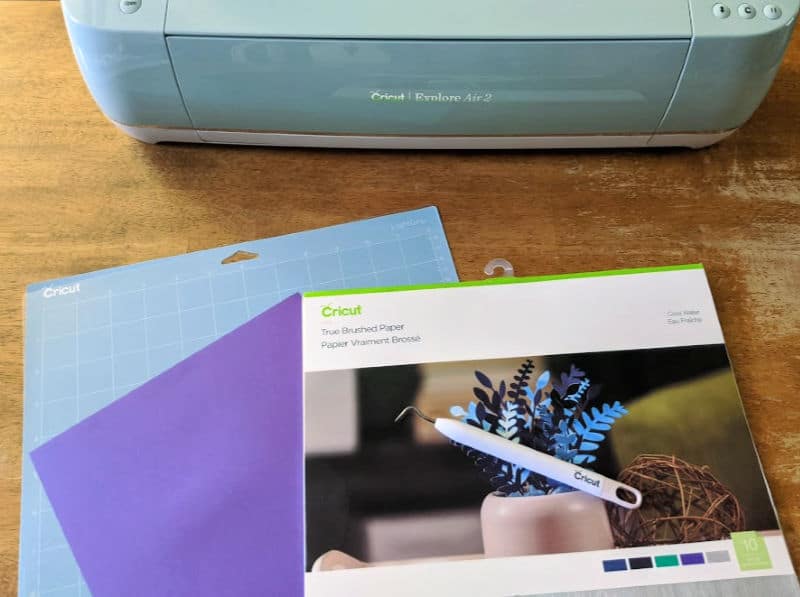
When you purchase a Cricut Explore Air 2, it comes with a cutting blade already installed, a LightGrip mat, a fine point pen (did I mention it can write as well as cut?!), Cricut Access free trial membership, and materials for a practice project.
You don’t need a lot of mats to begin with, but it’s worth grabbing the machine mat variety pack. I use the LightGrip and StandardGrip mats a lot.
This is enough to start learning your machine and to make one project. I highly recommend also getting the Essential Tool Set. I received one to use for my review, and have used every tool so far.
If you are mostly interested in creating paper projects, you will definitely need lots of cardstock and various paper materials.
To try making a few vinyl projects, the Vinyl Starter Kit is great too. It comes with a weeding tool, a scraper, a few different colors of vinyl, transfer tape, and directions for a project. There is enough vinyl to make a few projects before deciding if you want to buy more vinyl.
How to Use the Cricut Explore Air 2
Cricut made the process of setting up their machine super easy. After unboxing it, I connected the power cable and plugged the USB cable into my computer. Then went to the setup link provided.
Don’t forget to register for your free trial of Cricut Access too. Even though you can upload your own images and fonts to use, there are so many great designs and ready made projects available through Cricut Access.
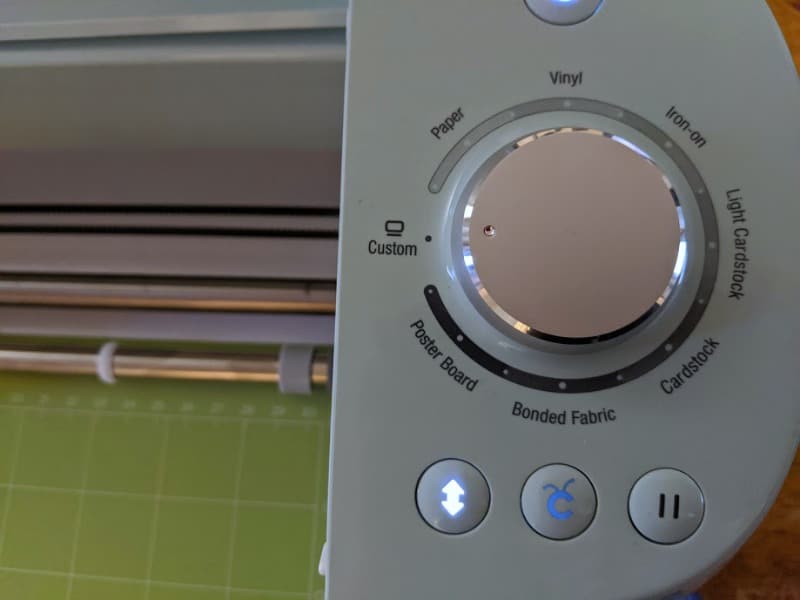
You can cut a lot of different types of materials with your Explore Air 2, such as cardstock paper, vinyl, iron-on, party foil, and so much more.
The dial makes it easy to select what you are cutting. If yours is not on the dial, set it to Custom, then select the material in Design Space.
You will always place your paper, vinyl, etc. onto a cutting mat and load it into your machine. When it is done cutting, you need to carefully weed out little cutouts and remove it from the mat.
I really didn’t think it would be this easy to use, but I’m glad I took it out of the box and got started!
Cricut Beginner Tips
Here are a few things to remember as you get started:
- Take your time. There is a slight learning curve, so take some time to watch their tutorial videos and get familiar with your machine.
- Start with simple, ready made project designs. I started to feel overwhelmed at all the possibilities and wanted to do more advanced projects, but I needed to get comfortable with the basics first.
- Use only one color of vinyl or iron-on for first time projects.
- Complete the practice projects provided by Cricut.
- Mark project ideas as favorites, especially if they are more complex. You can work your way up to them or use them as inspiration.
- Take time to play around in Design Space and watch tutorials on how to create your own designs.
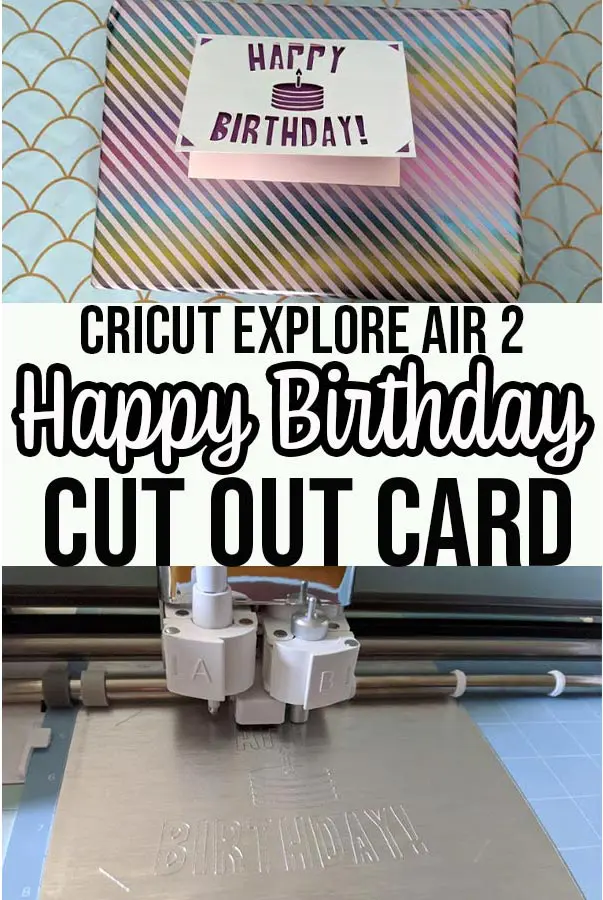
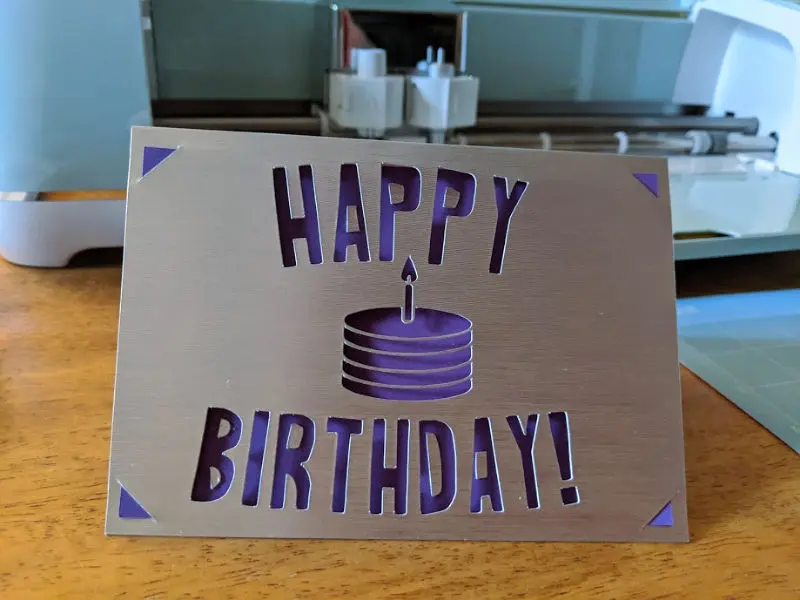
Easy DIY Happy Birthday Card Tutorial
I love handmade cards because they are so unique. As I learned how to use my machine, I created a couple cards using ready made designs.
In honor of January being my birthday month (and having other birthdays to celebrate as well), I wanted to design a birthday card myself.

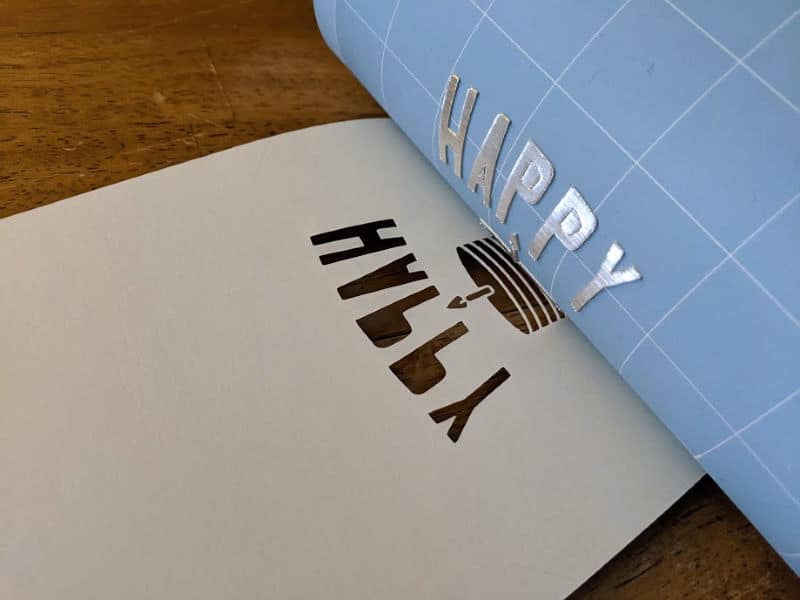
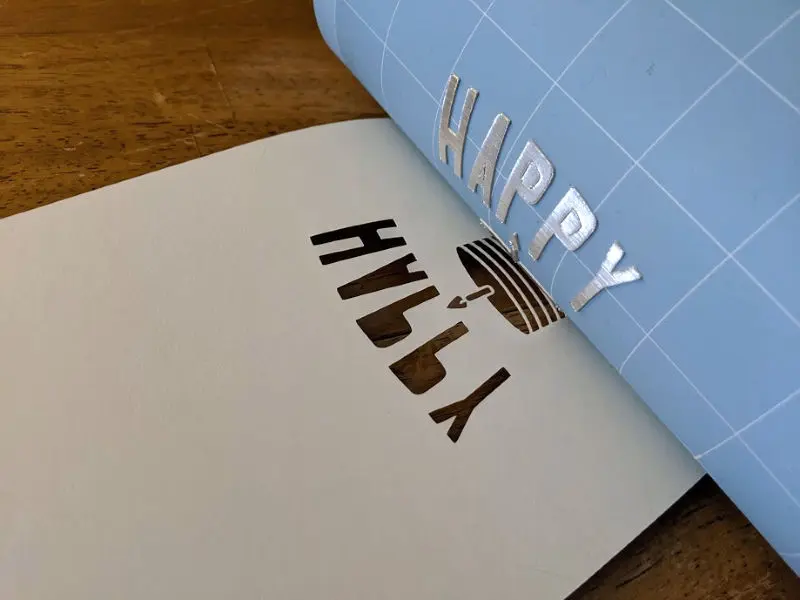
I love the look of cut out cards, so I learned how to use the Slice function in Design Space to make my Cricut cut the words out of the card.
This is a great beginner project and I’ll walk you through how to make one too.
Happy Birthday Card Supplies

- This Cutout Birthday Card Design (or design your own)
- Cricut Machine (I used the Cricut Explore Air 2)
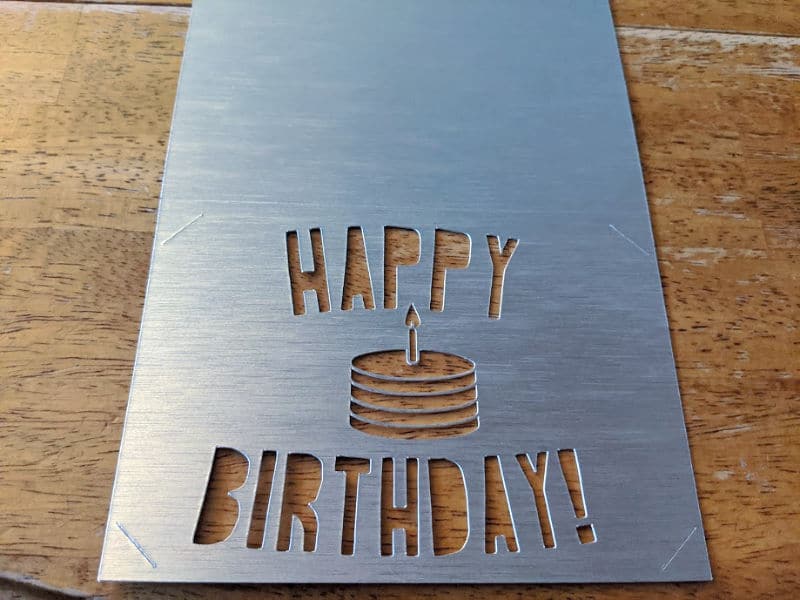
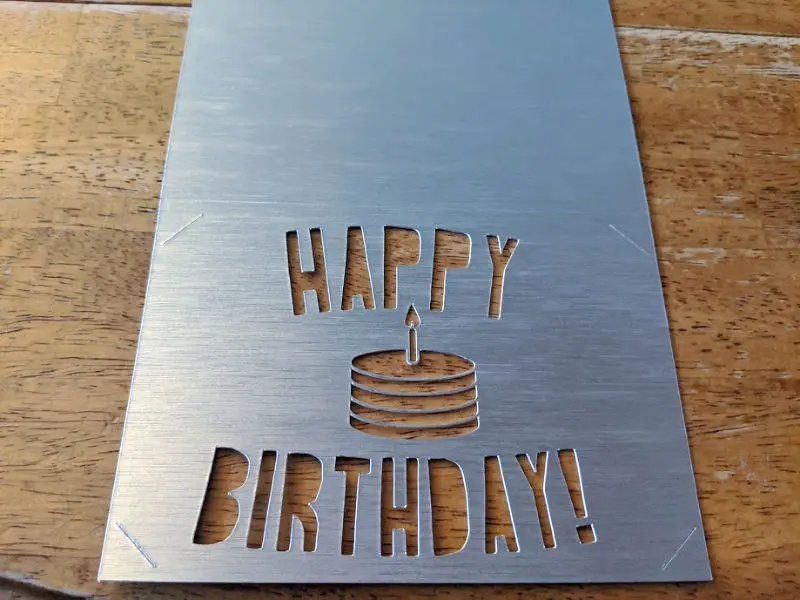
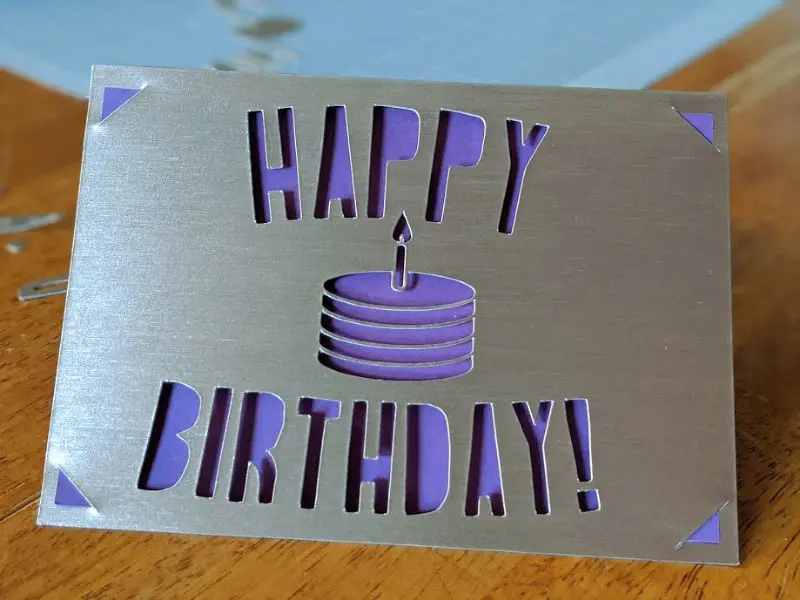
- 2 colors of Cardstock (I used silver True Brushed Paper and purple cardstock)
- LightGrip Mat or StandardGrip Mat
How to make a Cut Out Happy Birthday Card with a Cricut
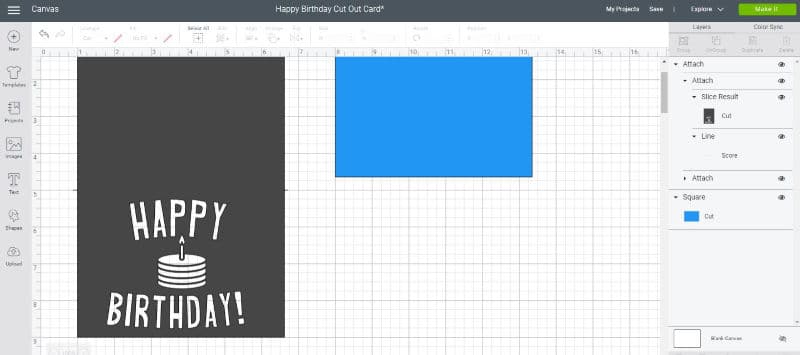
You can use my birthday card Design Space canvas available here or create your own design.
When creating your own design, to make cut out words, place your text where you want it to go. Then select both the text and the card shape and use the slice function. The words will be cut out of the card.
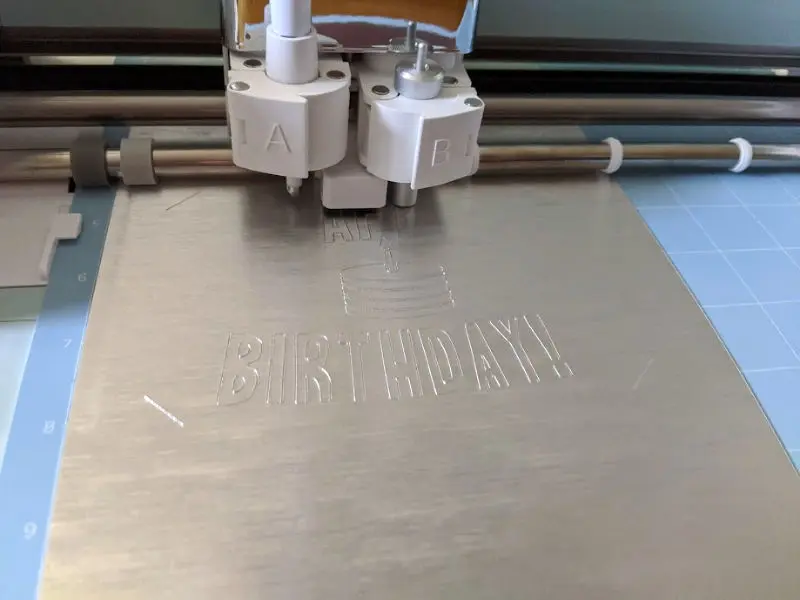
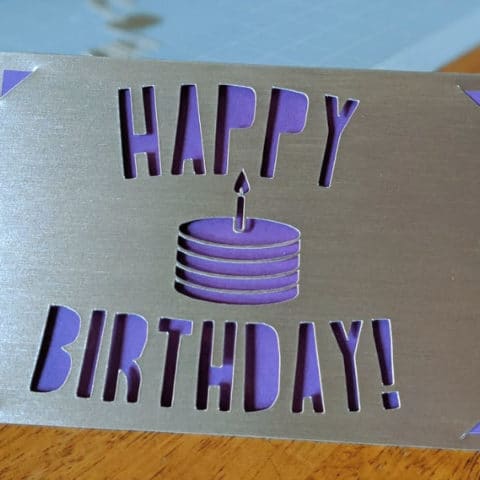
Repeat that for each line of text and any images, like the cake in my design pictured above.
You will want to use two different colors of cardstock paper. This will make the cut out words pop with the color placed behind them. A solid color for the card itself and a pattern paper would make a cute combination!
I loved the texture and shine of the True Brushed Paper, so I used a silver one and paired it with purple cardstock.
When I clicked “Make It” it shows two different mats. The machine knows that the cuts are being done on two different colors of paper.
The insert was designed to be the correct size to fit into the slots on the card corners.
The True Brushed paper is much thicker than card stock. Set the dial to Custom and select True Brushed Paper.
This design will also score the card, making it easier to fold it. The program will prompt you to add the scoring stylus.
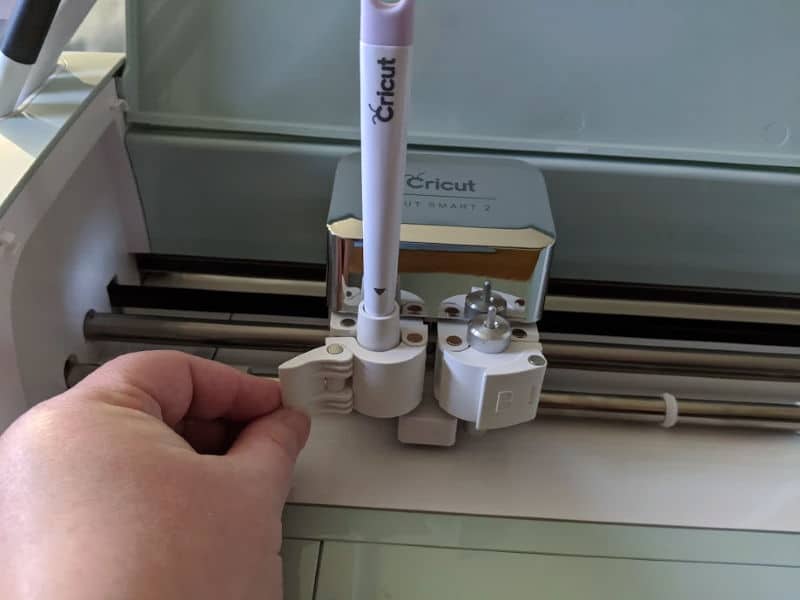
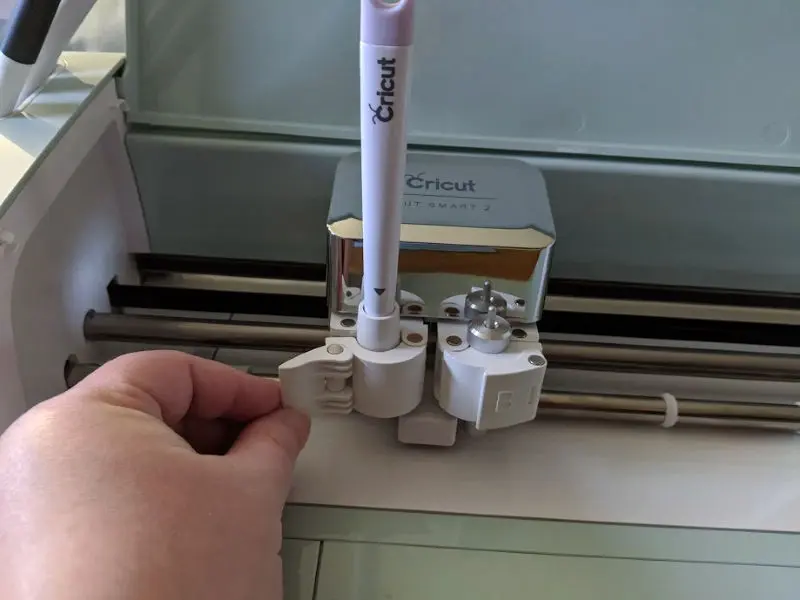
Do this by opening Clamp A and putting the stylus in until you hear a click. Then close Clamp A.
Place the paper on the mat. (I should have put it on the StandardGrip Mat, but regular cardstock seems fine on the LightGrip Mat.)
Load the mat when prompted and press the Cricut button to start cutting. Unload and change the mats when prompted.

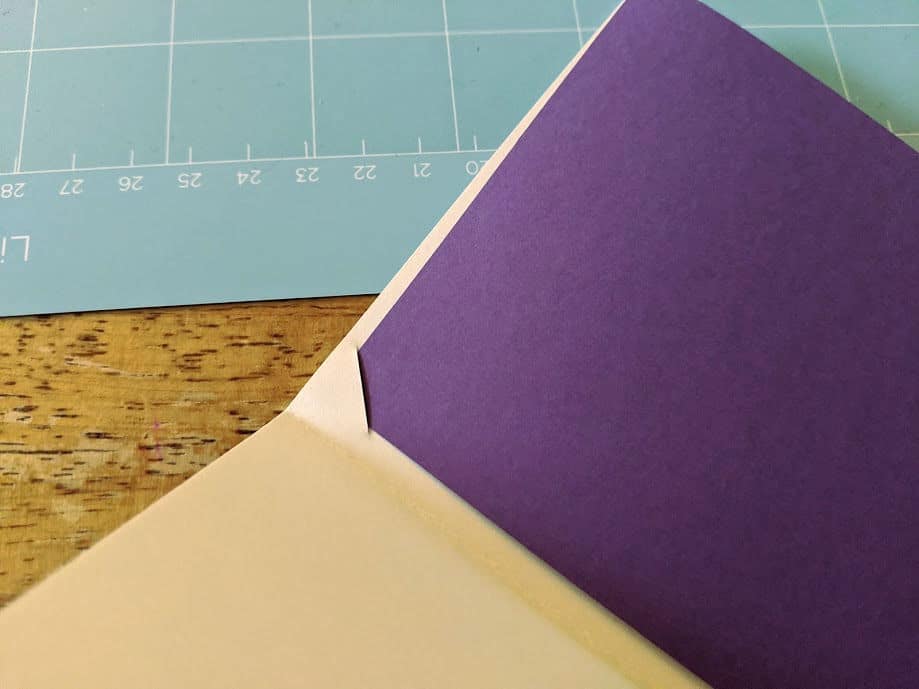
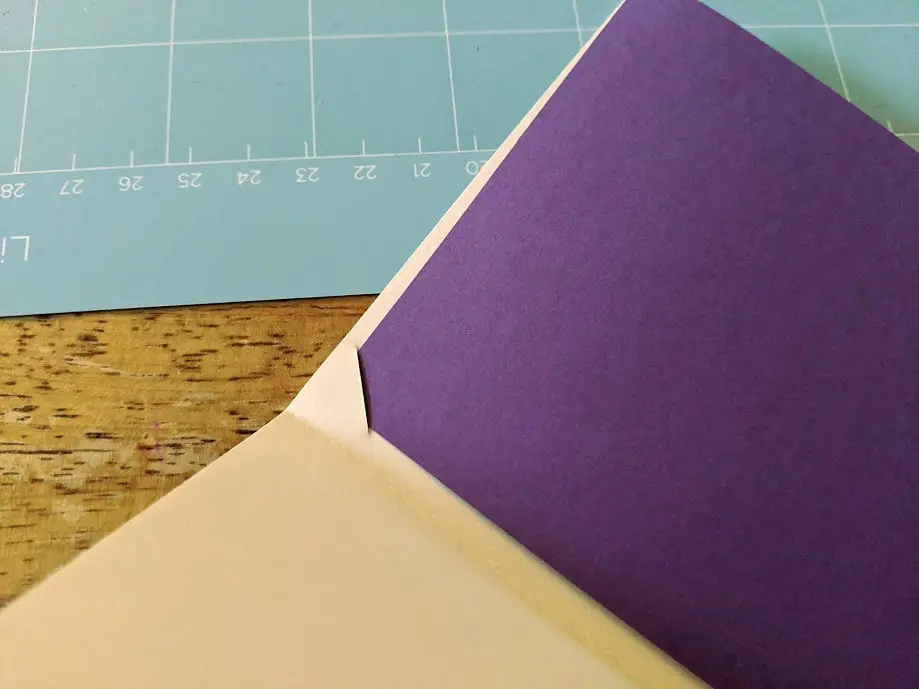
Carefully remove the outer excess paper, starting in the upper corner and pulling back.
To remove the card and prevent it from curling too much, start peeling a corner of the card then flip the mat upside down. Hold the card against the table and gently pull the mat off of it.
The letter cutouts should remain on the mat. Fold along the score line.
Remove the insert from its mat the same way. Slide it into the corner slits inside the card.
You can leave the card as is or take the small inside pieces for the letters and glue them to the card.

I think it looks great both ways!
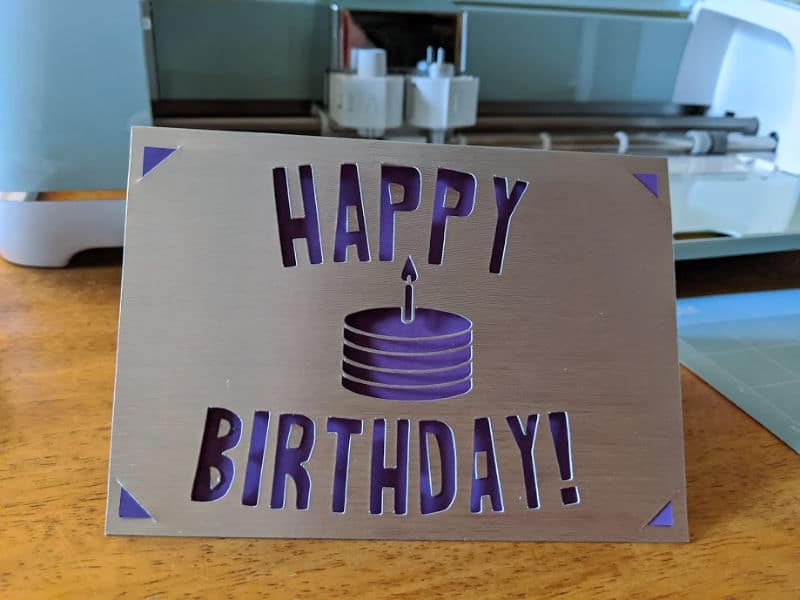
I did not make envelope for this card, but that is another thing you could make with your Cricut. Instead, I attached the card directly to the birthday gift.
More Cricut Projects:
- Dragons & Dice Hoodie
- Frog Paper Bag Puppet
- DIY Headphone Station
- Weekends Are For Gaming Sign
- Dice Bag of Holding

Cricut Cut Out Birthday Card
Create a unique handmade birthday card using a Cricut cutting machine and uses little to no glue for assembly.
Materials
- Cardstock
- Design Project
Tools
- Cricut Cutting Machine
- Scoring Stylus
- Mat
Instructions
- Use my my birthday card Design Space canvas available here.
- When you click “Make It” in Design Space it shows two different mats. The machine knows that the cuts are being done on two different colors of paper.
- The insert was designed to be the correct size to fit into the slots on the card corners.
- Set the dial to cardstock or custom if using a thicker material.
- This design will also score the card, making it easier to fold it. Follow the prompts to add your scoring stylus.
- Place the paper on the mat.
- Load the mat when prompted and press the Cricut button to start cutting. Unload and change the mats when prompted.
- Carefully remove the outer excess paper, starting in the upper corner and pulling back.
- Fold along the score line.
- Remove the insert from its mat the same way. Slide it into the corner slits inside the card.
Recommended Products
As an Amazon Associate and member of other affiliate programs, I earn from qualifying purchases.


Darcy is the founder of “Life With Darcy and Brian,” where she combines her love for education, board games, and crafting to create engaging learning experiences for kids. Her creative projects and writing have been featured in outlets like The Toy Insider, CafeMom, Mom.com, Parents.com, Country Living, and The Pioneer Woman.
PHYL
Monday 19th of September 2022
Way can't I downloAD THIS TEMPLATE?
Darcy Zalewski
Wednesday 25th of January 2023
The template is on Cricut Design Space.