

This is a sponsored conversation written by me on behalf of Cricut. The opinions and text are all mine.
Keep your computer gaming room organized with a headphone station. This is an easy DIY Cricut project you can complete in a short amount of time.
For this project, I used my Cricut Explore Air 2 to cut vinyl and created a spot in our computer room for everyone to hang their gaming headsets.
If you love gaming, you may also like the Dragons & Dice custom hoodies I made for our gaming group using the Cricut Explore Air 2 and EasyPress 2.
More Home Organization Ideas
Keeping your home tidy and clutter-free doesn’t have to be a daunting task. Here are a few tips and tricks that can assist you as well as teach the kids how to help.
- Children can put away their laundry easier with our printable kid drawer labels.
- Learn how to use command stations to reduce clutter from Lois at Walking On Sunshine Recipes.
- Teach kids how to be more responsible and keep track of their tasks with a printable chore chart.
- Get room by room home organization ideas from our friend Rebekah at A Blissful Nest.
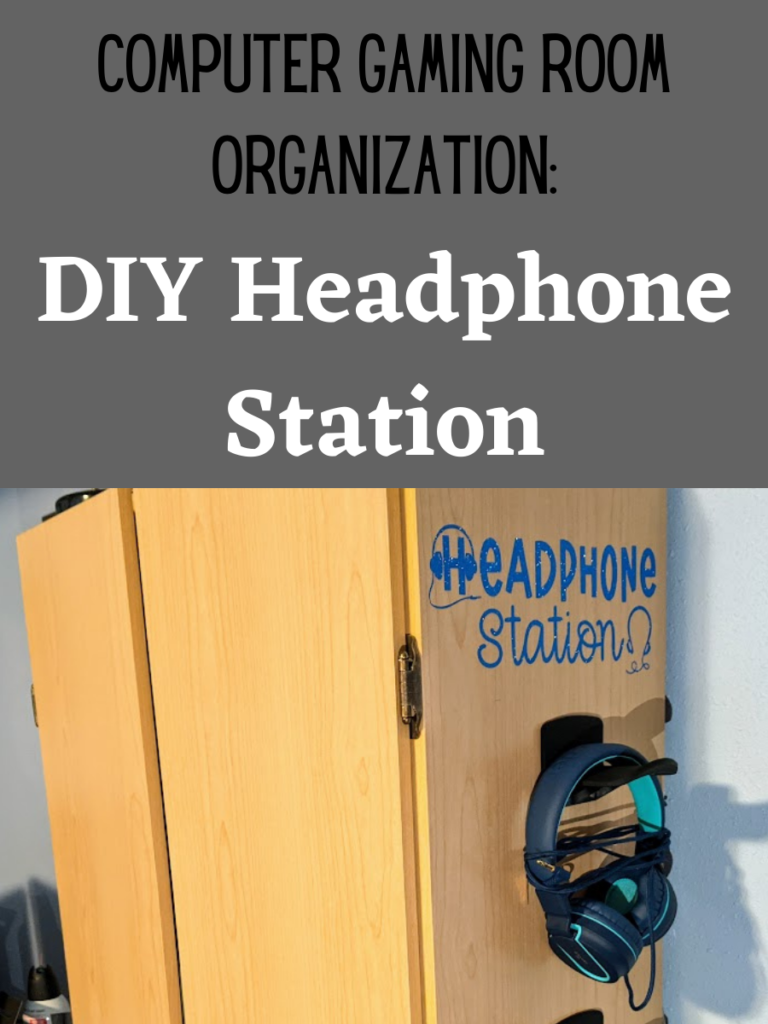
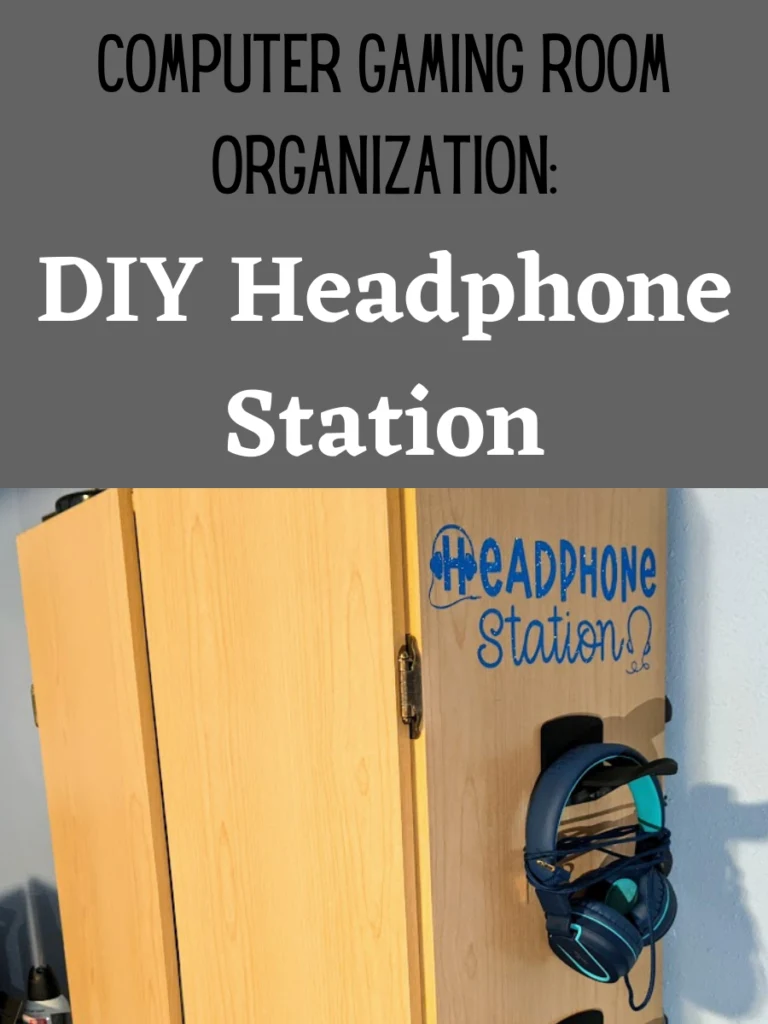
DIY Computer Gaming Room Organization
Do you ever get tired of the kids losing their headphones? Or finding them stashed somewhere with the cord a tangled mess?
I decided I wanted everyone’s headphones kept in a central location rather than randomly floating around our computer gaming room.
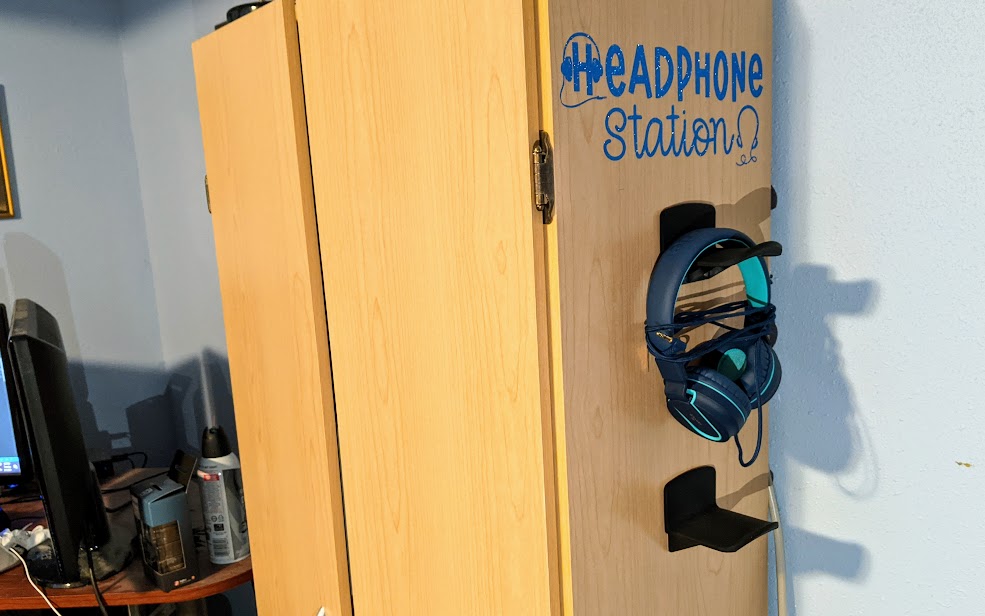
We have a cabinet by the wall between my husband’s desk and the family computer desk that both of my children share. I thought the side of it would be a great spot to hang headphones.
This post contains affiliate links. As an Amazon Associate and a participant in other affiliate programs, we earn a commission on qualifying purchases.
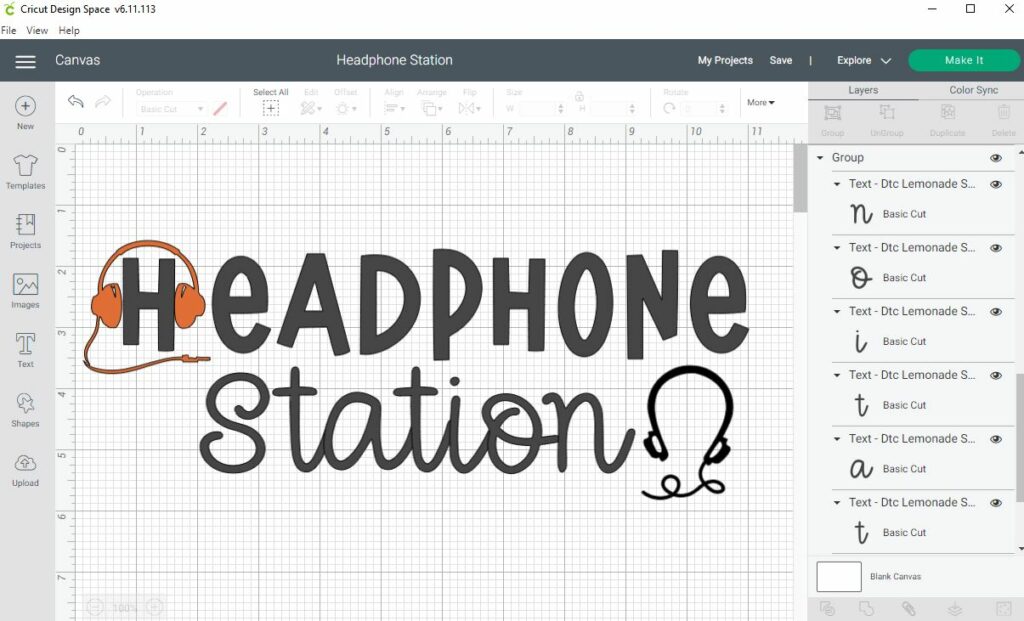
I searched through the available designs in Cricut Access and found a couple headphone designs I liked. Then spent time playing around with fonts and arranging everything until I liked my design.

This project works with either removable vinyl or permanent vinyl. Since I am not planning on applying it to the wall or changing the location any time soon, I chose permanent vinyl.
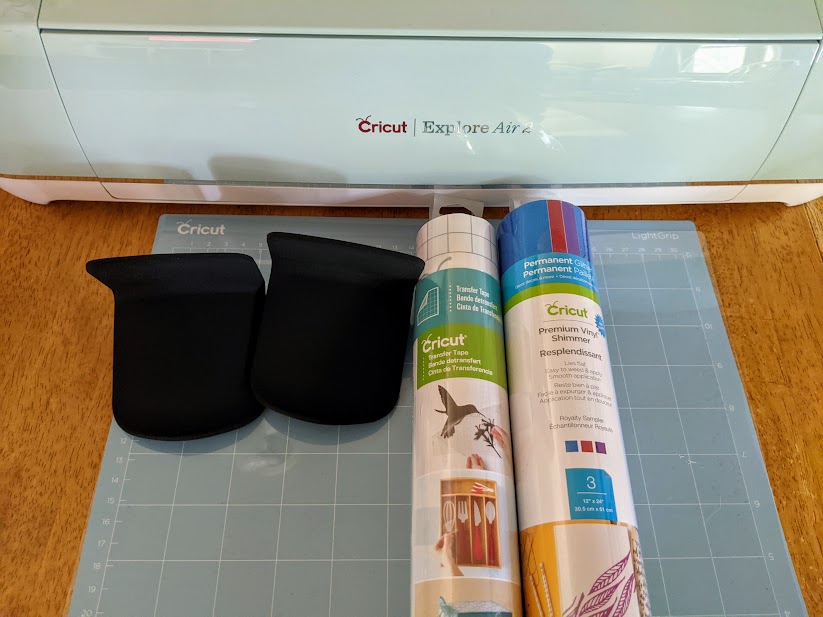
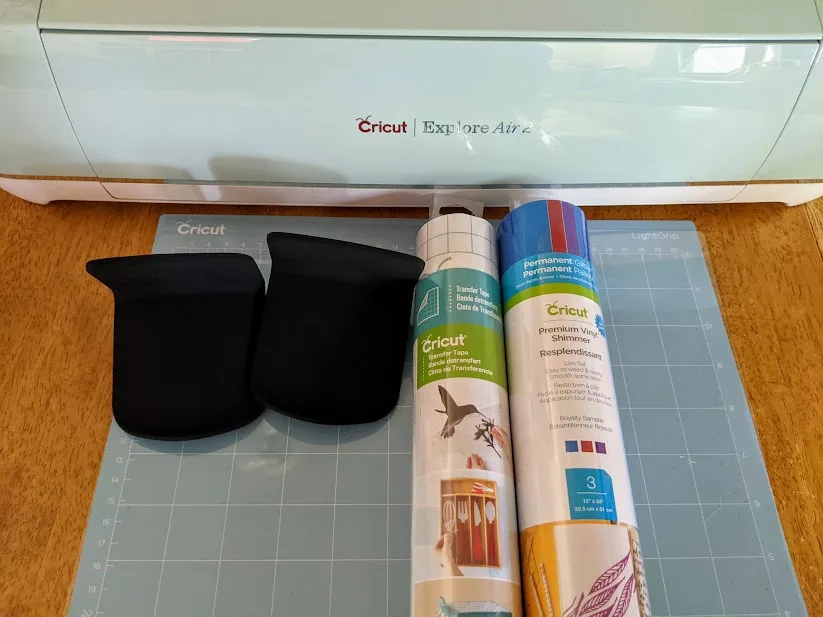
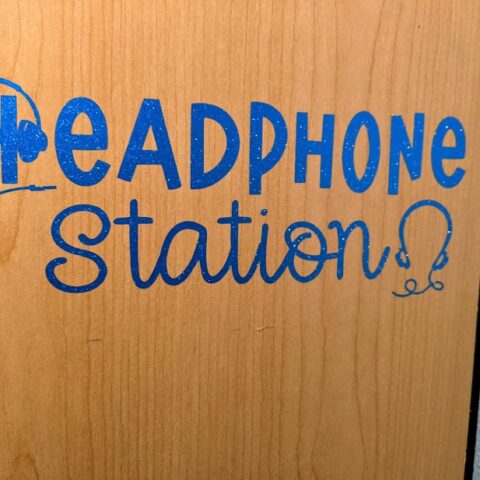
My son helped picked out which color to use from my stash of materials. I considered using black vinyl, but the kids really liked the shimmery blue.
You could also use different colors for the headphones and text too.
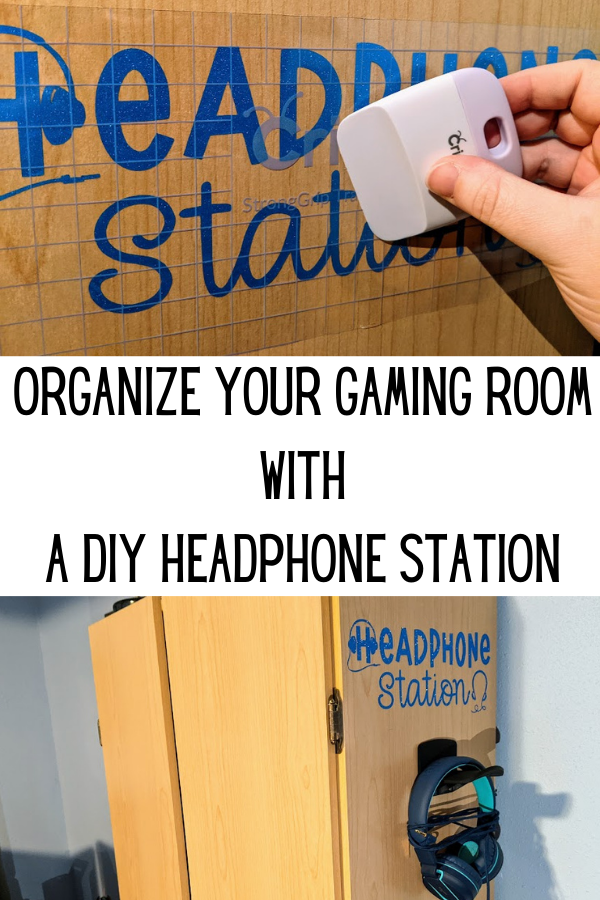
If you are also using a glitter vinyl, make sure you have StrongGrip Transfer Tape. I initially tried to use my regular transfer tape but the glitter vinyl wasn’t sticking to it. Once I got out the StrongGrip transfer tape it lifted easily.
Headphone Station Project Supplies:
- Headphone Station Project Design
- Cricut Machine (I used the Cricut Explore Air 2)
- Machine Mats
- Vinyl (I used blue from the Premium Vinyl Royalty Shimmer Sampler)
- Transfer Tape (for glitter vinyl like I used, you need StrongGrip Transfer Tape)
- Weeding tool
- Headphone hanger holders
How to Create Your Own Computer Gaming Room Headphone Station:
You can create your own design or use my Headphone Station Project Design. Click customize to resize it and alter the text as needed.
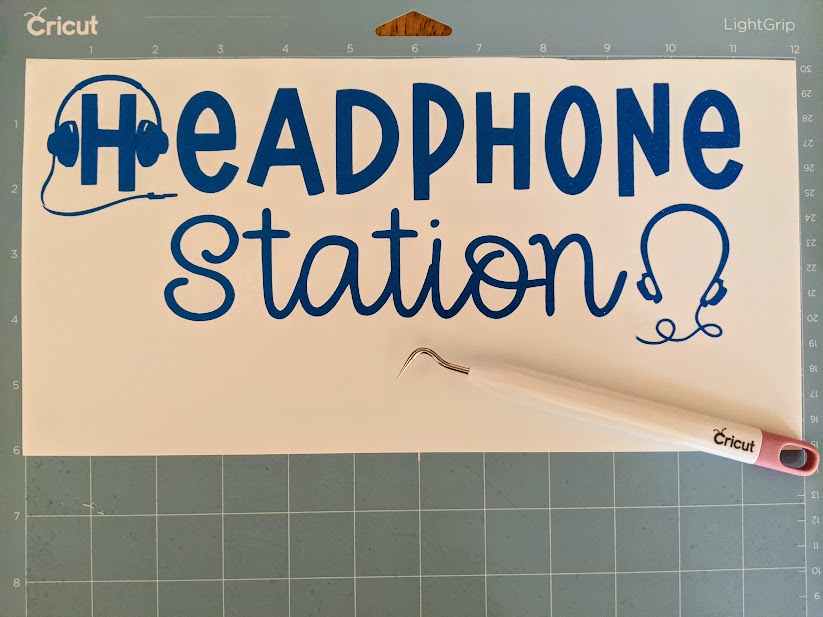
Using Cricut Access fonts, I chose DTC Lemonade Stand for the word “headphone” and DTC Peach Cakes for the word “station.”
After finding headphone images to use through Cricut Access, I inserted them.
I ungrouped the text in order to arrange the letters how I wanted them. I brought the letters in “station” closer together so they connected. I moved the H in “headphone” away to create room to place the headphones over the H.
Then I grouped them again to increase the size. If you plan to cut using multiple colors of vinyl, you may need to ungroup everything again and make different groups.
Next select the entire design and click “attach” so everything cuts in place how I arranged it.

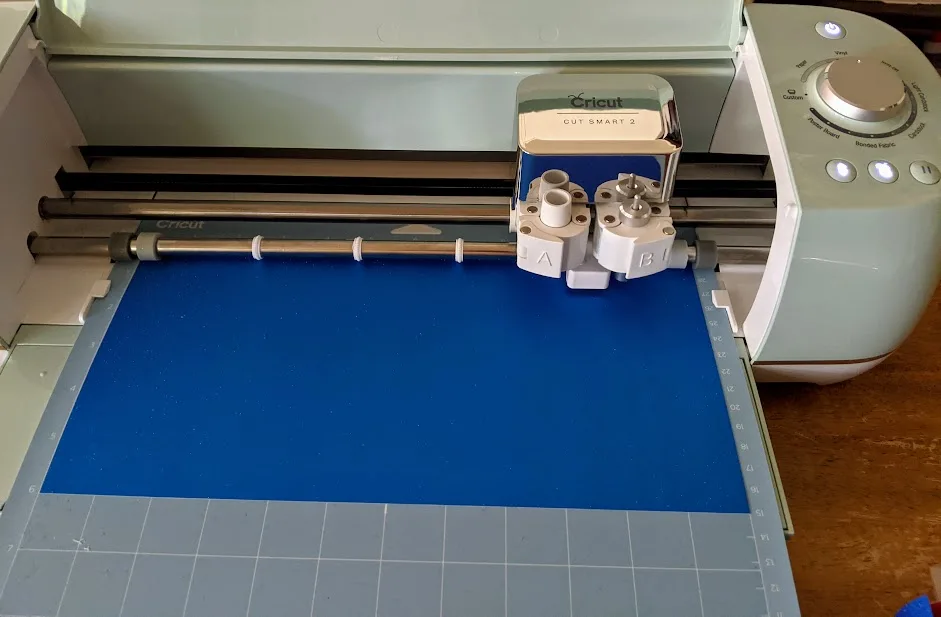
When you are ready to cut the design, click Make It. Place your choice of vinyl with the color side up on a machine mat. Follow the directions to load your mat and begin cutting the design.

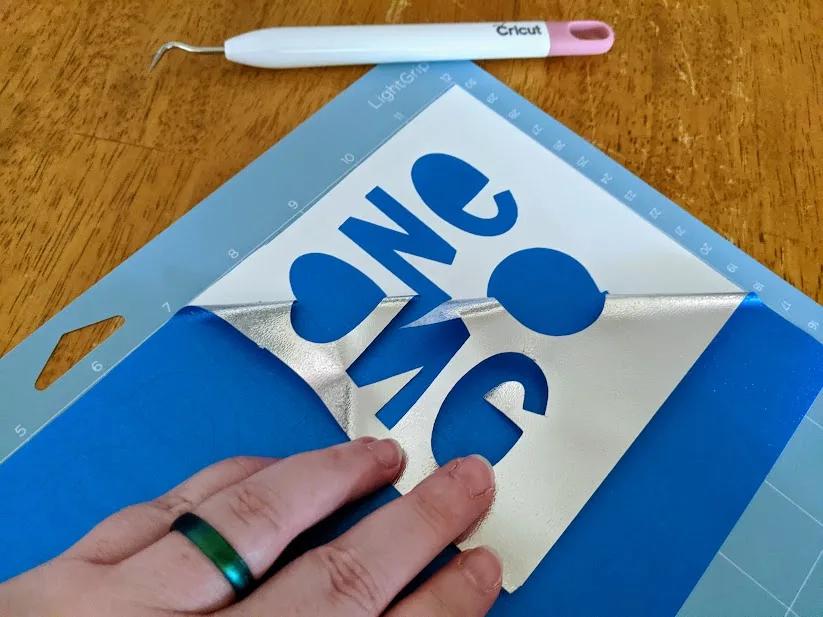
After unloading the mat, remove the excess vinyl from around the design. Starting at the corner, gently pull it away from the liner at about a 45 degree angle. I kind of pull it back while also gently rocking my hand side to side.
Use care when pulling off the excess vinyl around the thinner parts of the headphones.

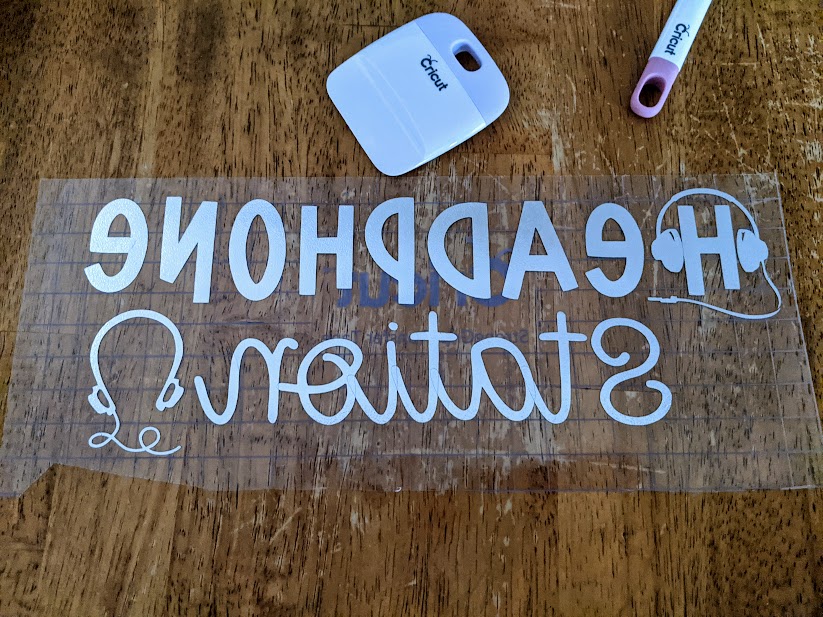
Then use your weeding tool to remove the small inner pieces in the text and the headphones.


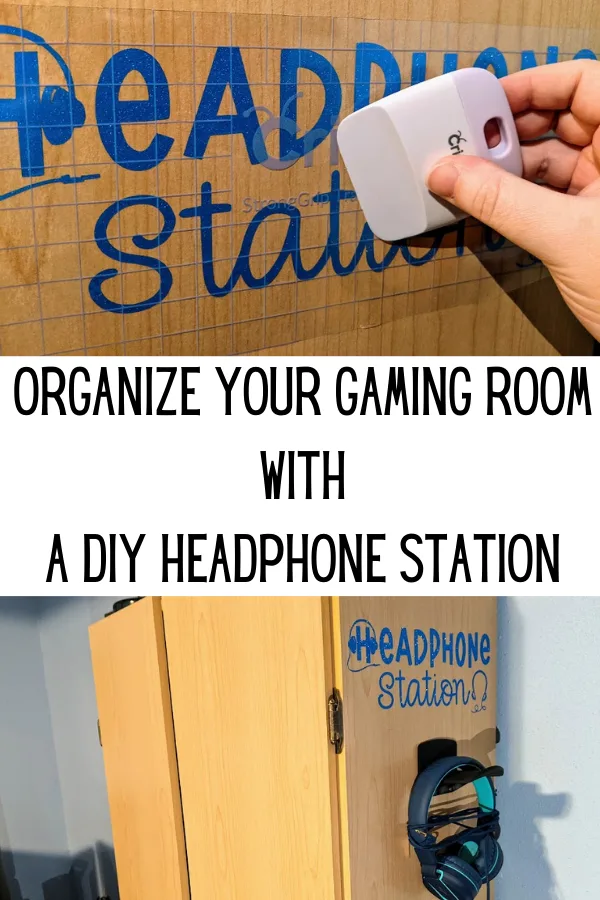
Measure and cut the amount of transfer tape you will need (use StrongGrip for glitter vinyl) and place it over the weeded design. Use scraper to remove air bubbles and go over the design to make it stick to the transfer tape.

Carefully peel back transfer tape to lift vinyl design from liner.
Find a location in your gaming room for your own headphone station. It can be on the side of a cabinet, desk, or even on the wall.
(Vinyl doesn’t stick very well to textured walls, so you make need to apply the vinyl to a blank wood sign first before hanging it on the wall.)
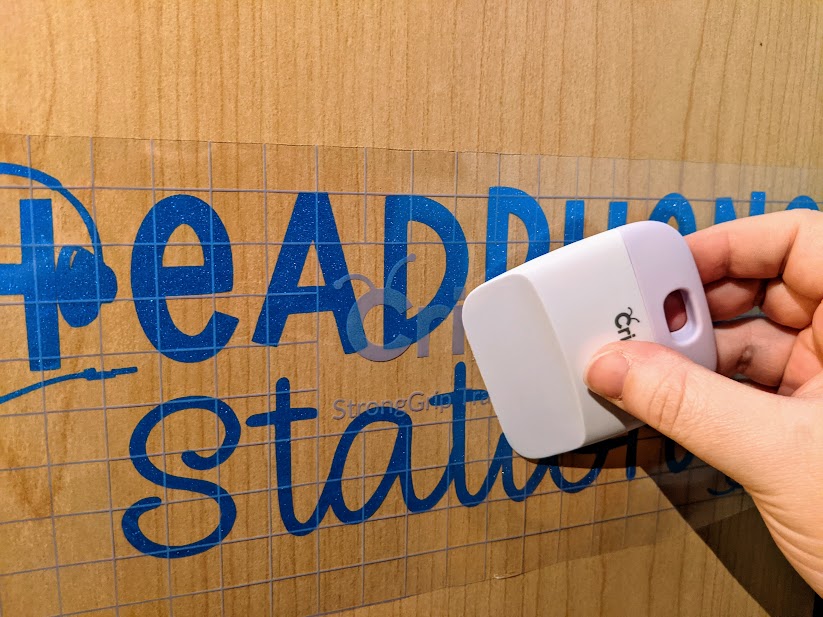

Position the transfer tape where you want the vinyl words to go and apply it. I press the transfer tape down in the center and smooth it outwards, then use the scraper to go over it. Then gently peel away the transfer tape.
After applying the vinyl, we hung Headphone hanger holders underneath the “Headphone Station.”
Enjoy having a more organized gaming room!

More Cricut Projects:
- Dice Bag of Holding
- Weekends Are For Gaming Sign
- Cutout Birthday Card
- Frog Paper Bag Puppet
- DIY I Love School custom teeshirt
- Dragons & Dice Gaming Hoodie
Gaming Room Headphone Station Cricut Project
Keep gaming headsets organized with a DIY headphone station.
Materials
- Headphone Station Project Design
- Vinyl (NOT Iron-on)
- Transfer Tape
- Headphone hanger holders
Tools
- Cricut Machine (I used the Cricut Explore Air 2)
- Machine Mats
- Weeding tool
Instructions
- You can create your own design or use my Headphone Station Project Design. Click customize to resize it and alter the text as needed.
- If you plan to cut using multiple colors of vinyl, you may need to ungroup everything again and make different groups.
- Next select the entire design and click "attach" so everything cuts in place how I arranged it.
- When you are ready to cut the design, click Make It. Place your choice of vinyl with the color side up on a machine mat. Follow the directions to load your mat and begin cutting the design.
- Unloading the mat and remove excess vinyl from around the design.
- Then weed the rest of the design.
- Measure and cut the amount of transfer tape you will need and place it over the weeded design.
- Use a scraper tool to remove air bubbles and go over the design to make it stick to the transfer tape.
- Carefully peel back transfer tape to lift vinyl design from liner.
- Position the transfer tape where you want the vinyl words to go and apply it.
Notes
Use StrongGrip Transfer Tape for glitter vinyl.
Vinyl doesn't stick very well to textured walls.
Find a smooth surface (cabinet, desk, etc) where you can apply the vinyl or use a blank wood sign to hang it on the wall.
Recommended Products
As an Amazon Associate and member of other affiliate programs, I earn from qualifying purchases.


Darcy is the founder of “Life With Darcy and Brian,” where she combines her love for education, board games, and crafting to create engaging learning experiences for kids. Her creative projects and writing have been featured in outlets like The Toy Insider, CafeMom, Mom.com, Parents.com, Country Living, and The Pioneer Woman.