
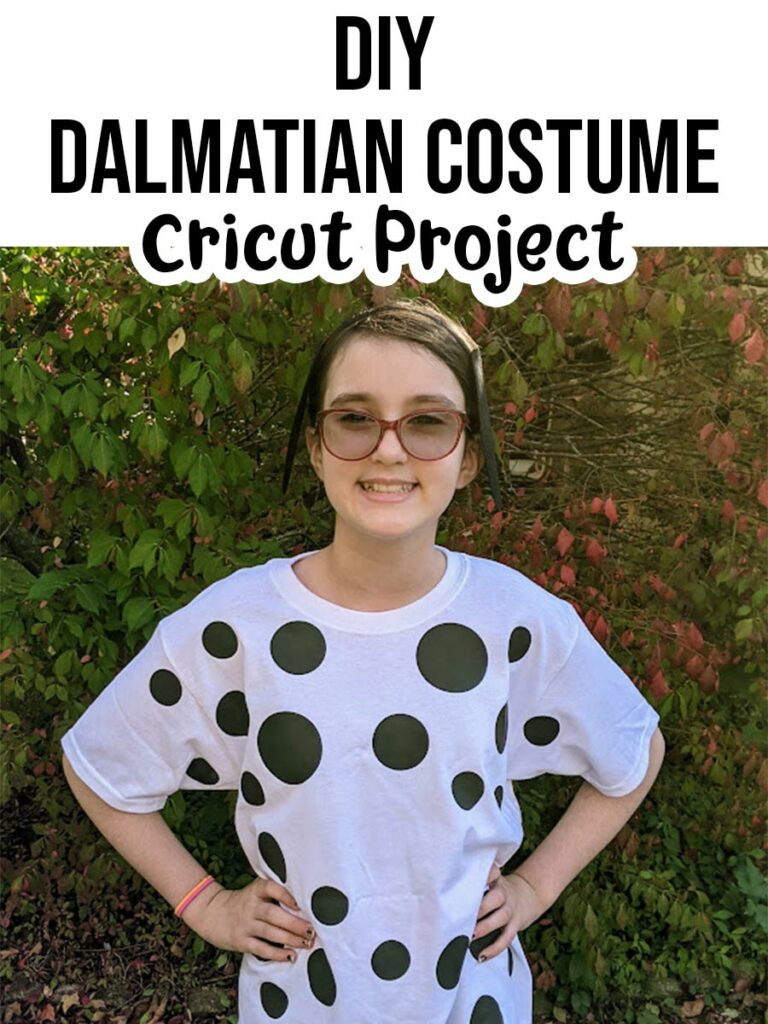
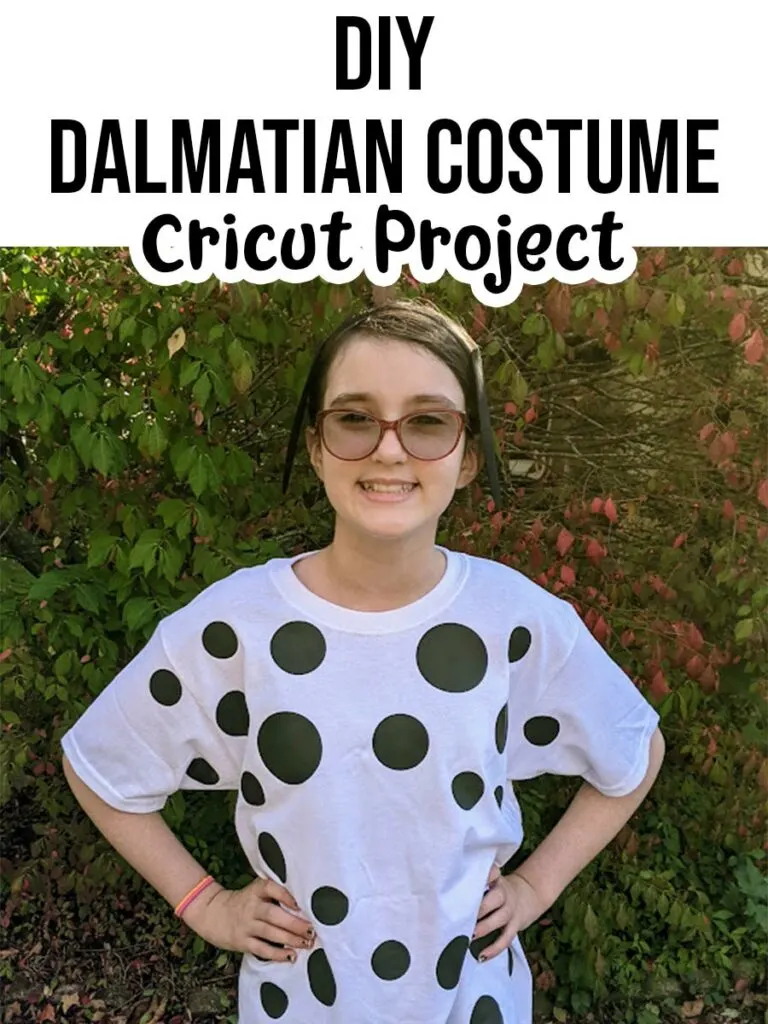
This DIY Dalmatian Halloween costume is an easy Cricut project. Make this Dalmatian costume for any age! It’s a nice last minute Halloween costume for kids and also works for dress up and pretend play.
In this tutorial, I’m going to show you how to use the new smart materials iron-on vinyl with the Cricut Maker 3. You can still use an older machine and heat transfer vinyl for this project.
I received the new Cricut Maker 3 machine to review and some supplies to assist in the creation of this project. I love working with Cricut and getting creative!
If you do not have a Cricut cutting machine or an EasyPress, you can still make this costume yourself by hand cutting the spots from iron-on vinyl and applying it with an iron.
Looking for more homemade Halloween costume ideas? Check out our DIY Hades costume inspired by Descendants 3.
Easy Cricut Projects:
Getting crafty and making something with your Cricut machine shouldn’t be intimidating. Check out some of our beginner projects that will help you become more comfortable with using it.
This post contains affiliate links and we may earn a commission on qualifying purchases.
Homemade Dalmatian Costume
I wanted to share a quick and easy Halloween costume idea with you that could work for babies, toddlers, older kids and even adults. Love that it’s simple enough to pull together last minute too.
One year, my kids were obsessed with Paw Patrol and my son loved Marshall, the Dalmatian character. This project would be a great base for a DIY Paw Patrol Marshall costume – would just need a firefighter hat!
I was also thinking about Dalmatians a lot this year after watching the new Cruella movie a couple times. What a fun group costume idea for Halloween!
Whether your kid wants to be a solo pup or you are planning a family costume theme, this Dalmatian costume is easy to make with the new Cricut Maker 3. I’m really loving the new smart materials that can be loaded without a mat.
Even without a Cricut, there are lots of DIY Halloween costumes for kids that you can make!

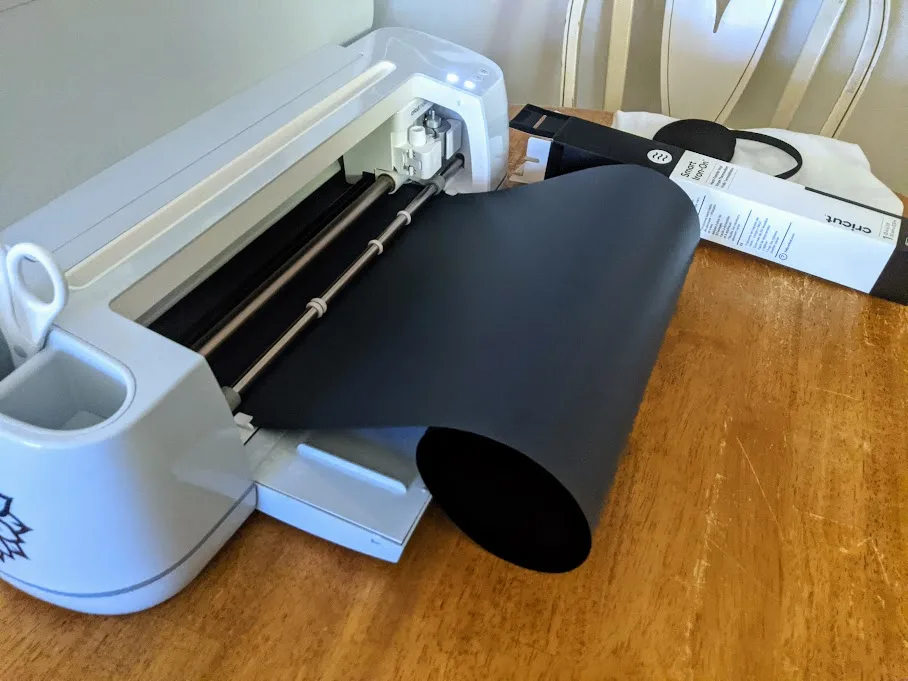
One of the new smart materials from Cricut is their smart iron-on vinyl. It made cutting out a bunch of spots easier than loading and unloading multiple mats.
If you are making this costume for an elementary aged child and up, I’d recommend two 3ft rolls or a 9ft of smart iron-on. I only had one 3ft roll which was enough for the front of the shirt and used everyday iron on for the rest of the spots on the back.
The ears were also made by cutting felt with the Cricut Maker 3 and attaching them to a headband.
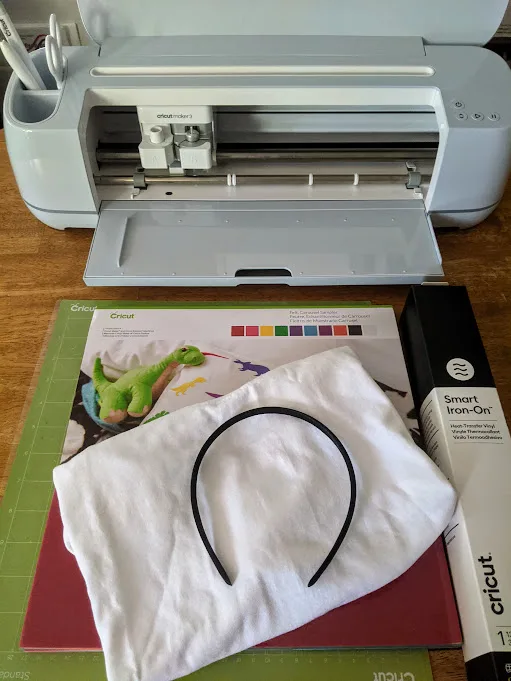
Dalmatian Halloween Costume Supplies:

- Dalmatian costume design
- Plain white tshirt
- Black headband
- Black felt
- Black iron-on vinyl (I used Smart Iron-On Vinyl and Everyday Iron-On in black)
- Cricut cutting machine (I used Cricut Maker 3)
- EasyPress 2 (I used the 9×9)
- EasyPress Mat
- Hot glue gun
If you are using a Cricut Maker 3, smart materials don’t need Machine Mats. However, regular materials do. When cutting fabric, a FabricGrip Mat is recommended. I don’t have one yet, so I used one of my other mats.
How to Make a Dalmatian Halloween Costume With a Cricut:
Gather up your supplies, prep your shirt, and start by creating a few different sized circles in Cricut Design Space or use my Dalmatian costume design.
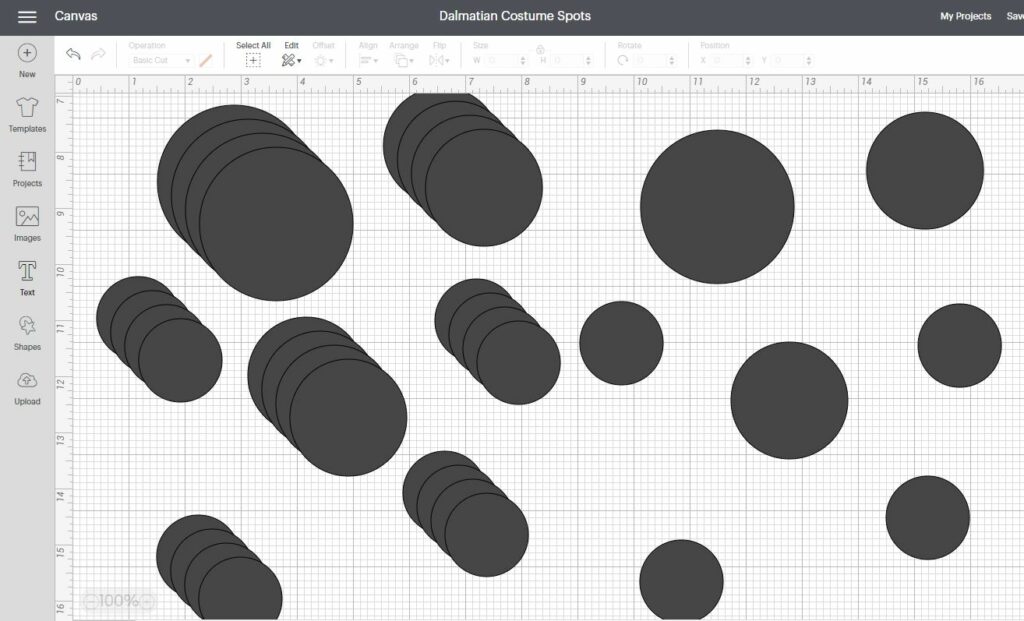
I created a few different sized circles using the space function. I also created groups of spots to make it easier to iron on without having to place them all individually. I made a large group that cuts nicely when using a 3ft roll of smart vinyl.
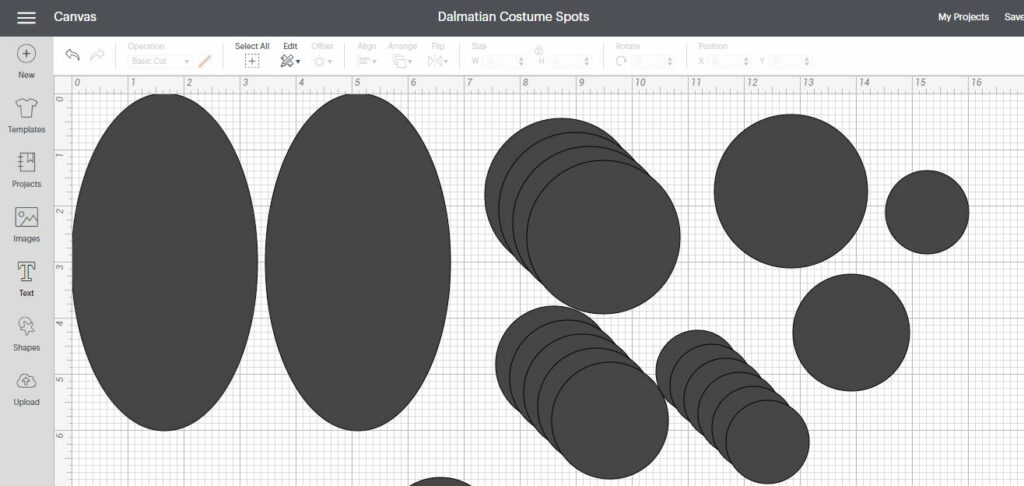
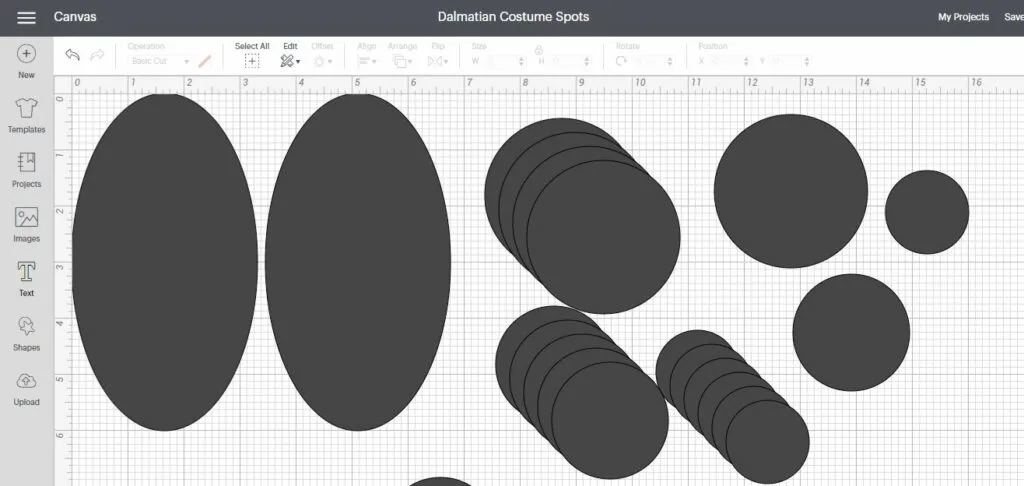
I also used the circle shape tool to make elongated oval shaped ears.
Choose which spots you want to use by clicking the eye icon next to the different groups until only the ones you want are visible. I used the long group with my smart vinyl, then the individual dots fitting however they were placed to cut on a 12×12 section of iron on loaded on a mat.
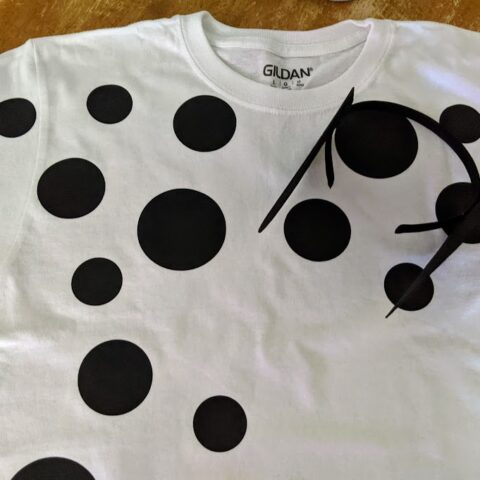
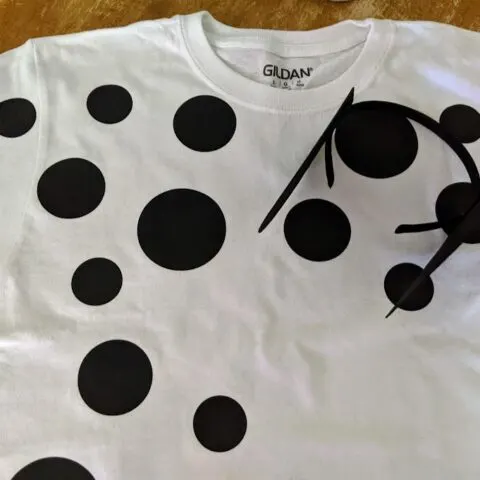
All iron-on vinyl (whether on a mat or not) is loaded with the shiny side face down. The system will remind you to turn on mirror image for iron-on projects; however, if you forget it will not affect the Dalmatian spots.

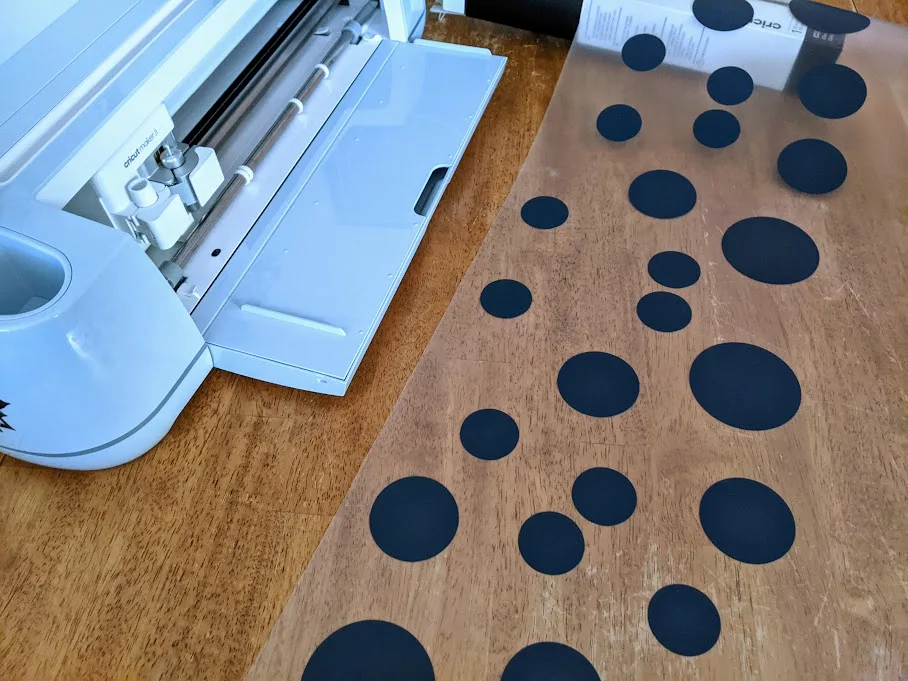
After cutting the spots, remove the excess iron-on material from the liner. Peel back from the corner at about a 45 degree angle.
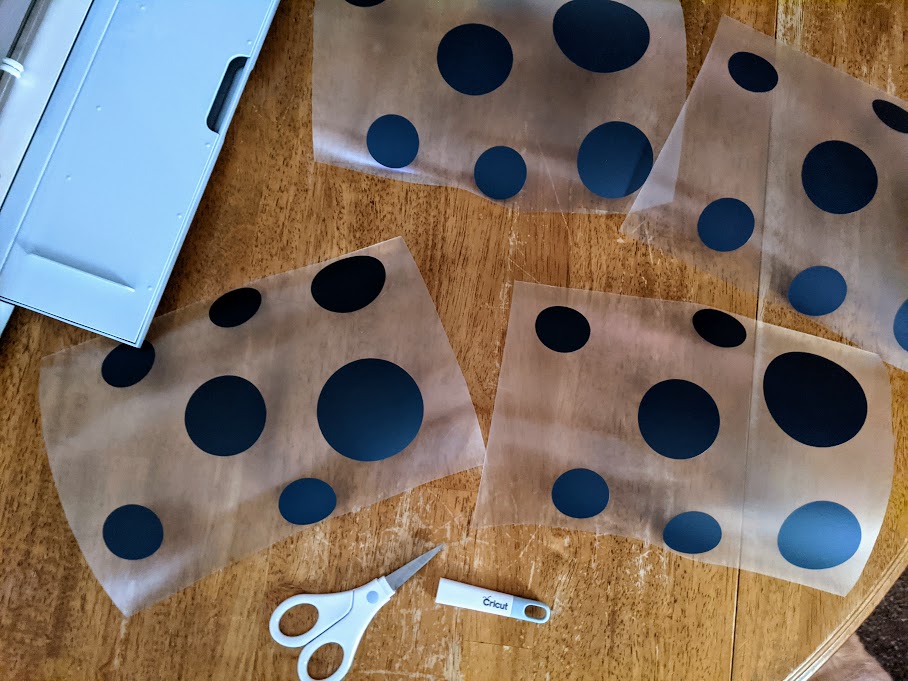

Cut the liner apart to make it easier to arrange individual spots or groups of spots on the shirt.

Use the Cricut Heat Guide to apply the iron on materials using the EasyPress 2.
Select the type of material you are using for your design, your base material, and whether you are using an EasyPress Mat or folded towel underneath your project.
It tells you what temperature to set the EasyPress 2, how long to preheat the base material, and how long to set the press timer.

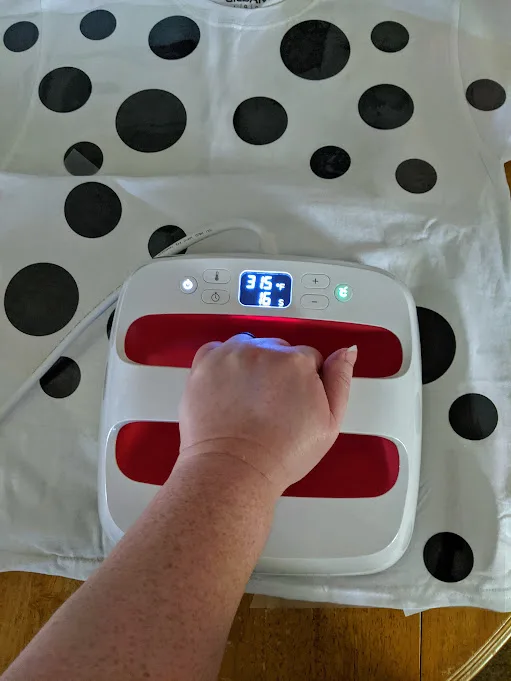
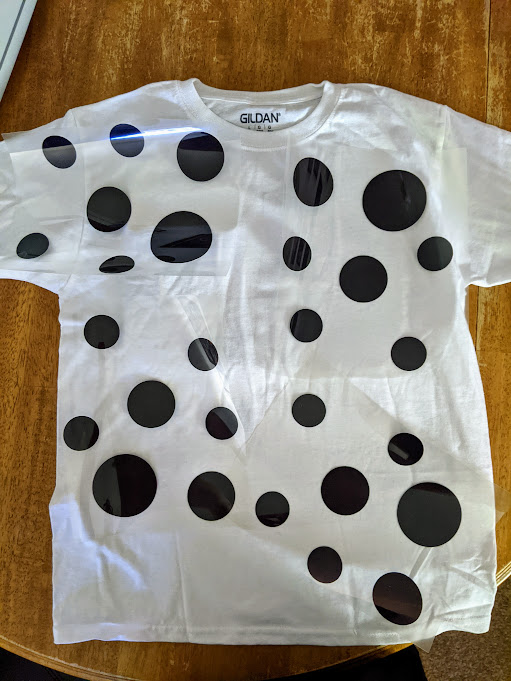
Since we are placing spots all over the white shirt, I used the EasyPress 2 in sections. I started with the upper right side, then shifted the shirt over the EasyMat to press the upper left side. Continuing until the entire front side was done.
I left the liners on and carefully flipped the shirt over and repeated the process on the back.
Once all of the spots were applied and cooled down, I cold peeled the liners off.


Next, I loaded the felt fabric into my Cricut to cut out the ears. I put the headband on to get an idea of where I wanted the ears to be placed and marked the headband with clothespins.
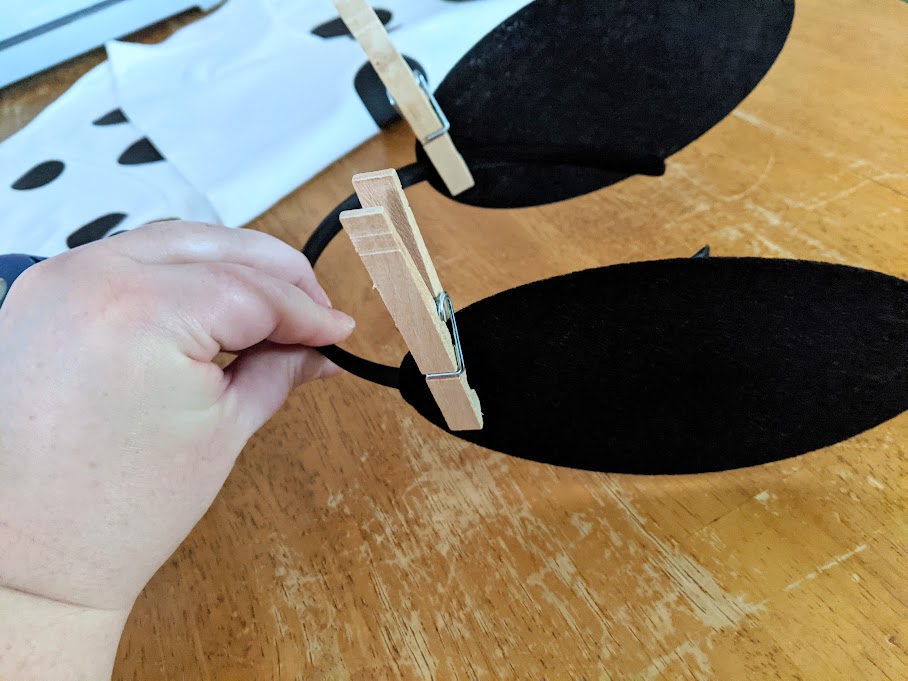

Then I hot glued the felt ears to the headband. I placed mine to lay flat along the sides of the head, but you could turn them so they flop forward.

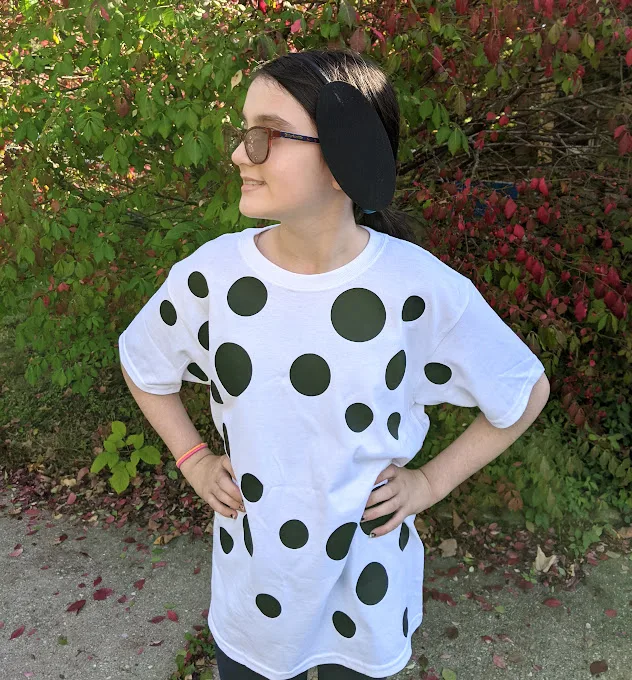
Pair it with a pair of black leggings or black pants and you’re done! Or, repeat the process to apply more black spots to white pants.

More Halloween Costume Ideas:
DIY Dalmatian Halloween Costume
Make this cute DIY Dalmatian costume for Halloween. It's an easy Cricut project.
Materials
- Dalmatian costume design
- Plain white tshirt
- Black headband
- Black felt
- Black iron-on vinyl
Tools
- Cricut cutting machine
- EasyPress 2
- EasyPress Mat
- Hot glue gun
Instructions
- Gather up your supplies, prep your shirt, and start by creating a few different sized circles in Cricut Design Space or use my Dalmatian costume design.
- Choose which spots you want to use by clicking the eye icon next to the different groups until only the ones you want are visible. I used the long group with my smart vinyl, then the individual dots fitting however they were placed to cut on a 12x12 section of iron on loaded on a mat.
- All iron-on vinyl (whether on a mat or not) is loaded with the shiny side face down. The system will remind you to turn on mirror image for iron-on projects.
- Follow prompts for loading and unload mats.
- After cutting the spots, remove the excess iron-on material from the liner.
- Cut the liner apart to make it easier to arrange individual spots or groups of spots on the shirt without overlapping.
- Use the Cricut Heat Guide to apply the iron on materials using the EasyPress 2.
- Since we are placing spots all over the white shirt, I used the EasyPress 2 in sections. I started with the upper right side, then shifted the shirt over the EasyMat to press the upper left side. Continuing until the entire front side was done.
- I left the liners on and carefully flipped the shirt over and repeated the process on the back.
- Once all of the spots were applied and cooled down, I cold peeled the liners off.
- Next, I loaded the felt fabric into my Cricut to cut out the ears.
- Attach felt ears with a glue gun to the headband.
- Wear with black leggings or black pants.
Notes
If you do not have a Cricut cutting machine or an EasyPress, you can still make this costume yourself by hand cutting the spots from iron-on vinyl and applying it with an iron.
Recommended Products
As an Amazon Associate and member of other affiliate programs, I earn from qualifying purchases.


Darcy is the founder of “Life With Darcy and Brian,” where she combines her love for education, board games, and crafting to create engaging learning experiences for kids. Her creative projects and writing have been featured in outlets like The Toy Insider, CafeMom, Mom.com, Parents.com, Country Living, and The Pioneer Woman.