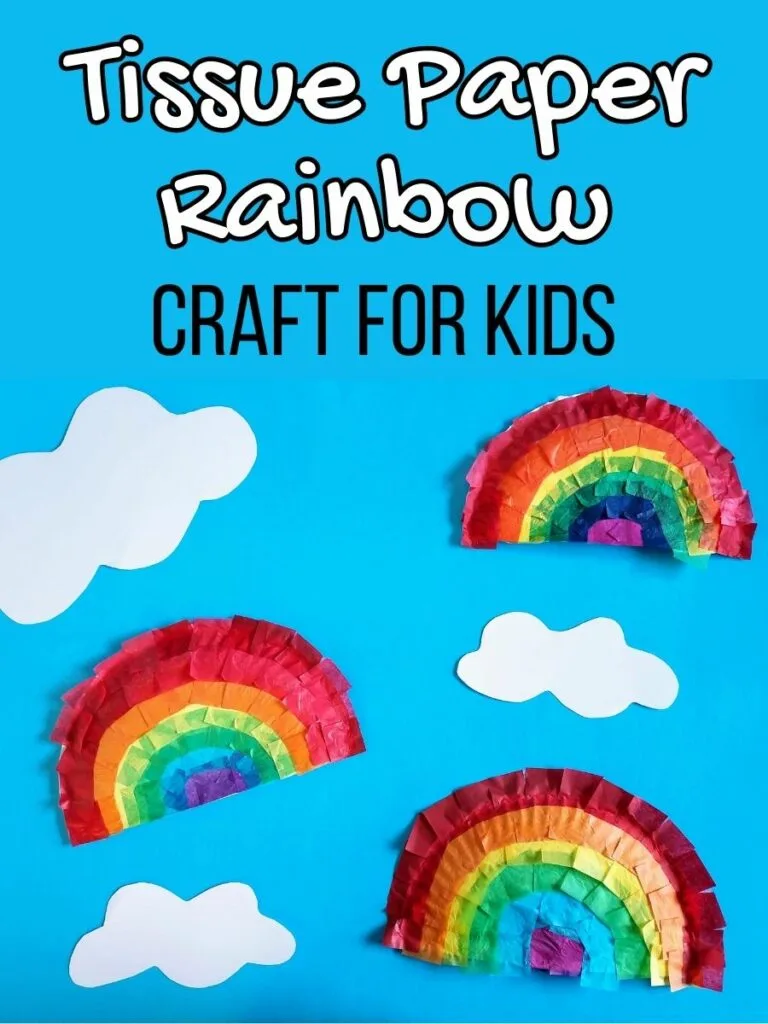
What kid doesn’t love rainbows? This paper plate rainbow craft made with tissue paper is one of several spring craft ideas for kids.
This craft project is ideal for kindergarten and elementary age children to make. Preschool age children can also complete this craft with some assistance.
I love that it is easy to make, inexpensive, and makes a wonderful home or classroom decoration!
Kids will love learning about all the different colors in a rainbow and how to order the colors to create their very own rainbows.

You can use this craft to teach kids about the science behind what causes us to see rainbows: how light reflects off of water in the atmosphere, bending and separating to show us colors.
This would make a great addition to any rainbow science experiments you may do at home or in the classroom.
This is such a fun craft and, honestly, quite the crowd pleaser. I hope you enjoy making these with your kids or students!
More Rainbow Activities for Kids
- Coffee FIlter Rainbow Craft
- Felt Rainbow Bookmark Craft
- Popsicle Stick Rainbow
- Rainbow Candy Science Experiment
- Melting Rainbows Baking Soda Science Experiment
- Rainbow Writing Bag
- Counting With Rainbows Fine Motor Activity
Rainbow Paper Plate Craft
This paper plate and tissue paper rainbow craft uses just a few common craft supplies and only takes about 20 minutes to complete (plus additional drying time).
It’s a quick and easy craft to make at home, as a family activity, or at school.
Additionally, you can include this rainbow craft in an art center themed around spring, St. Patrick’s Day, or weather.
Making rainbows also works well as a summer learning craft project!
Creating tissue paper crafts for kids like these rainbows are a fun way for preschool and kindergarten children to work on fine motor skills.
They will get plenty of practice using their pincer grasp to pick up and place the tissue paper. Plus, lots of cutting and gluing practice.
Older children will also enjoy this craft, too, which they can complete mostly independently.

Paper Plate Rainbow Craft Supplies:
The rainbows may require additional drying time depending on how much glue is used for attaching the tissue paper.
Providing young children with a small cup of liquid glue and a toothpick or cotton swab for them to dip with can help limit excess glue usage and speed up drying times. You can also use a glue stick.
If crafting with younger children, I suggest pre-cutting the paper plates as it can be harder to cut through for those newer to scissors.
This post contains affiliate links. As an Amazon Associate and a participant in other affiliate programs, we earn a commission on qualifying purchases.
If you don’t have tissue paper on hand, you can also paint the paper plates using washable kids paint.
If you would like to craft with minimal mess, you can also have kids color the paper plates with crayons or washable markers.
Helpful tip: Prep ahead by cutting tissue paper into one inch squares. You can also buy pre-cut tissue paper squares for a quick and easy project.
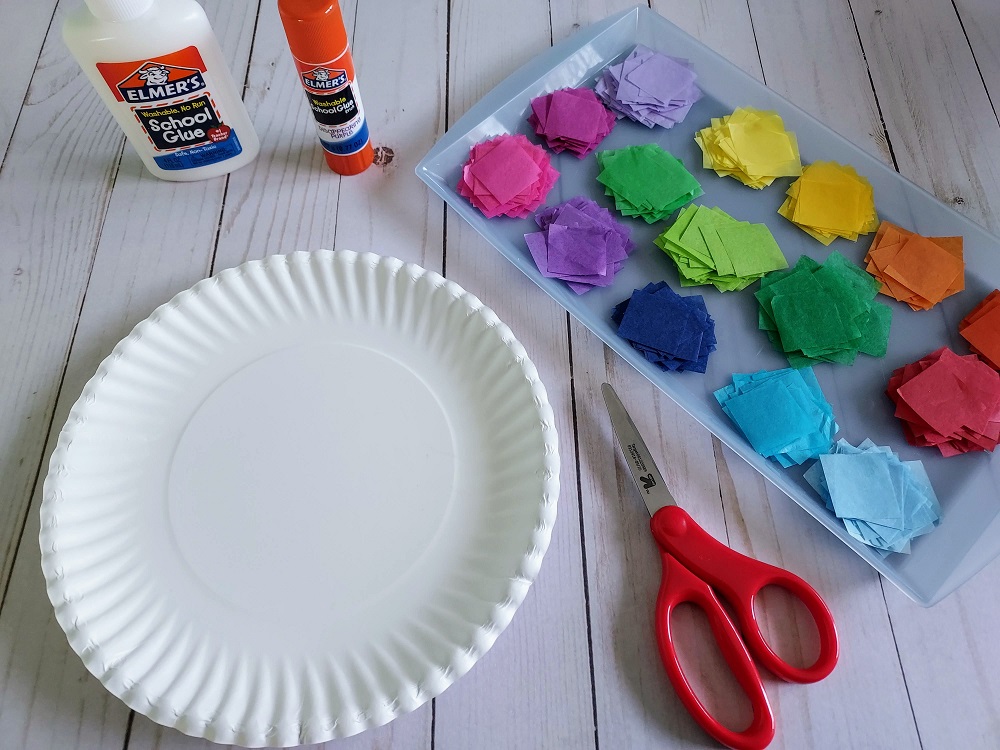

- 1 Plain white paper plate
- Tissue paper in rainbow colors
- Liquid school glue (white) or glue stick
- Scissors
- Newspaper, parchment paper, or craft mat (optional)
How to Make Paper Plate Tissue Paper Rainbows:
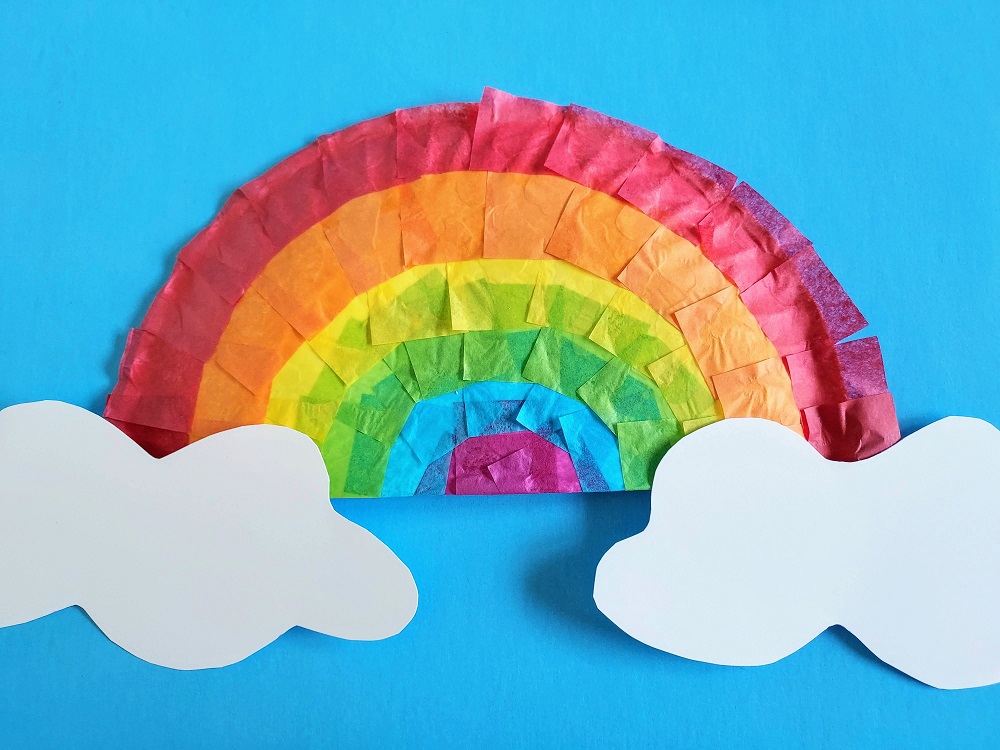
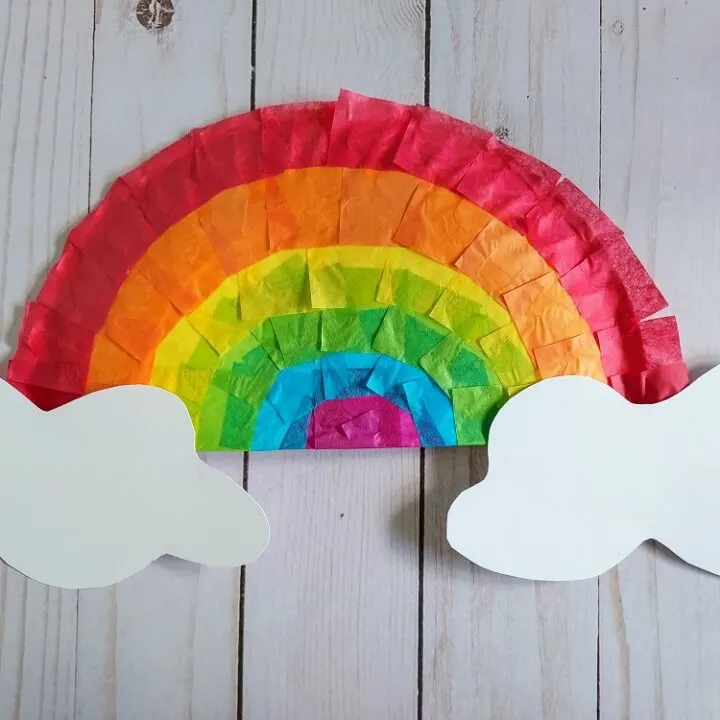
Start by cutting 3-4” off the bottom of a standard 9.5” paper plate. Cut in a straight line, to form the bottom of your rainbow.
If using a different sized plate, cut about ¼-½ of the plate off the bottom. You may need to adjust how big your tissue paper squares are for smaller plates so you have enough room for all colors.
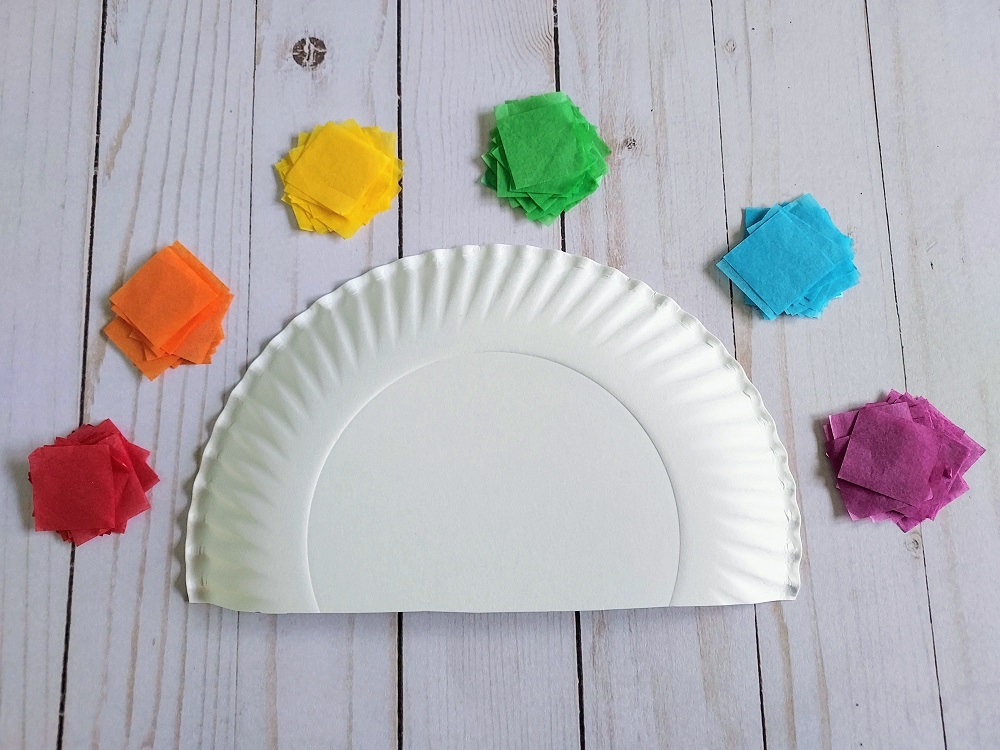

Arrange your tissue paper squares in small piles of like colors.
Tip: Have kids arrange the tissue paper squares in the order that they will use them. (ROYGBIV or they can replace them in reverse VIBGYOR.)
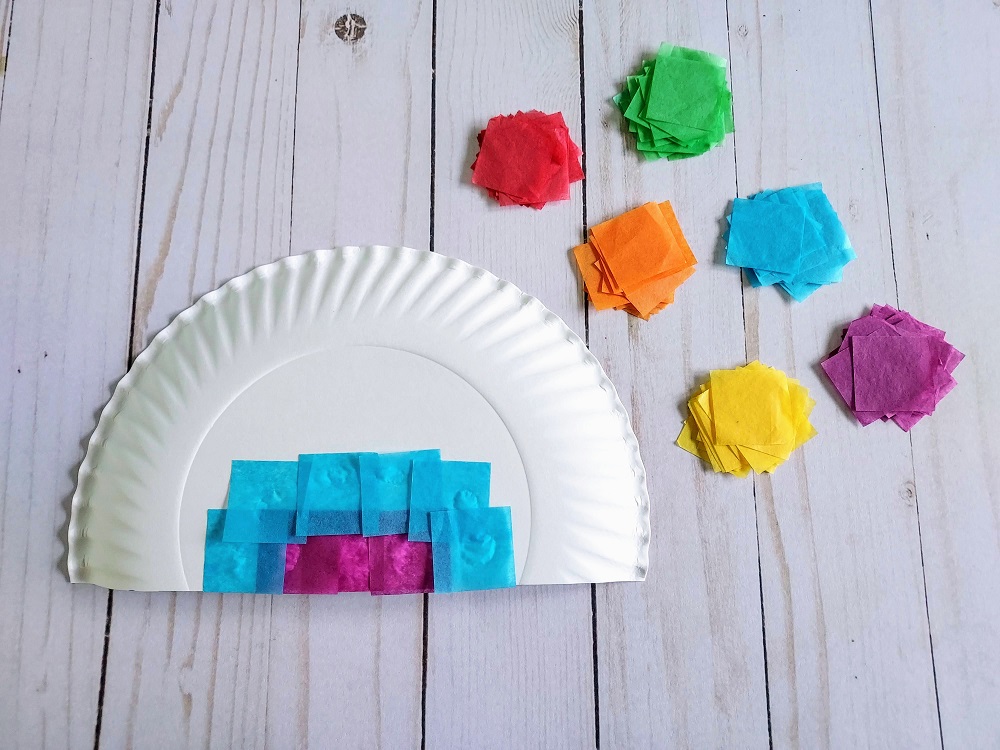

Starting with purple, glue on a few tissue squares on the bottom middle of the plate along the flat side, overlapping them slightly.
Next, forming an arch-like shape, glue on your blue tissue paper, also overlapping the bottom layer so the plate doesn’t show through.
Continue steps for green, yellow, orange and red.

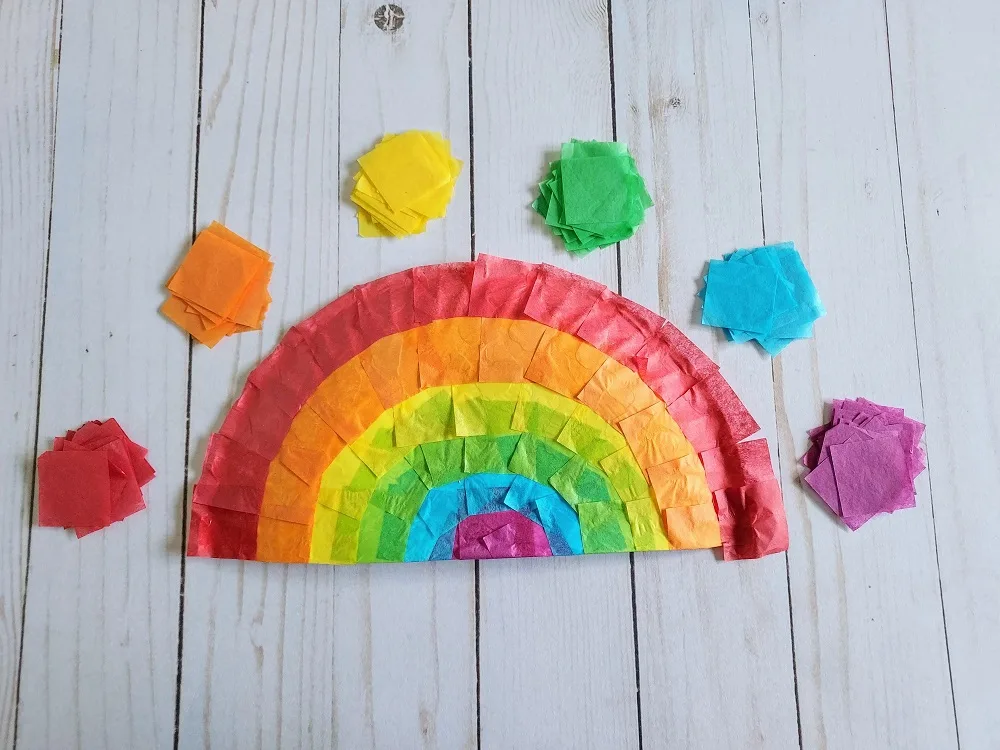
Don’t worry if your tissue paper goes over the edges of the plate. You can always fold them in or trim them once it is dry.
Allow time to dry completely. These may require extra drying time depending on how much glue is used.
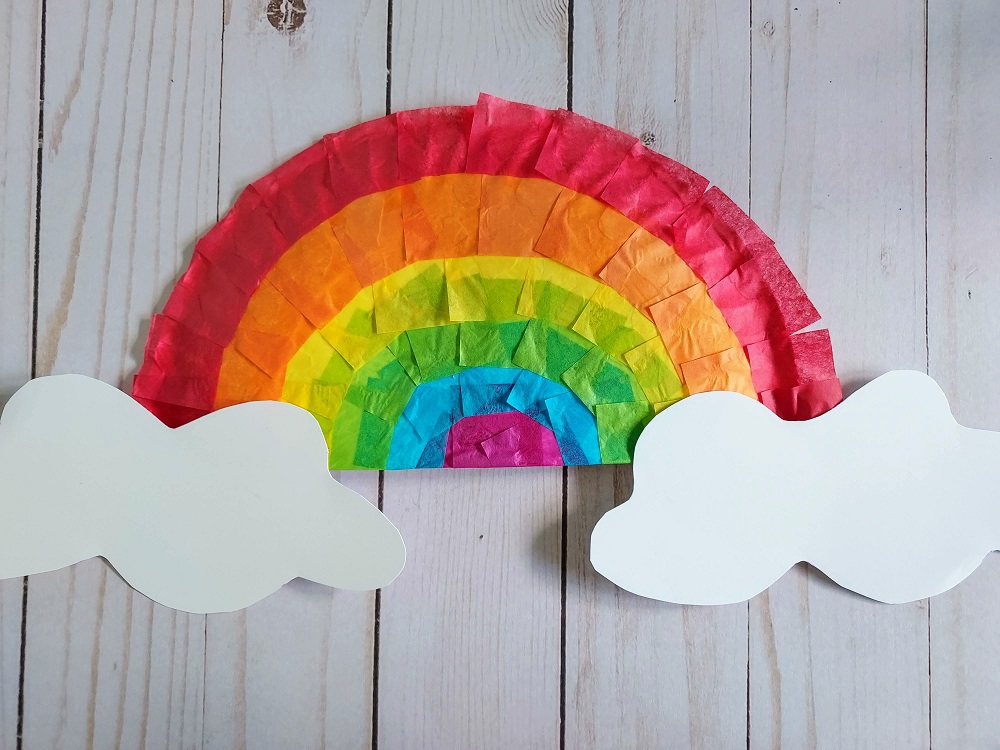

Want to add clouds? Simply trace some fluffy clouds on a piece of white cardstock, cut them out, and attach with glue to your completed rainbow.
If you want to add texture to your clouds, you can use cotton balls.
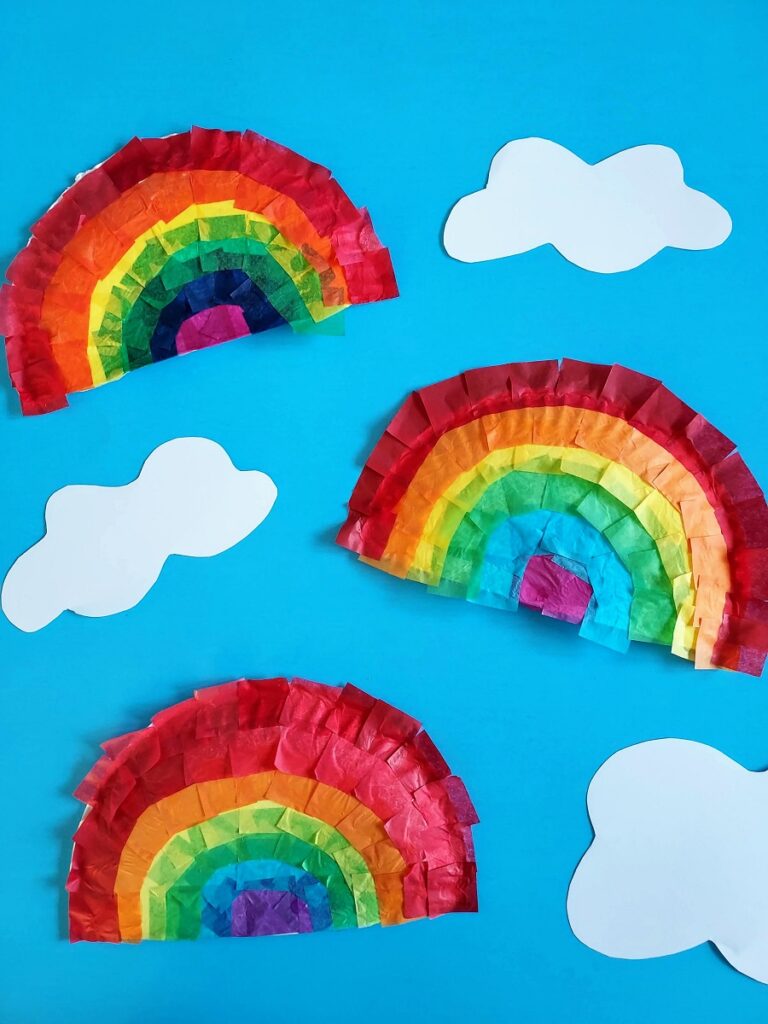
Hang the rainbows for a lovely decoration!

More Paper Plate Craft Ideas for Kids
- Handprint Sun Paper Plate Craft
- Moving Shark Paper Plate Craft
- Handprint Chicken Paper Plate Craft
- Paper Plate Love Bug Craft

Rainbow Paper Plate Craft
Make a colorful rainbow with a paper plate and tissue paper for a fun and easy kids' craft!
Materials
- 1 Plain white paper plate
- Tissue paper in rainbow colors
- Liquid school glue (white) or glue stick
Tools
- Scissors
- Newspaper, parchment paper, or craft mat (optional)
Instructions
- Start by cutting 3-4” off the bottom of a standard 9.5” paper plate. Cut in a straight line, to form the bottom of your rainbow.
- Arrange your tissue paper squares in small piles of like colors.
- Tip: Have kids arrange the tissue paper squares in the order that they will use them. (ROYGBIV)
- Starting with purple, glue on a few tissue squares on the bottom middle of the plate along the flat side, overlapping them slightly.
- Next, forming an arch-like shape, glue on your blue tissue paper, also overlapping the bottom layer so the plate doesn’t show through.
- Continue steps for green, yellow, orange and red.
- Don’t worry if your tissue paper goes over the edges of the plate. You can always fold them in or trim them once it is dry.
- Allow time to dry completely.
- Want to add clouds? Simply trace some fluffy clouds on a piece of white cardstock, cut them out and attach with glue to your completed rainbow! If you want to add texture to your clouds, you can use cotton balls.
Notes
- Prep ahead by cutting tissue paper into one inch squares. You can also buy pre-cut tissue paper squares for a quick and easy project.
- If using a different sized plate, cut about ¼-½ of the plate off the bottom. You may need to adjust how big your tissue paper squares are for smaller plates so you have enough room for all colors.
- Drying time will vary depending on how much glue is used.
- Providing young children with a small cup of liquid glue and a toothpick or cotton swab for them to dip with can help limit excess glue usage and speed up drying times. You can also use a glue stick.
A. Hager is a lover of books and all things crafty. She enjoys puzzles, board games and puppy snuggling. She is constantly adapting new recipes so her two children with food allergies are able to experience a variety of delicious and fun foods.