This moving shark paper plate craft for kids is a fun summer activity. It’s also perfect to make at home during Shark Week or as part of an ocean or shark unit study.
It’s one of our easy craft ideas for kids and can be finished in less than 30 minutes. It’s an ideal project for preschool, kindergarten, and elementary age children. Once completed, they can use the shark puppets for imaginative play.

Like this shark craft? You may also enjoy our shark life cycle slider and ocean zone density jar activities.
Swimming Sharks Craft
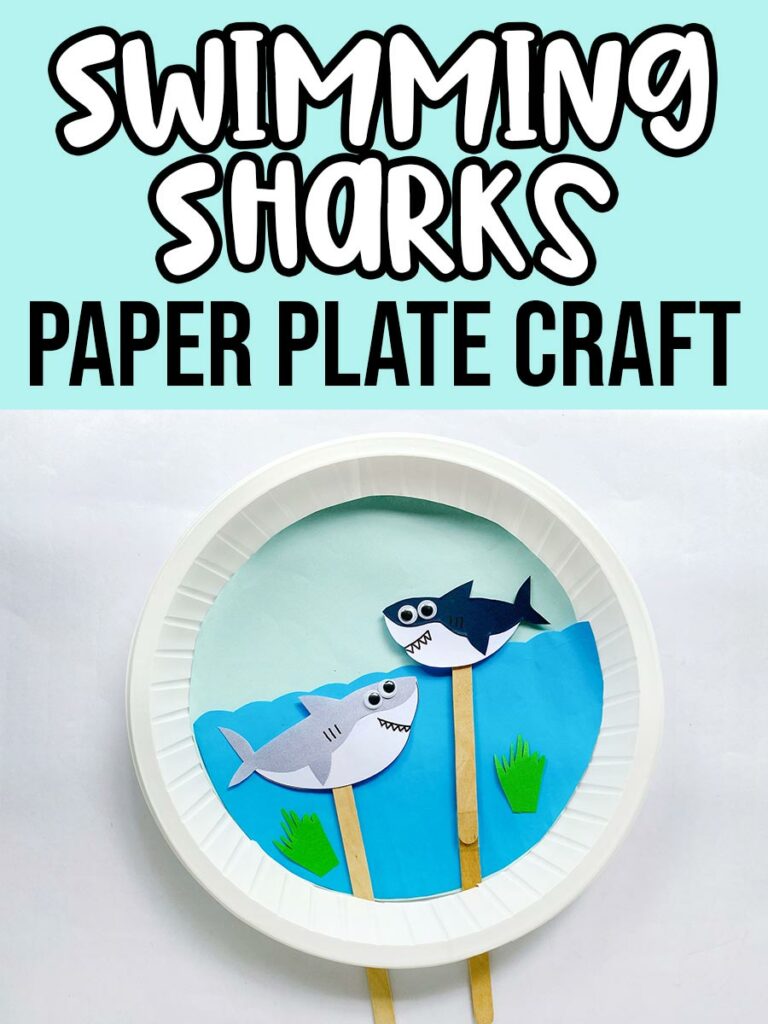
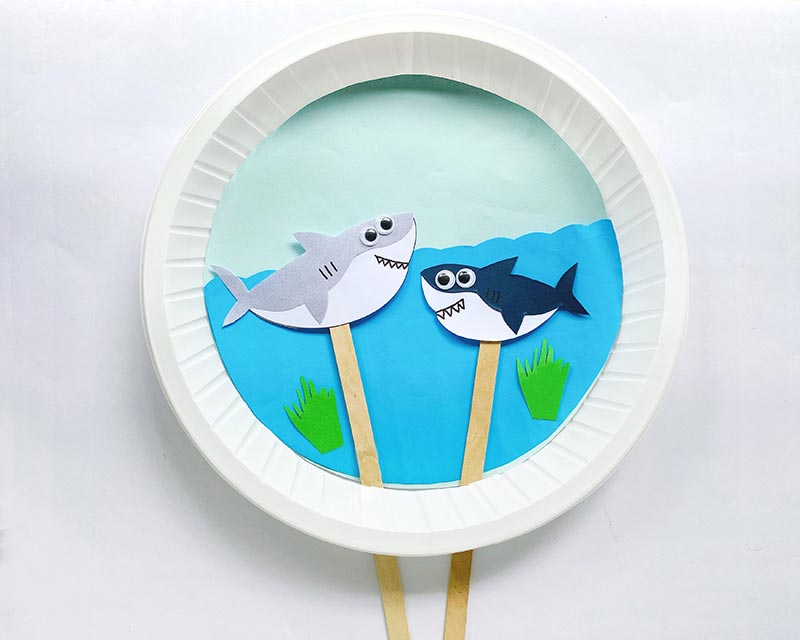
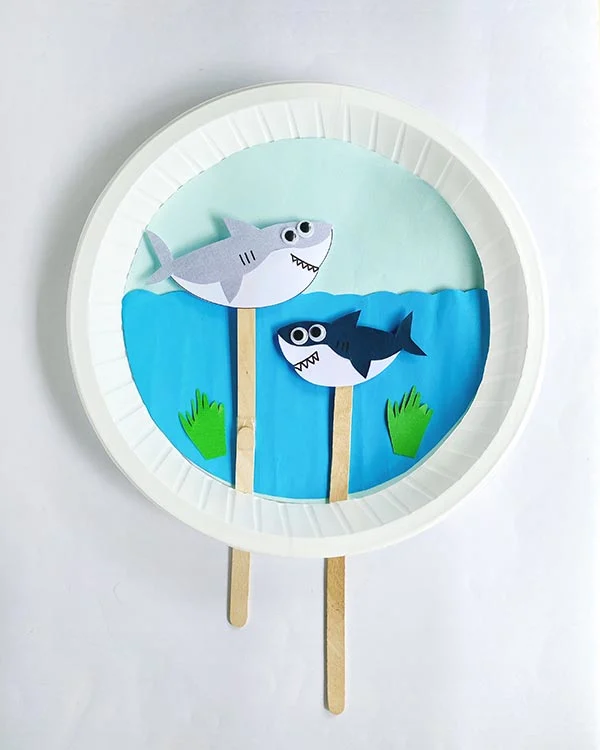
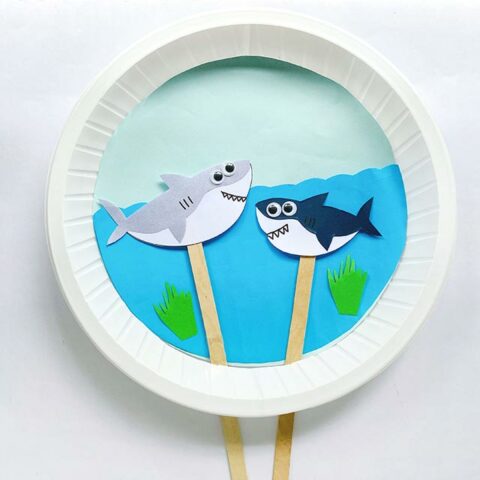
Transform a disposable plate into a scene under the sea with two cute shark puppets you can make swim around.
I think the paper sharks are so adorable and the whole activity is fun for kids to do. We’re providing a printable template for ease of use, or you can freehand your own sharks and underwater plants.
Younger children may need some assistance, but older kids should be able to complete this project independently. An adult should prep the paper plate by cutting a slit near the bottom edge for the puppets.
Have the kids work on fine motor skills by tracing the templates onto colored paper and cutting the pieces out. Practicing scissor skills and tracing is beneficial for improving fine motor and writing skills.

The swimming sharks is a great opportunity to inspire kids’ creativity and imagination. They can make up a little play for the sharks to act out or even make additional sea creature puppets.
You can also create a stationary ocean scene by gluing the sharks directly to the plate, rather than making puppets and cutting an opening in the plate for them.
Keep the theme going and make a shark headband craft too. It’s the perfect addition to a summer crafting session.
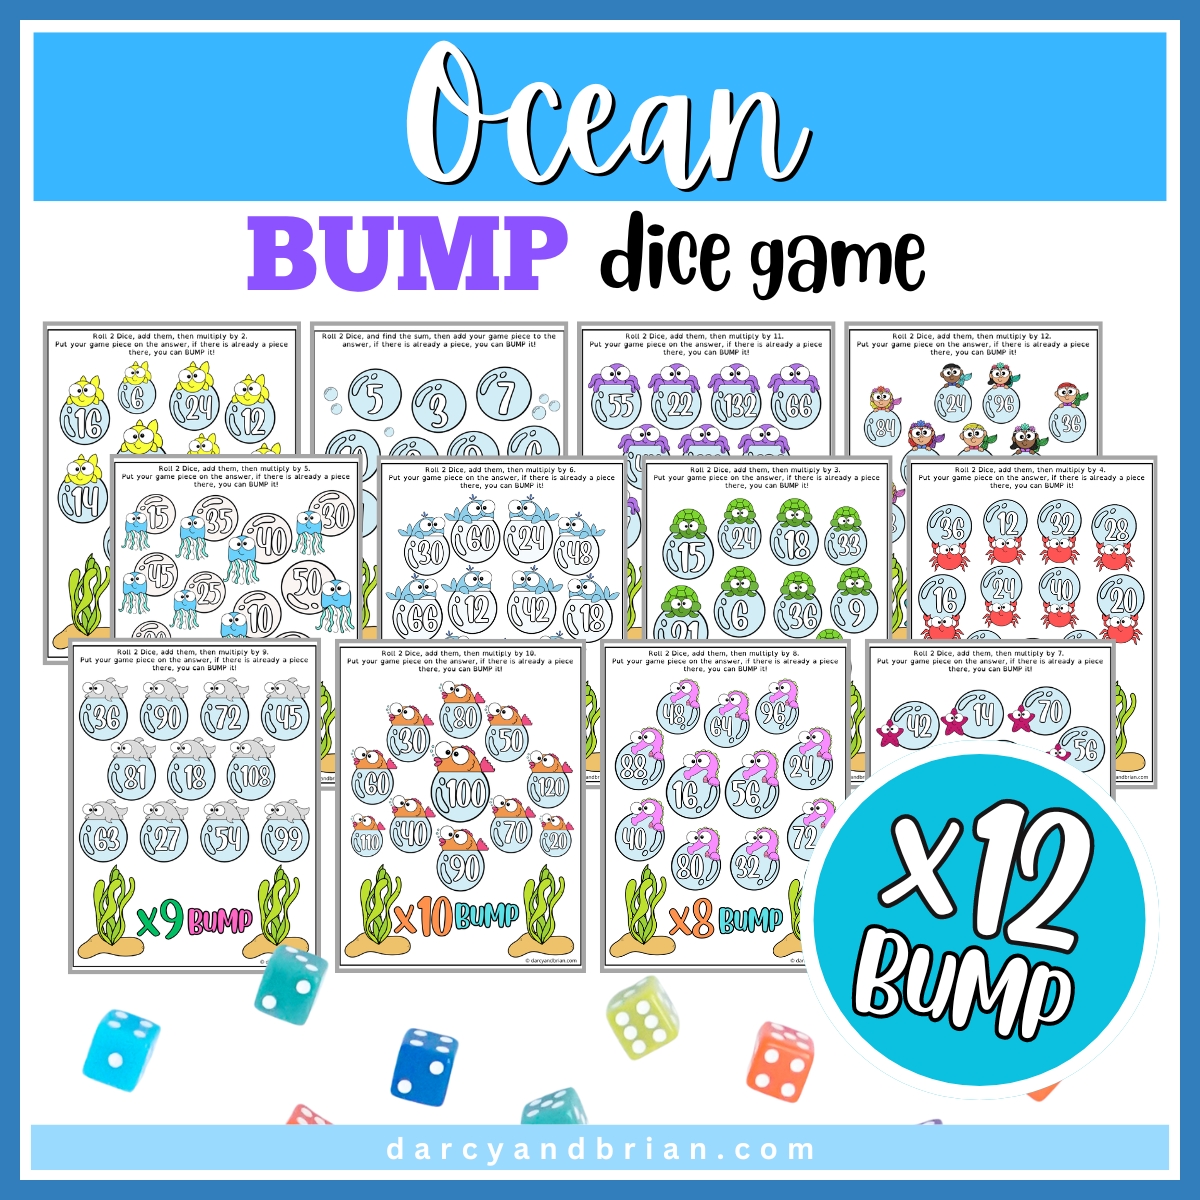
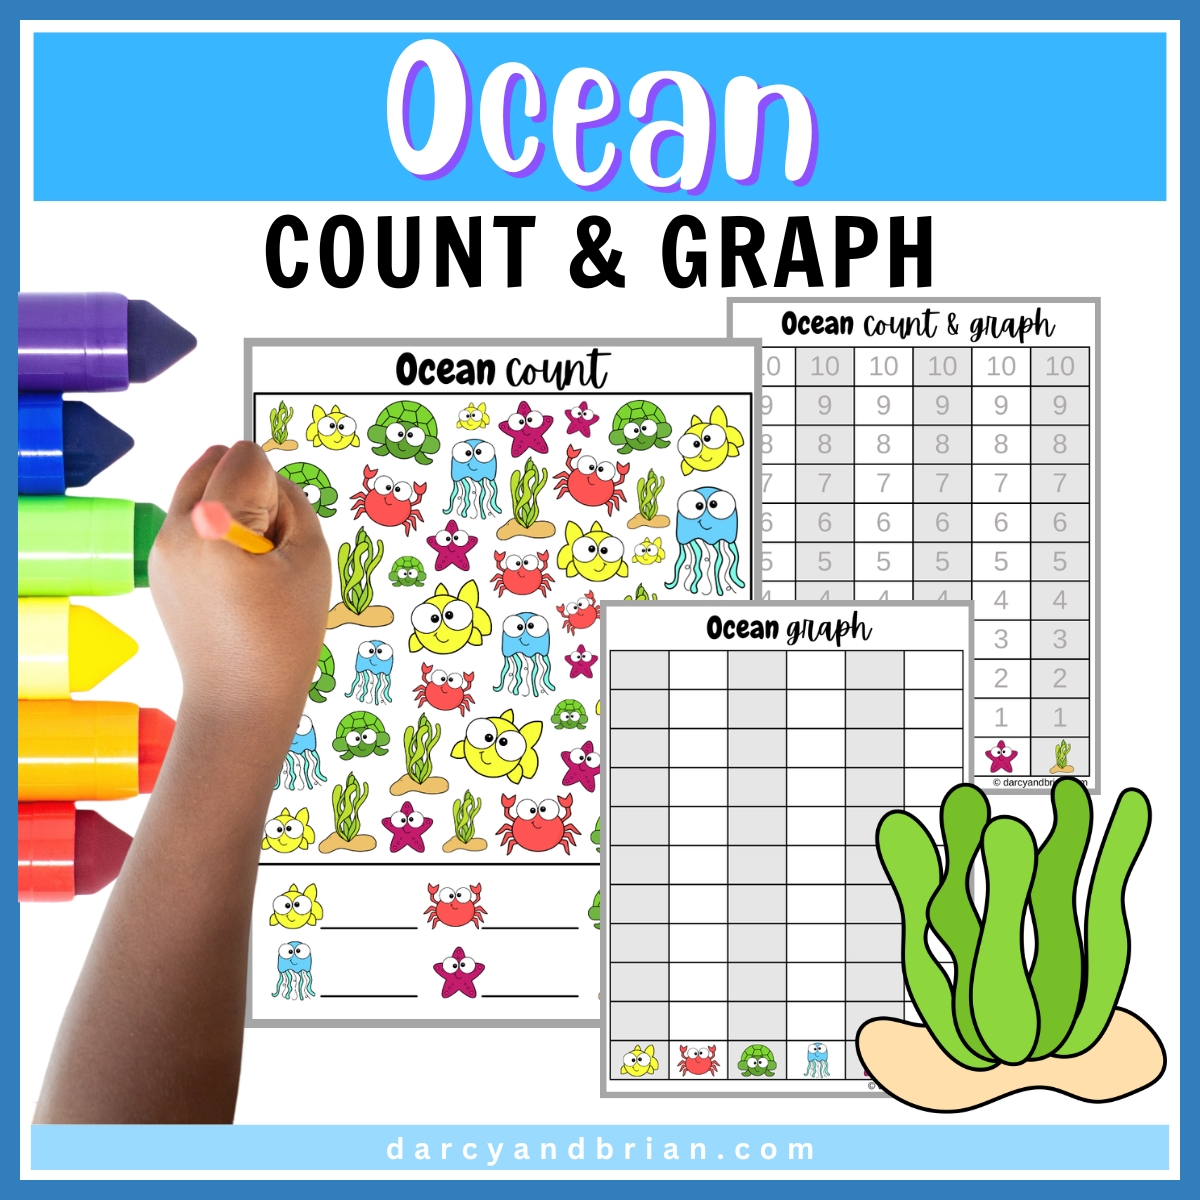
Ocean Bump Dice Game Ocean Count and Graph
This post contains affiliate links. As an Amazon Associate and a participant in other affiliate programs, we earn a commission on qualifying purchases.
Shark Paper Plate Craft Supplies:
- Printable Shark Paper Plate Template PDF
- Paper Plate (9 or 10 inch)
- Cardstock or construction paper in a variety of colors
- Googly Eyes
- Wooden Craft Sticks
- Glue (liquid school glue or glue sticks)
- Fine Tipped Black Marker
- Pencil
- Scissors
Shop some of my favorite craft supplies on Amazon!
How to Make a Moving Paper Plate Shark Craft:
First you will need to print out our Shark Paper Plate Craft Template (available for free by filling out the form near the bottom of this post) or plan to draw and cut out your own pieces freehand.
Next, cut out all of the pieces from the PDF template. Use them to trace onto colored paper.
Example colors to use: light blue circle for center of paper plate sky, different shade of blue for water waves, white for the shark bellies, gray and navy blue for top of the sharks, and green for sea plants.
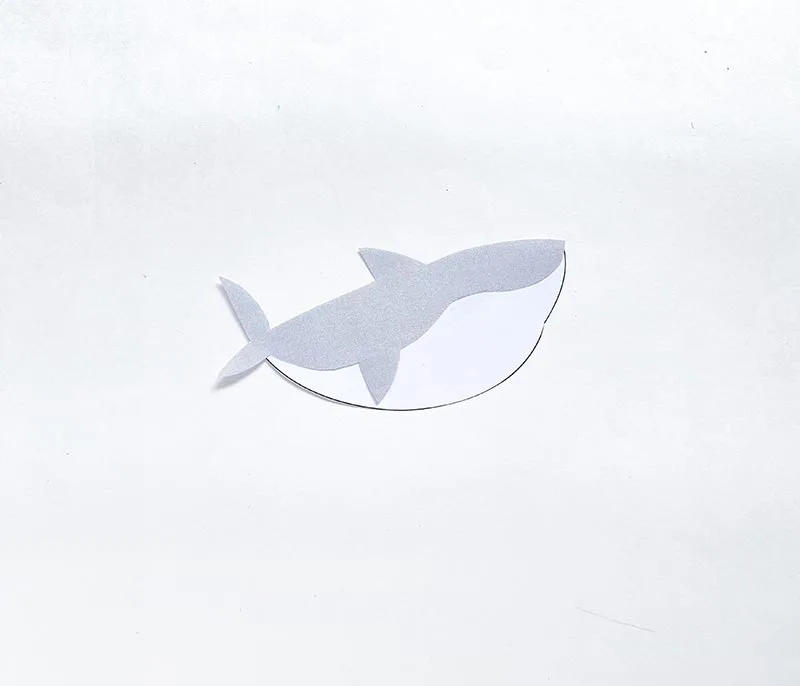
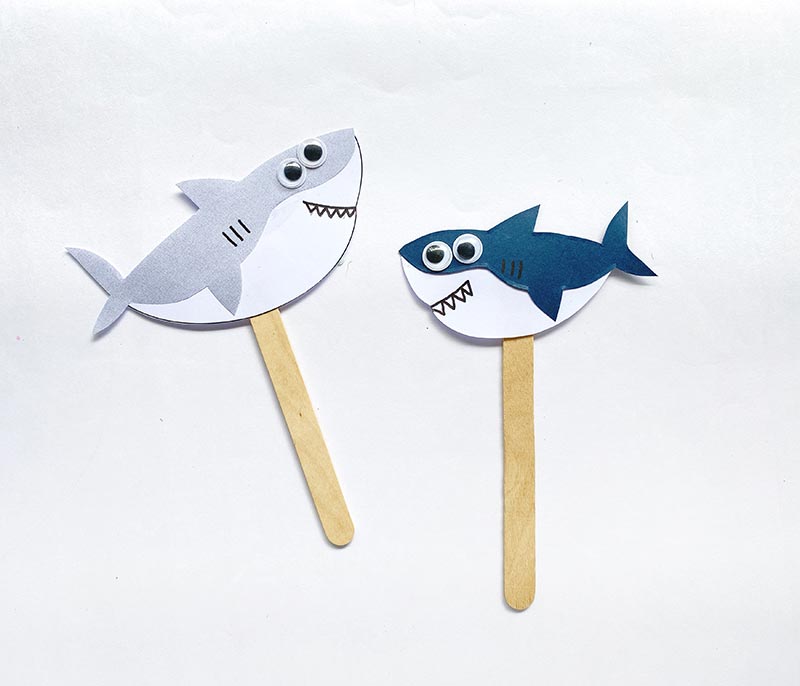
Then cut out the shark pieces and glue the bottom and top part of each shark together.
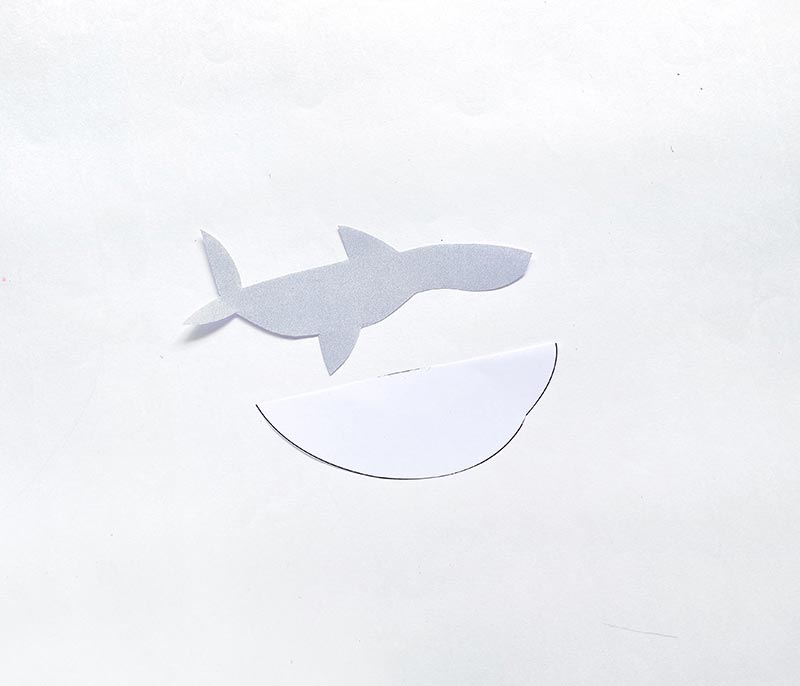

Line the top part up with the bottom and overlap them a little. Set aside to dry.
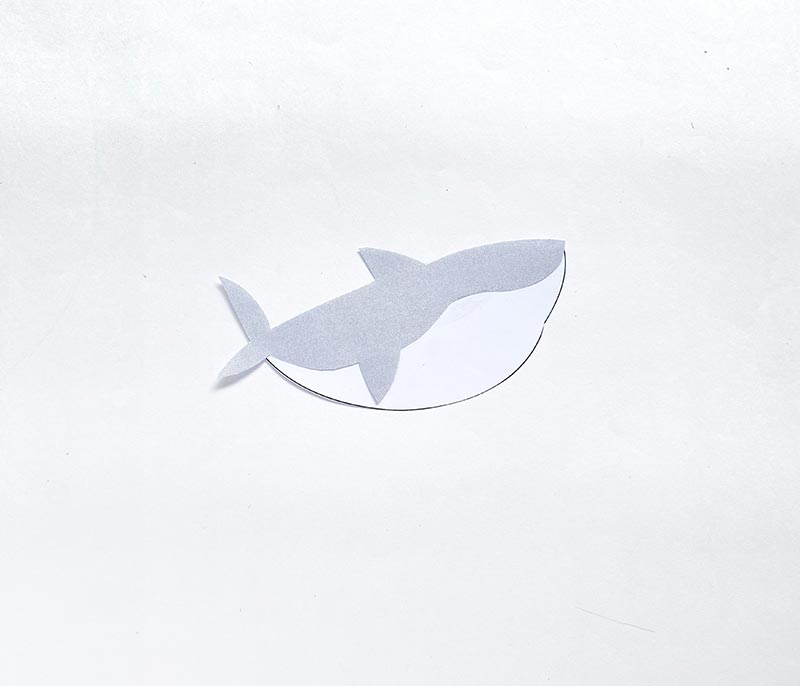
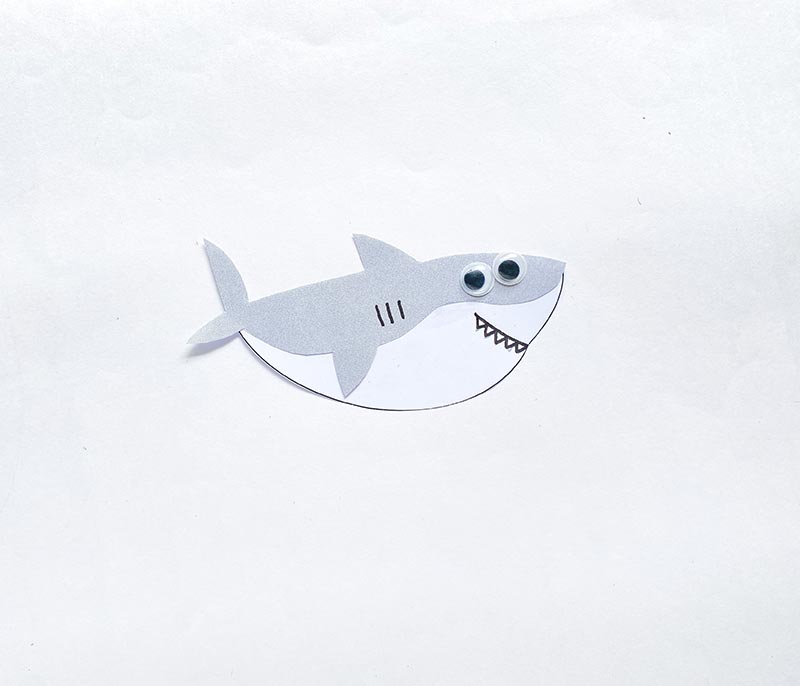
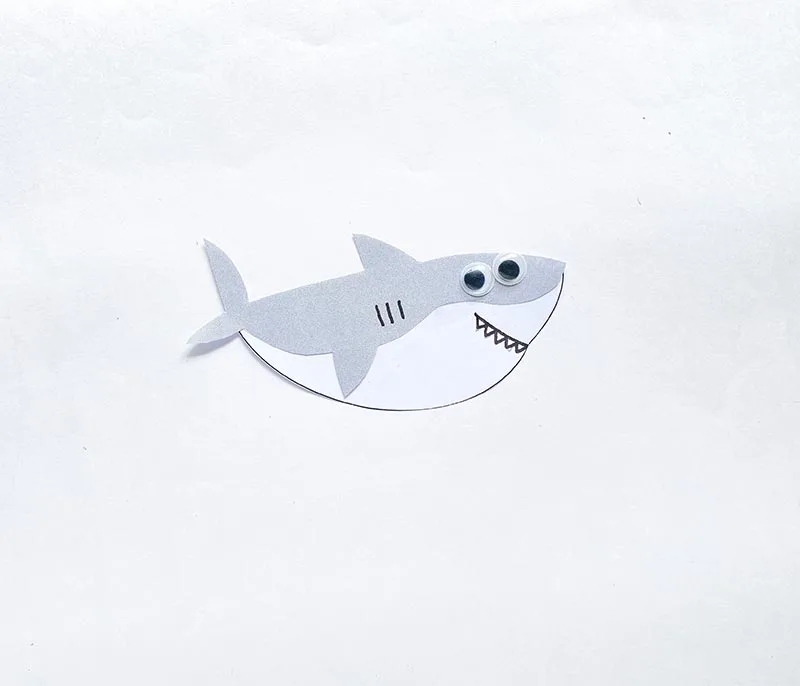
Use a marker or pen to draw the gills, mouth and teeth on the sharks.
Attach two googly eyes onto each shark.
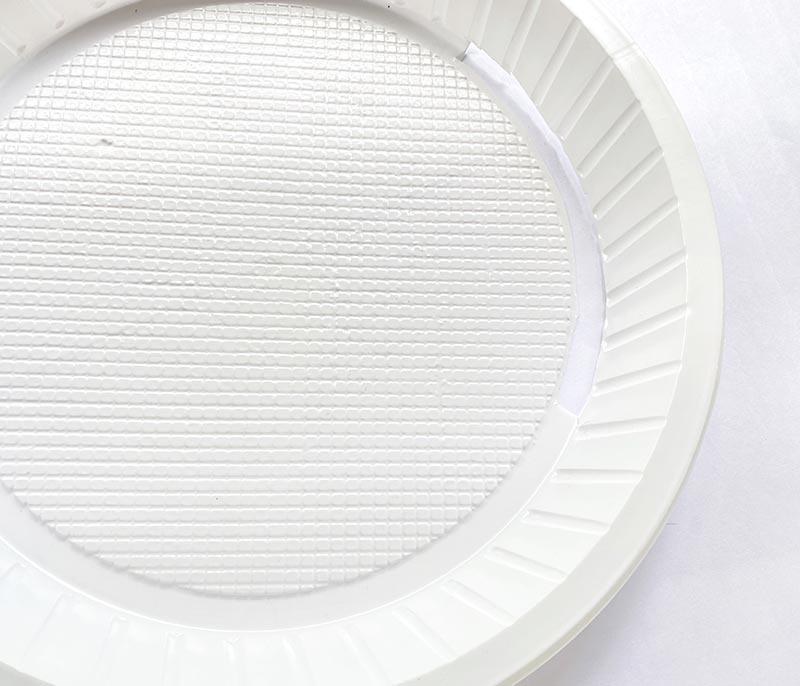
Use a pair of scissors to cut a long slit on the bottom edge of the paper plate’s center.
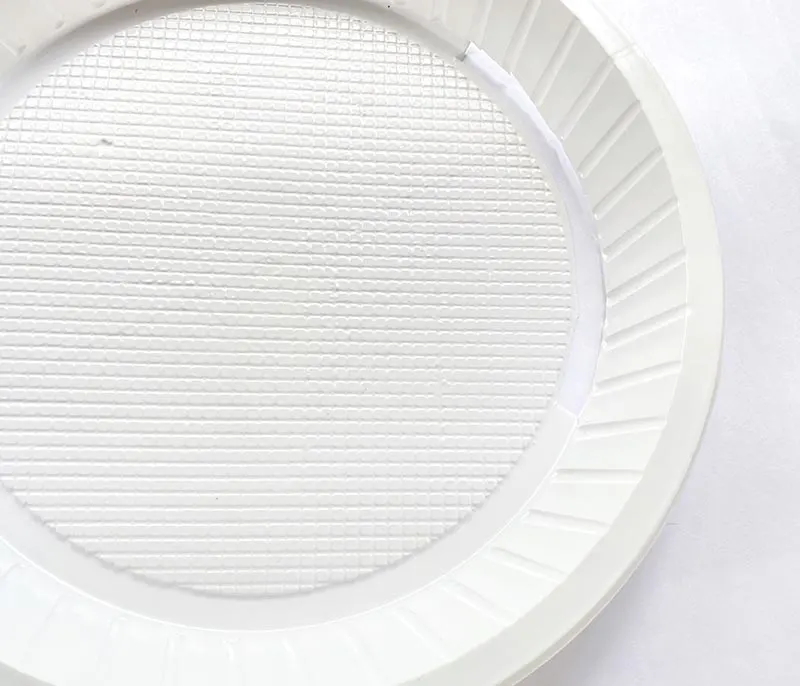
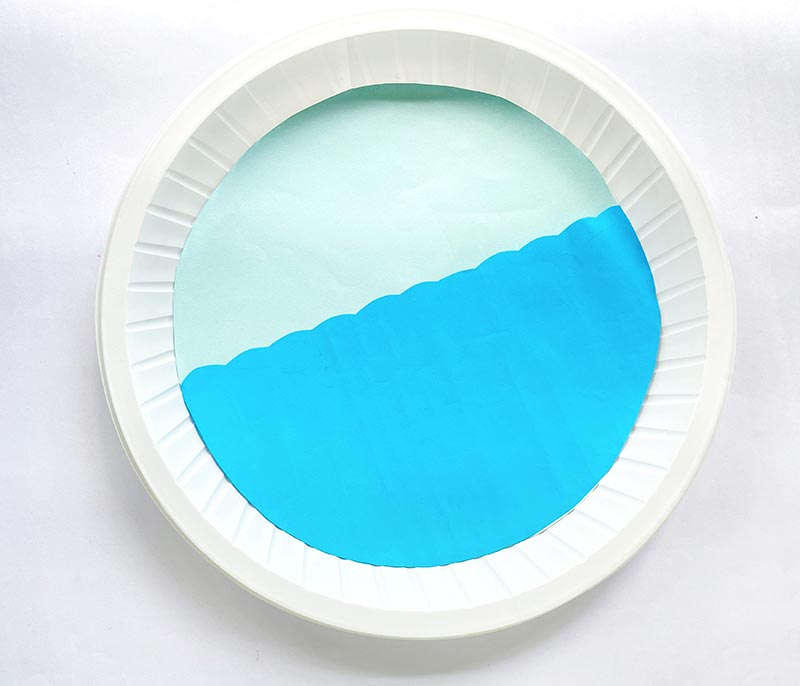
Cut out a light blue circle the size of the center of your paper plate and glue it to the plate.
Then use the template to cut out the waves from a different shade of blue, and glue it onto the plate.

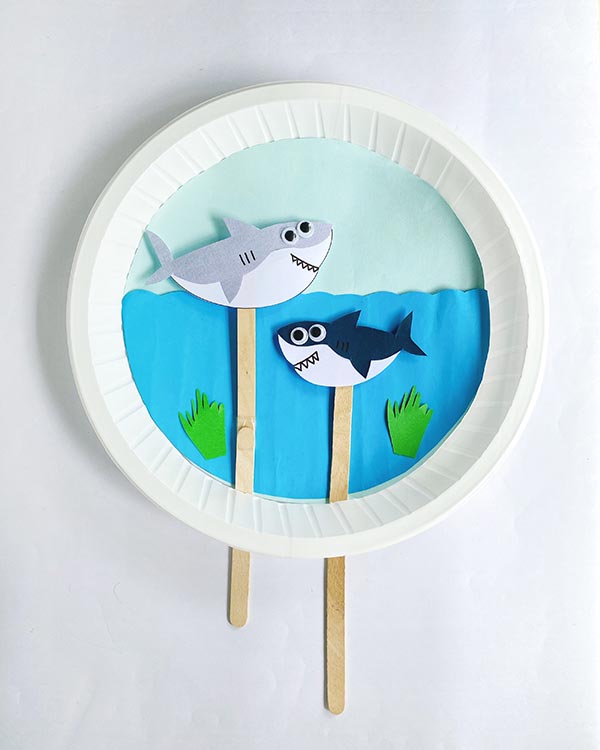
Glue the sea plants under the water. Add additional items to set the scene if you’d like such as seaweed, starfish, small fish, rocks, etc.
Now tape or glue the wooden craft popsicle sticks to the back of the sharks. You can attach another stick to the end of the first to make it longer, if needed.

Finish it off by sliding the popsicle sticks through the slit in the plate. Move the sticks around to make the sharks swim around in the ocean!
More Paper Plate Crafts:
Get the Shark Template Printable
Fill out the form below and the shark paper plate printable template file will be emailed to you.

Moving Shark Paper Plate Craft
Make this cute and easy shark paper plate craft and have fun making the shark puppets swim under the sea.
Materials
- Printable Shark Paper Plate Template PDF
- Paper Plate (9 or 10 inch)
- Cardstock or construction paper in a variety of colors
- Googly Eyes
- Wooden Craft Sticks
Tools
- Glue (liquid school glue or glue sticks)
- Fine Tipped Black Marker
- Pencil
- Scissors
Instructions
- Print out our Shark Paper Plate Craft Template or draw and cut out your own pieces freehand.
- Next, cut out all of the pieces from the PDF template. Use them to trace onto colored paper. Example colors to use: light blue circle for center of paper plate sky, different shade of blue for water waves, white for the shark bellies, gray and navy blue for top of the sharks, and green for sea plants.
- Then cut out the shark pieces and glue the bottom and top part of each shark together. Line the top part up with the bottom and overlap them a little. Set aside to dry.
- Use a marker or pen to draw the gills, mouth and teeth on the sharks.
- Attach two googly eyes onto each shark.
- Use a pair of scissors to cut a long slit on the bottom edge of the paper plate's center.
- Cut out a light blue circle the size of the center of your paper plate and glue it to the plate.
- Then use the template to cut out the waves from a different shade of blue, and glue it onto the plate.
- Glue the sea plants under the water. Add additional items to set the scene if you'd like such as seaweed, starfish, small fish, rocks, etc.
- Now tape or glue the wooden craft popsicle sticks to the back of the sharks. You can attach another stick to the end of the first to make it longer, if needed.
- Finish it off by sliding the popsicle sticks through the slit in the plate. Move the sticks around to make the sharks swim around in the ocean!
Recommended Products
As an Amazon Associate and member of other affiliate programs, I earn from qualifying purchases.


Darcy is the founder of “Life With Darcy and Brian,” where she combines her love for education, board games, and crafting to create engaging learning experiences for kids. Her creative projects and writing have been featured in outlets like The Toy Insider, CafeMom, Mom.com, Parents.com, Country Living, and The Pioneer Woman.