
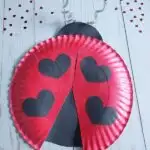
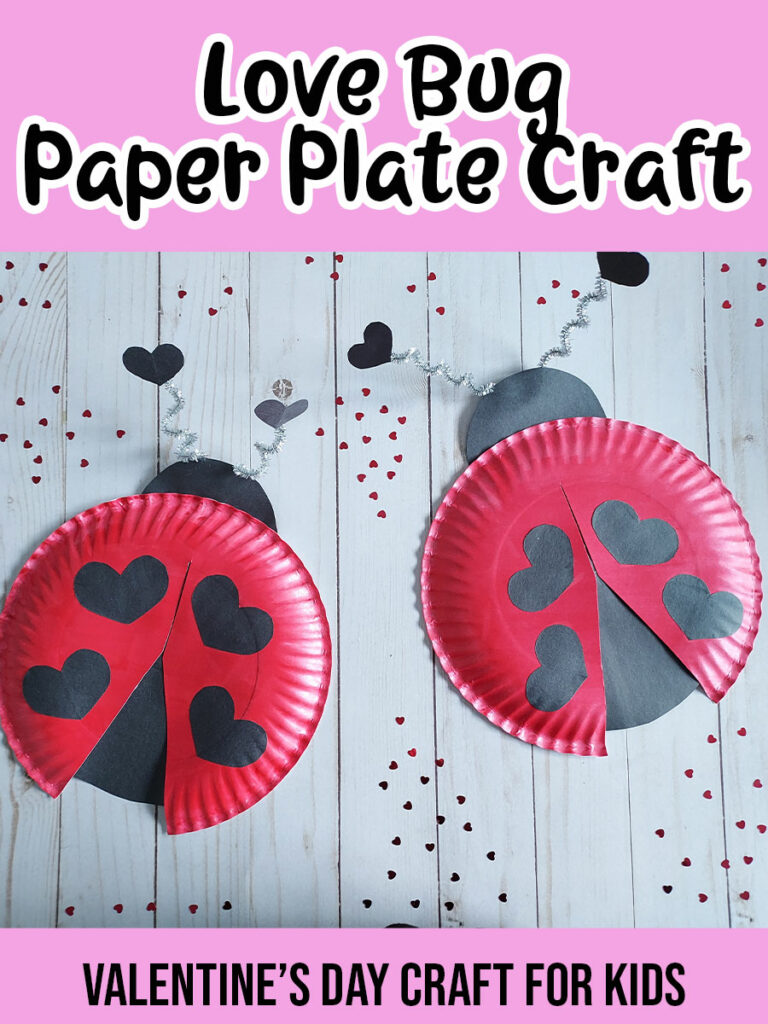
This paper plate love bug craft is the perfect Valentine’s Day craft for kids. It is easy to make, inexpensive and makes a wonderful handmade gift!
Kids will love painting the paper plates, cutting out paper hearts and twirling the chenille stems into antennae.
You can even use parts of this project to teach children about shapes and engage them in a scavenger hunt to find household objects to trace. When you are done, be sure to check out our collection of craft ideas for kids and be inspired all year!

Want to turn this into a valentine card? You can attach a piece of paper to the underside with a handwritten note or poem.
I hope you enjoy making these with your special little love bugs as much as I did!
Looking for more projects like this? Don’t miss our Heart Tissue Paper Suncatcher, Coffee Filter Hearts, and Easy Felt Conversation Heart crafts.
Love Bug Paper Plate Valentine Craft
This paper plate love bug craft uses just a few common craft supplies and only takes about 20-30 minutes to complete (plus additional drying time).
Do this craft at home, as a family, or at a school. It’s a quick and easy craft to include in an art center for Valentine’s Day.
This craft project is ideal for preschoolers as well as kindergartners and elementary age children. Preschool age children may need some help to complete it.
Making these paper plate love bugs provide painting, tracing, cutting and gluing practice which is a fun way to work on fine motor skills.
Older children will also enjoy this craft that they can complete mostly independently.
These may require additional drying time depending on how thickly the paint is applied and how much glue is used for attaching the other parts.
You can protect your work surface, and make cleanup easier, by placing the paper plate on a craft mat, parchment paper or newspaper before painting.

This post contains affiliate links. As an Amazon Associate and a participant in other affiliate programs, we earn a commission on qualifying purchases.
If crafting with younger children, I suggest pre-cutting the triangle out of the plate before painting as it can be harder to cut through for those newer to scissors.
If you would like to craft with less mess, you can also have kids color the paper plates with red crayons or washable markers. Glue dots or tape can also be used instead of liquid glue in places.
Helpful tip: If you would like to make a ladybug instead of a love bug, simply cut out 2” circles instead of hearts for the spots and attach 1” circles on top of black chenille stems for the antennae.
Paper Plate Love Bug Craft Supplies:

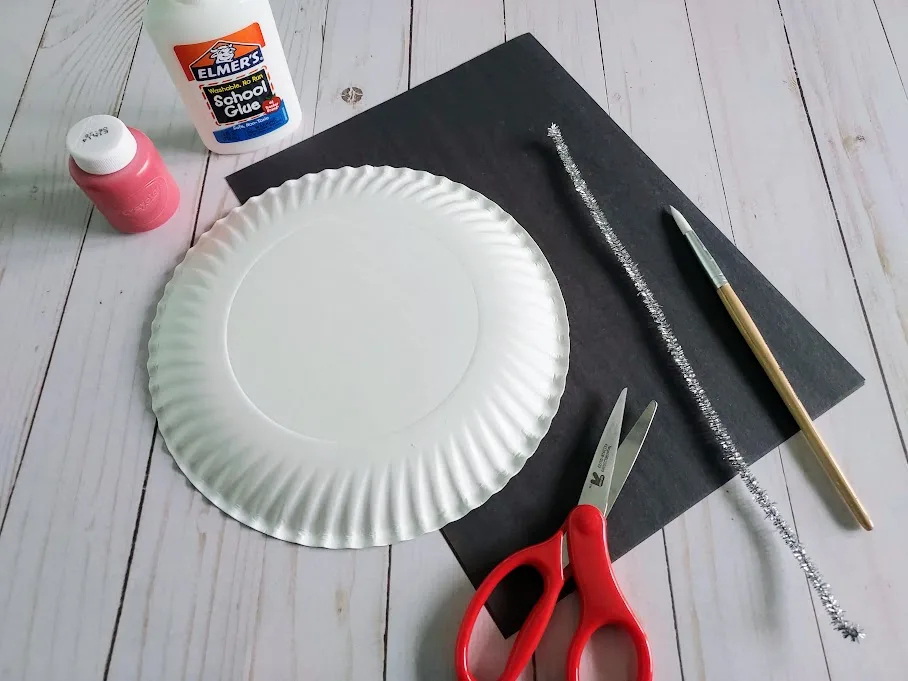
- Plain White Paper Plate
- Red Washable Kid’s Paint
- Black or Silver Chenille Stem
- Black Construction Paper
- Liquid school glue
- Scissors
- Paintbrush
- Pencil or chalk (for tracing)
- Round household objects for tracing (optional)
- Glue dots or tape (optional)
- Newspaper, parchment paper, or craft mat
How to Make Paper Plate Love Bugs:
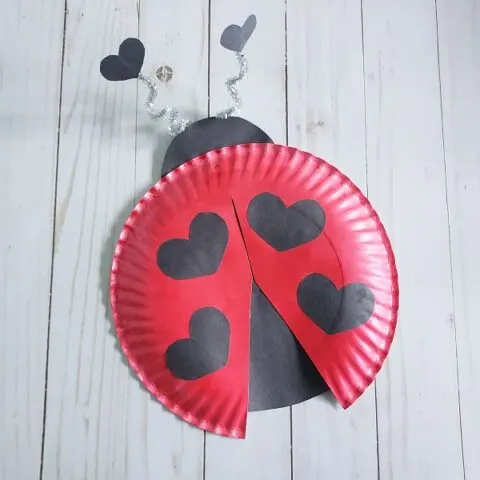
Start by painting one entire side of your paper plate red (the side that curves up like a dome).
Tip: Protect your work area with a sheet of parchment paper, craft mat or newspaper. An art smock or old oversized shirt may also be helpful to keep clothes clean while painting.

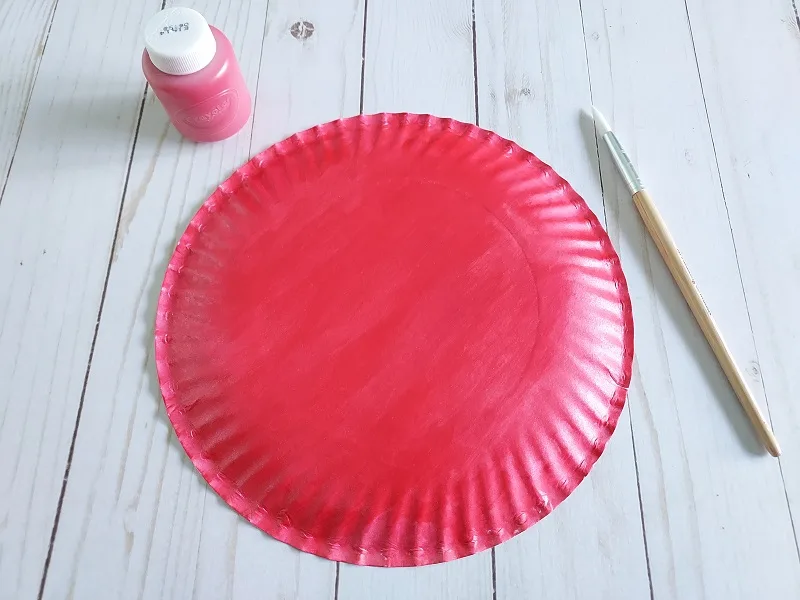
Allow time to dry. This step may require additional drying time depending on how thickly the paint is applied. While your plate is drying, now is a good time to prep your other supplies.
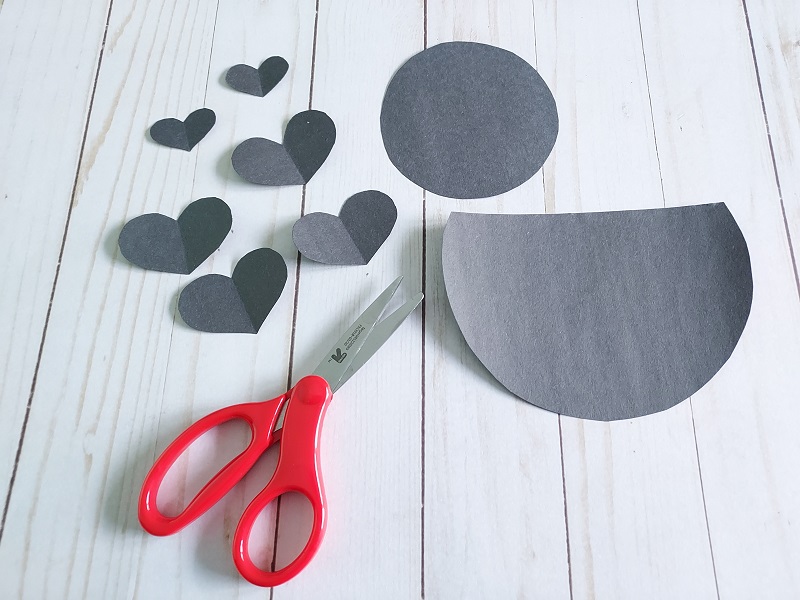
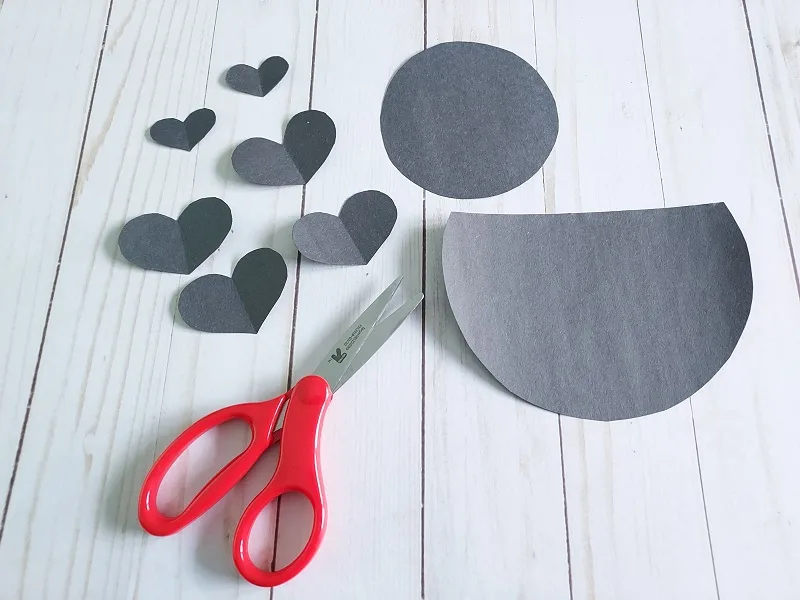
Locate and gather 2 round household objects that are approximately 4” and 6” in diameter for tracing the head and body. You can also hand draw the circles if you do not have objects for tracing.
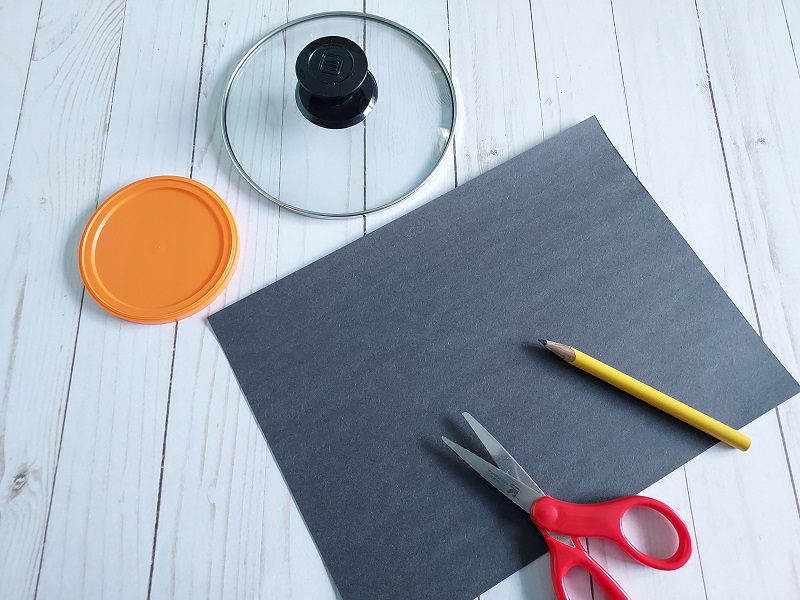

Trace and cut out one 4” circle and one 6” circle on black construction paper. Chalk may be helpful for tracing if the pencil is hard to see.
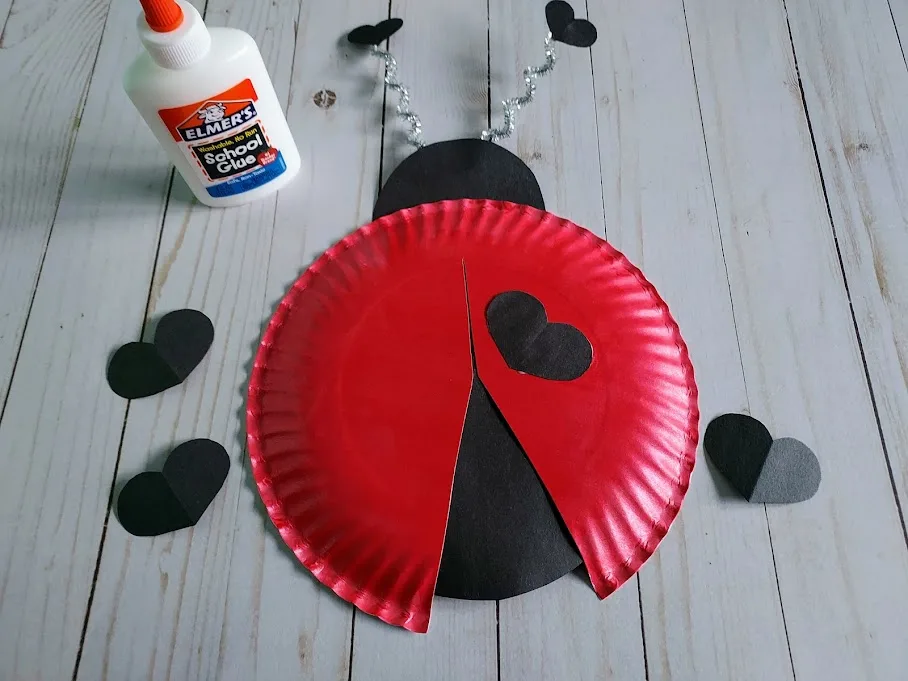
To make the hearts, fold another black piece of construction paper long-wise and cut out 2 small and 4 large half-heart shapes. You can also pre-trace these shapes for younger children to cut out.
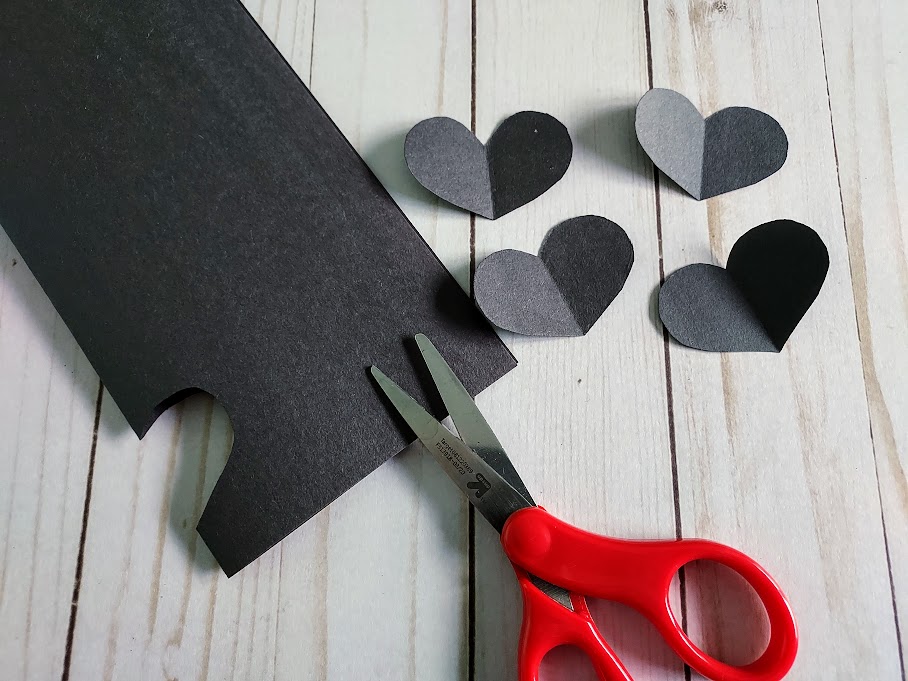

Unfold the cut paper to reveal your completed heart shapes.
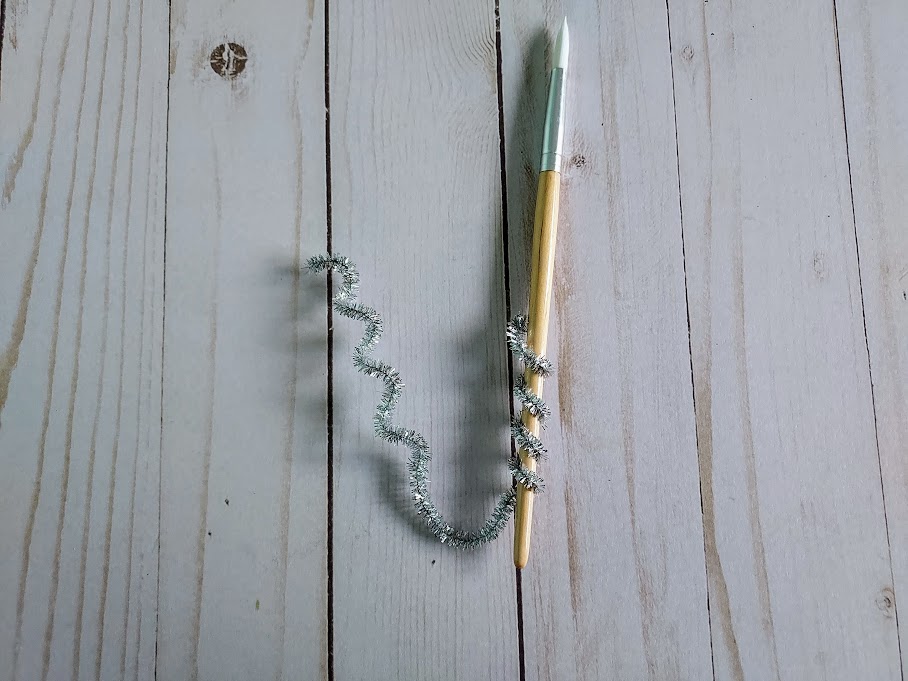
To make the antennae, fold one chenille stem in half and twist each side around a paintbrush or pencil to make a spiral.
Attach the small hearts to the tips of the antennae and your antenna to your small circle “head” using liquid glue, glue dots or tape.
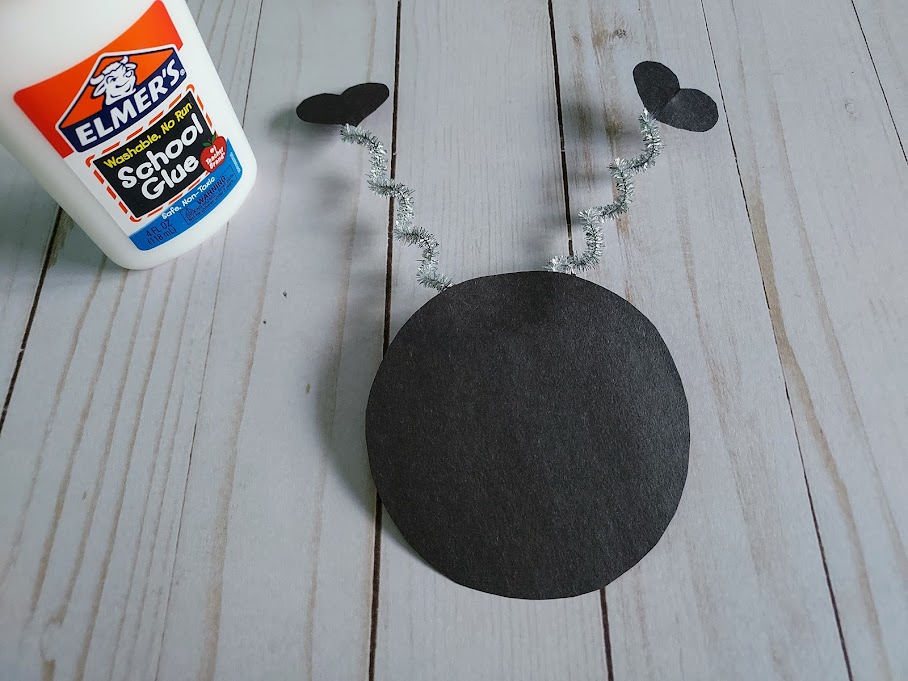
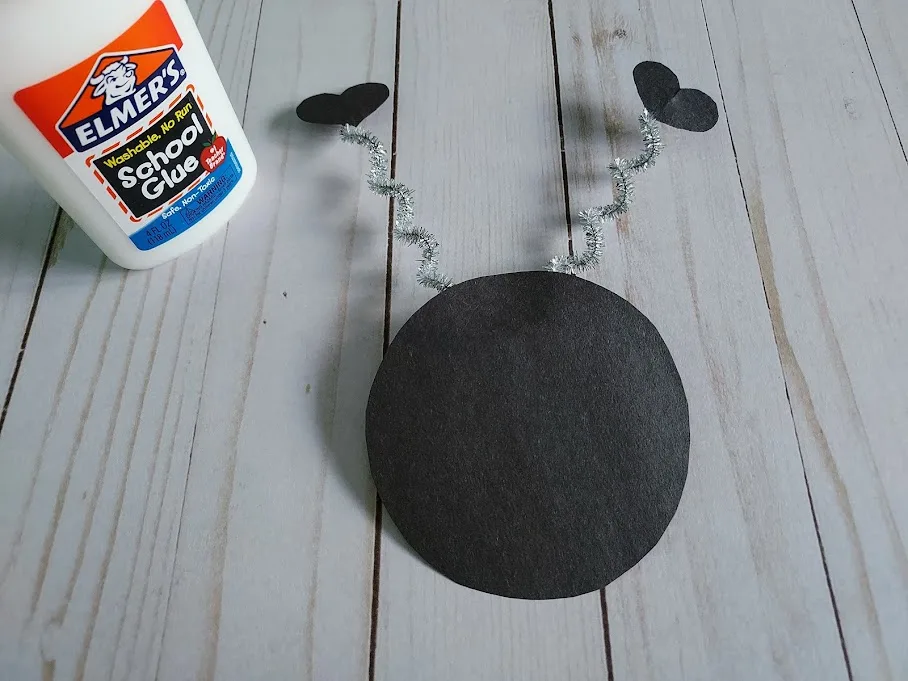
I found using glue dots to attach the small hearts to the chenille stem and tape to attach the chenille stem to the construction paper to be the easiest method.
Set aside to dry, if needed.
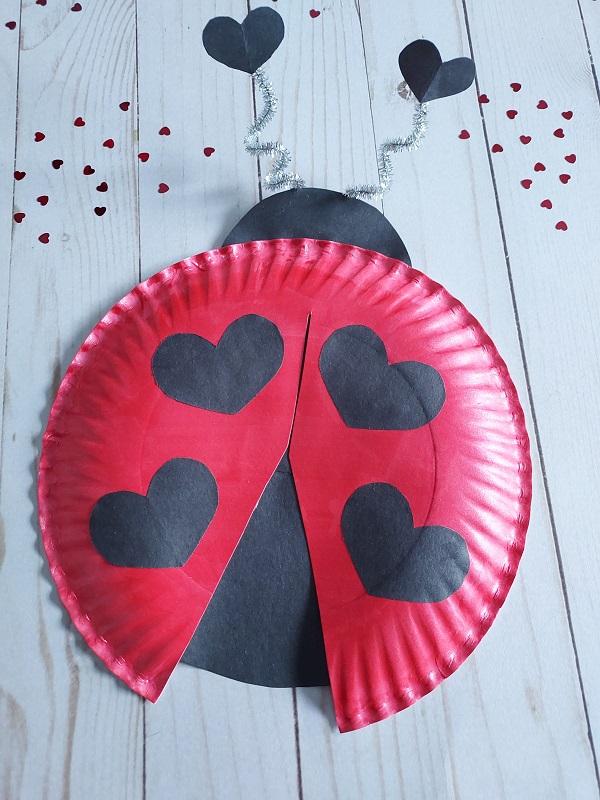
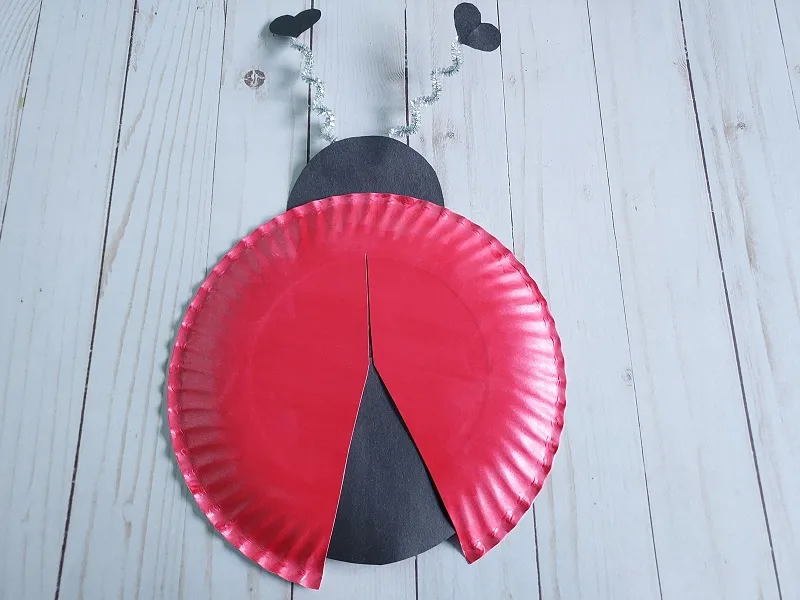
Once your painted plate is dry, cut a triangle-like shape into the paper plate to form the “wings.”
On a standard 9” plate, cut a roughly 3” wide triangle bottom going up 4-5” toward the center of the plate. You can make marks on the back of the plate to use as a guide.
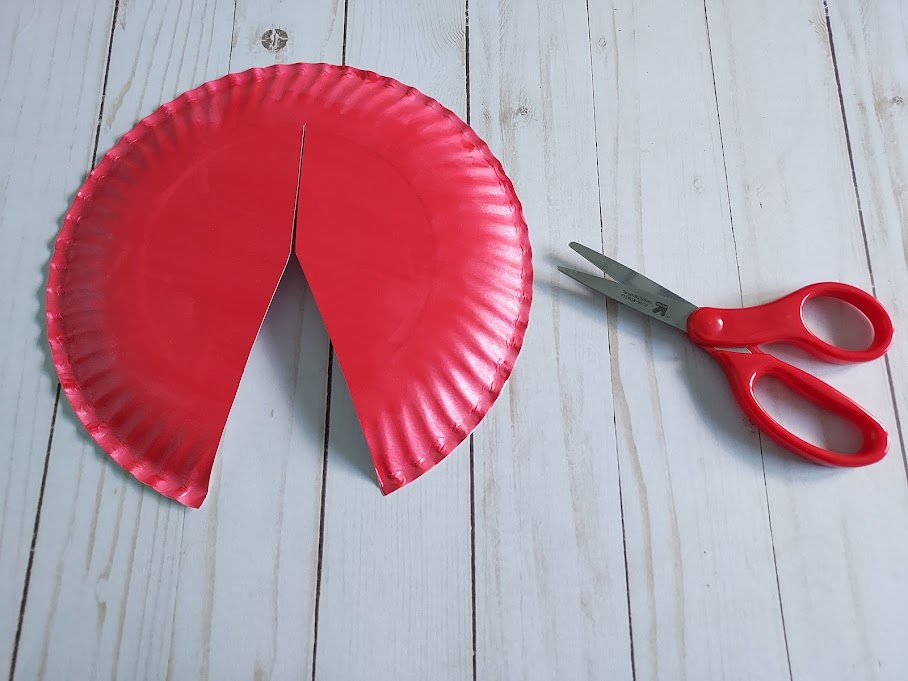

Helpful tip: If crafting with multiple children, you can pre-cut a triangle guide for them to trace on the back of their plates.
If you would like to add more definition to your wings, also cut a small slit from the tip of your triangle straight up another 2-2.5”. If this step is too complicated for younger children, you can simply skip it or add a line with black marker later.
Turning your painted plate over, glue your large circle to the underside of your bug to form the “body.”

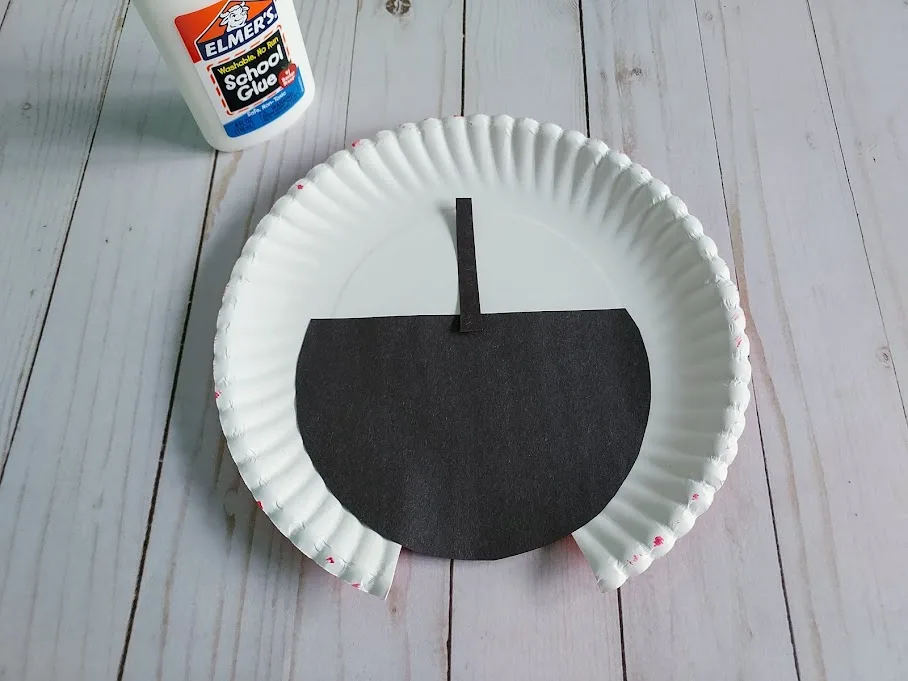
Then glue on your completed “head” to the top of the plate, showing only about half the circle.
Helpful tip: Providing young children with a small cup of liquid glue and a toothpick or cotton swab for them to dip with can help limit excess glue usage and speed up drying times.
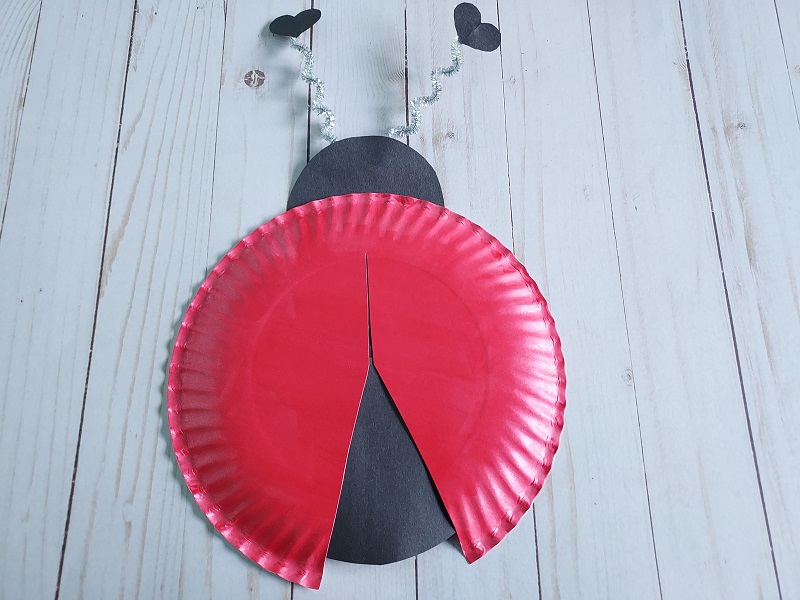
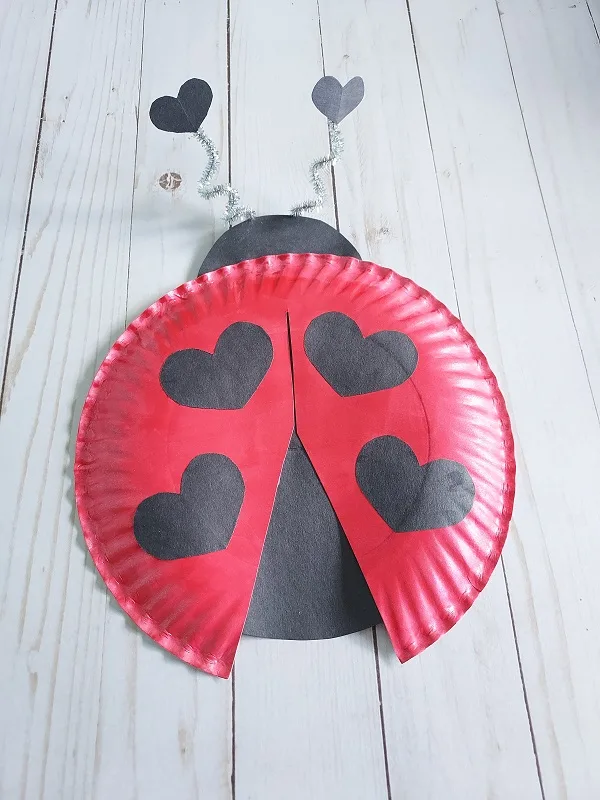
Set aside to dry. The last step is gluing on the large heart “spots.” Simply arrange your spots as desired and attach with liquid glue.

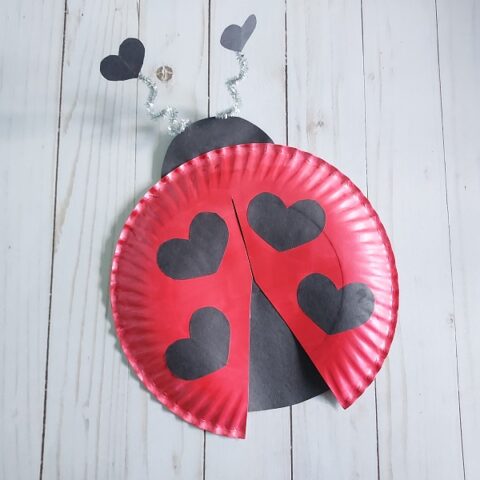
Allow time to fully dry. That’s it! Now you have an adorable love bug to use as decoration or as a unique card.

More Paper Plate Craft Ideas:
Paper Plate Love Bug Craft
Make this adorable paper plate love bug for a fun and easy Valentine's Day craft for kids.
Materials
- 1 Plain White Paper Plate
- Red Washable Kid’s Paint
- 1 Black or Silver Chenille Stem
- Black Construction Paper
- Liquid school glue (white)
Tools
- Scissors
- Paintbrush
- Pencil or chalk (for tracing)
- Round household objects for tracing (optional)
- Glue dots or tape (optional)
- Newspaper, parchment paper, or craft mat
Instructions
- Start by painting one entire side of your paper plate red (the side that curves up like a dome). Allow time to dry.
- Tip: Protect your work area with a sheet of parchment paper, craft mat or newspaper. A smock or old oversized shirt may also be helpful to keep clothes clean while painting.
- This step may require additional drying time depending on how thickly the paint is applied. While your plate is drying, now is a good time to prep your other supplies.
- Locate and gather 2 round household objects that are approximately 4” and 6” in diameter for tracing the head and body. You can also hand draw the circles if you do not have objects for tracing.
- Trace and cut out one 4” circle and one 6” circle on black construction paper. Chalk may be helpful for tracing if the pencil is hard to see.
- To make the hearts, fold another black piece of construction paper long-wise and cut out 2 small and 4 large half-heart shapes. You can also pre-trace these shapes for younger children.
- Unfold the cut paper to reveal your completed heart shapes.
- To make the antennae, fold one chenille stem in half and twist each side around a paintbrush or pencil to make a spiral.
- Attach the small hearts to the tips of the antennae and your antenna to your small circle “head” using liquid glue, glue dots or tape. I found using glue dots to attach the small hearts to the chenille stem and tape to attach the chenille stem to the construction paper to be the easiest method.
- Set aside to dry, if needed.
- Once your painted plate is dry, cut a triangle-like shape into the paper plate to form the “wings.” On a standard 9” plate, cut a roughly 3” wide triangle bottom going up 4-5” toward the center of the plate. You can make marks on the back of the plate to use as a guide.
- Helpful tip: If crafting with multiple children, you can pre-cut a triangle guide for them to trace on the back of their plates.
- If you would like to add more definition to your wings, also cut a small slit from the tip of your triangle straight up another 2-2.5 inches. If this step is too complicated for younger children, you can simply skip it or add a line with black marker later.
- Turning your painted plate over, glue your large circle to the underside of your bug to form the “body.” Also, glue on your completed “head” to the top of the plate, showing only about half the circle.
- Helpful tip: Providing young children with a small cup of liquid glue and a toothpick or cotton swab for them to dip with can help limit excess glue usage and speed up drying times.
- Set aside to dry.
- The last step is gluing on the large heart “spots.” Simply arrange your spots as desired and attach with liquid glue.
- Allow time to fully dry.
A. Hager is a lover of books and all things crafty. She enjoys puzzles, board games and puppy snuggling. She is constantly adapting new recipes so her two children with food allergies are able to experience a variety of delicious and fun foods.