
Need fun and easy Thanksgiving crafts for kids? This coffee filter and paper cup turkey is the perfect. Plus, it’s a fairly easy and inexpensive activity to do at home or school.
This craft project is ideal for kindergarten and elementary age children. Preschool age children can also complete this craft with assistance.
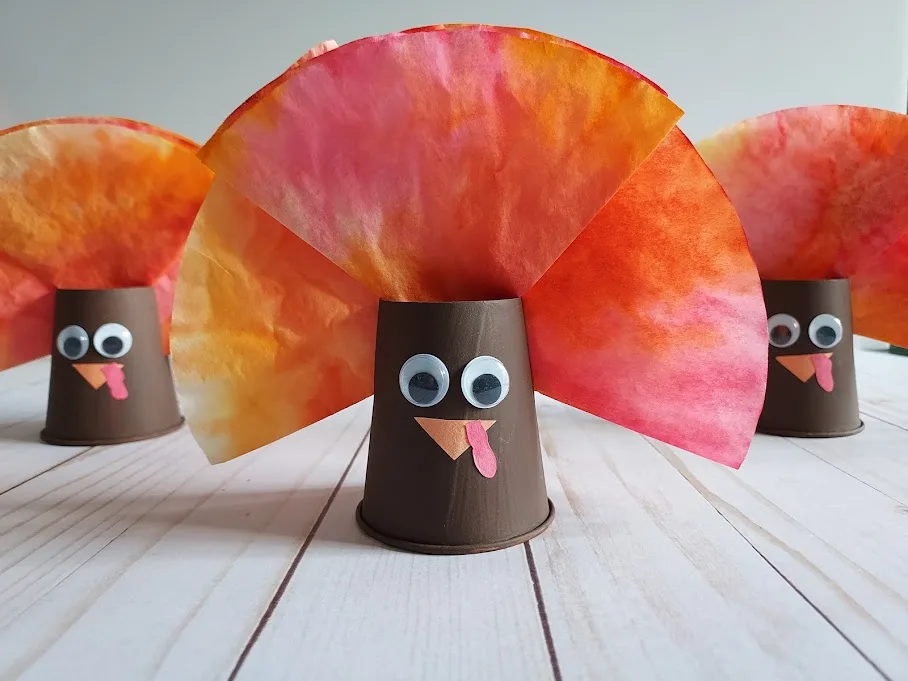
I love how this three-dimensional turkey craft stands by itself allowing you to easily decorate anywhere! These turkeys make great decorations for your home or classroom.
Make a row of these turkeys to place on your mantle at home. Or place them on desks or window sills at school. You can even use them for a centerpiece at your Thanksgiving table!
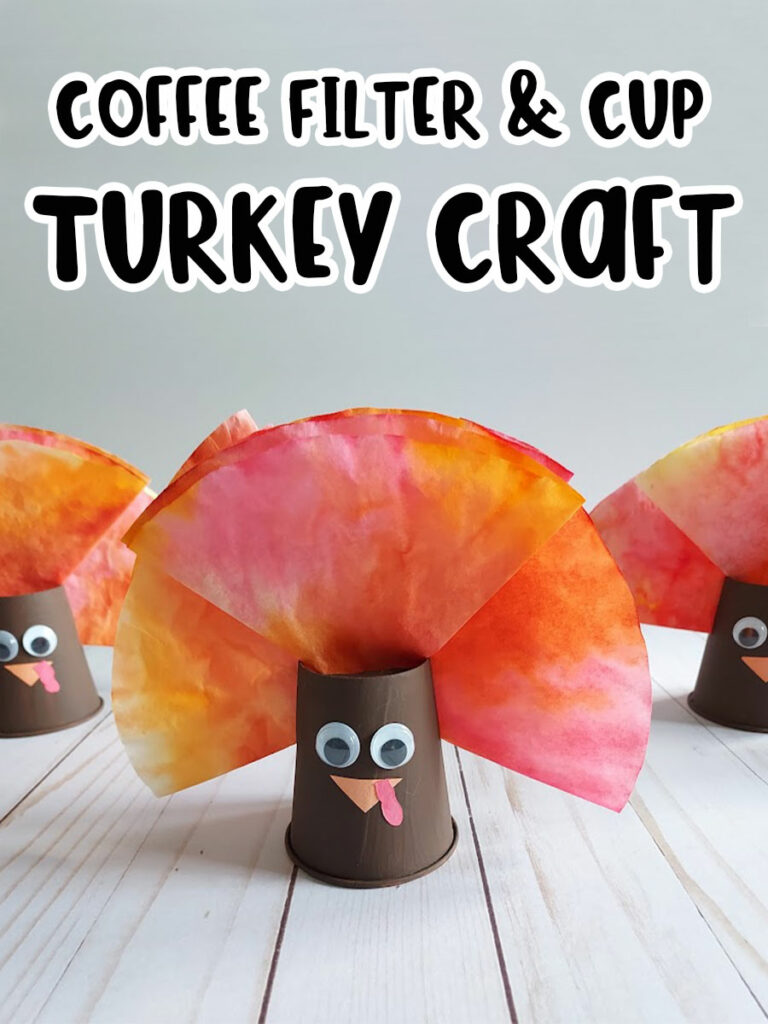
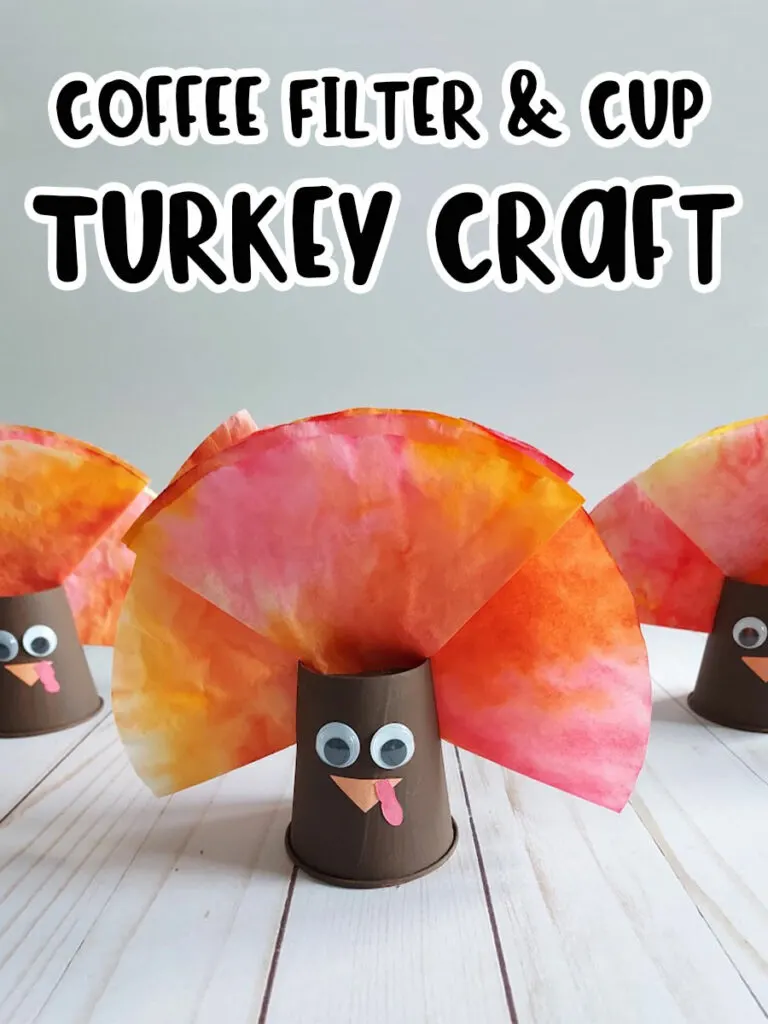
3D Coffee Filter Turkey Thanksgiving Craft
This paper cup turkey craft uses just a few common craft supplies and only takes about 20-30 minutes to complete (plus additional drying time).
Do this craft at home, as a family, or at a school for a special Thanksgiving craft art center activity.
Preschoolers will have fun making these paper cup turkeys and not even realize it is a fine motor activity. Preschool and kindergarten children will get coloring, painting, cutting and gluing practice.
Please note: It is highly recommended that adults help with poking the hole in the top of the cup for cutting.
These may require additional drying time depending on how thickly the paint is applied during the painting stage or on how much water is sprayed on the coffee filter during the blending stage.

This post contains affiliate links. As an Amazon Associate and a participant in other affiliate programs, we earn a commission on qualifying purchases.
It’s important to protect your work surface by placing the cups and coffee filters on top of a craft mat, parchment paper, zippered plastic bag, or even a paper plate before painting and spraying with water.
I also recommend wearing an art smock or old shirt while painting as acrylic paint may stain clothing.
If you prefer not to use acrylic paint, washable kid’s craft paint may also work as an alternative. If using washable paint, I recommend using a plain white cup as it won’t provide as much coverage to anything underneath.
Additionally, you could have the kids use markers on plain white cups as well.
Kids will enjoy painting the cups and also spraying the coffee filters with water. My girls especially loved watching how the colors blended together during the spraying stage!
Looking for more coffee filter crafts for kids? Don’t miss our 3D Coffee Filter Campfire, 3D Coffee Filter Pumpkin Craft, and our book of 15 cute coffee filter crafts.
Coffee Filter Paper Cup Turkey Supplies:

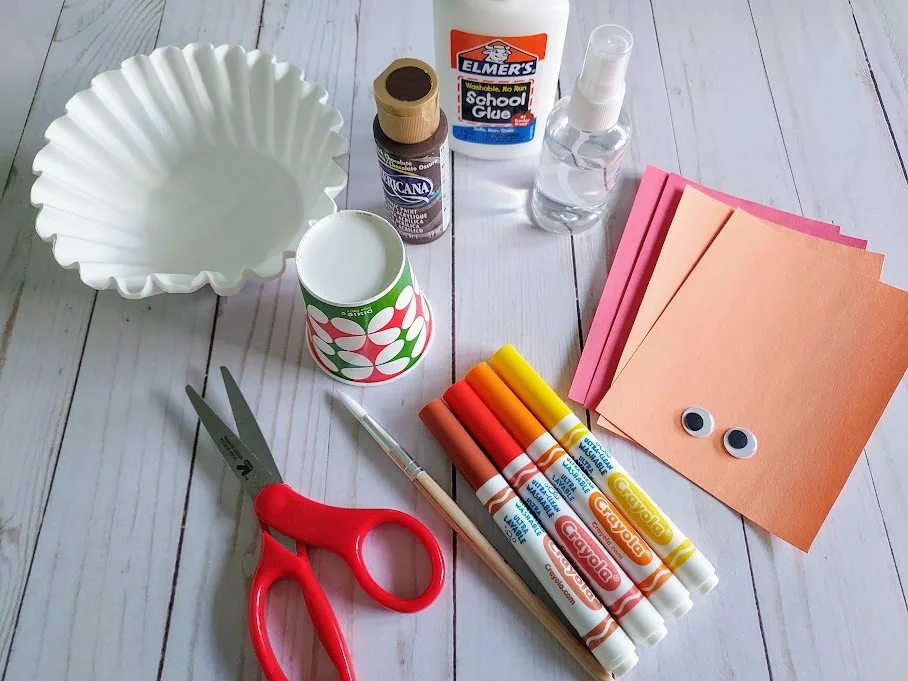
- 3 Round White Coffee Filters
- Washable Markers (Brown, Orange, Red, Yellow)
- Paper Cup
- Acrylic Paint (Brown)
- 2 Wiggle Eyes
- Construction paper (Orange and Red)
- Liquid Glue (white)
- Scissors
- Paintbrush
- Water Spray Bottle (for color blending)
- Paper Plate, parchment paper, ziploc bag or craft mat
How to Make Coffee Filter Paper Cup Turkeys:
Start by flattening out round coffee filters. I used three for one turkey.
Draw on them with a combination of orange, yellow, red and brown washable markers. Lightly color the entire area.
Tip: Coffee filters bleed color because they are so thin. Placing your coffee filter on top of a piece of construction or printer paper while coloring will help protect your work surface.
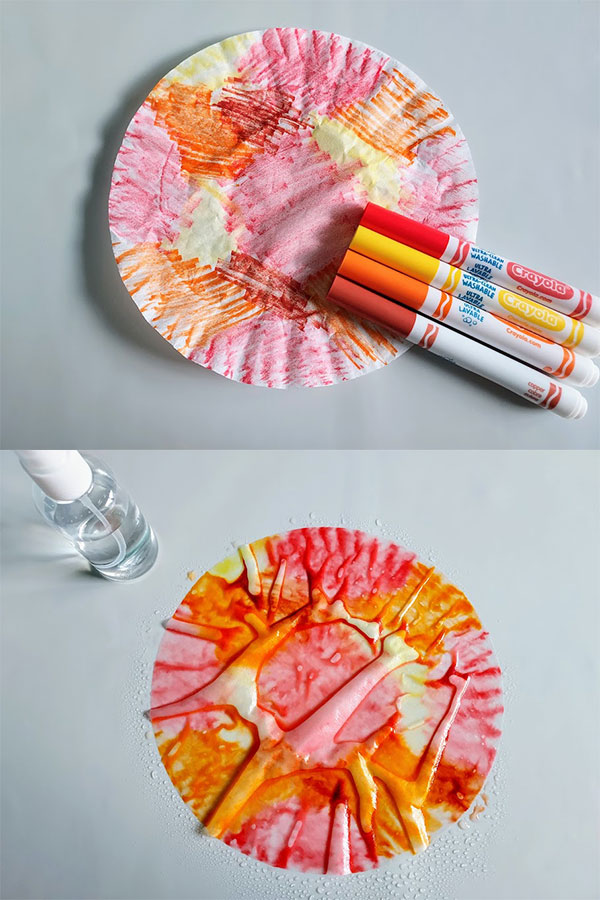

Place the colored coffee filters on a paper plate, sheet of parchment paper, craft mat or large zippered baggie and spray with water. Have fun watching the magic of the colors move and blend! Set aside to dry.
These may require additional drying time depending on how much water is sprayed on the coffee filter during the blending stage.

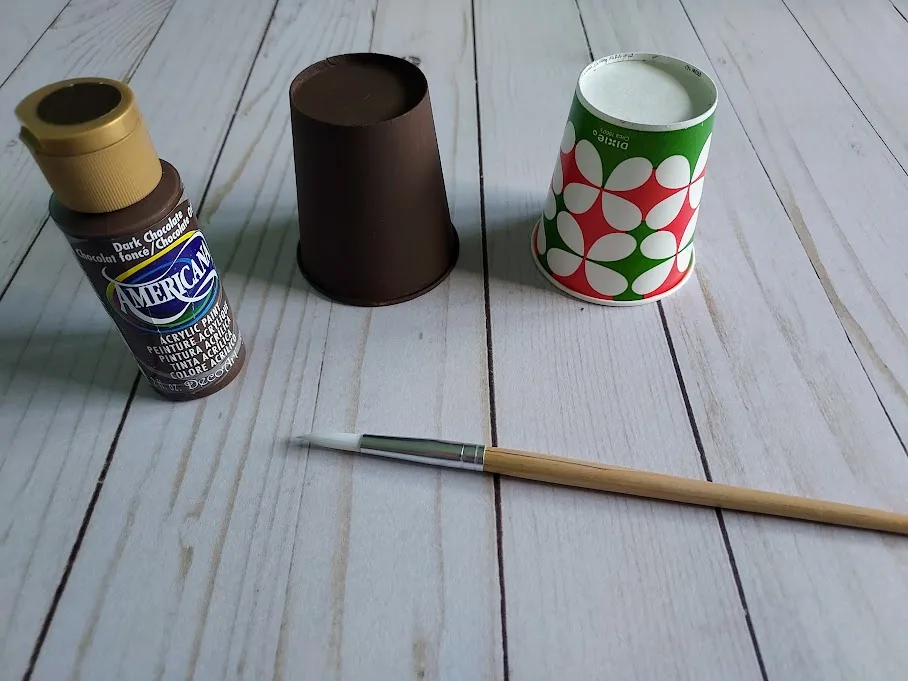
While your coffee filters are drying, paint your paper cup with brown acrylic paint. If you have a colored cup or prints on your cup, you may need multiple coats.
Set aside to dry.
With your construction paper, cut a small corner off the orange paper for the beak and a small wiggly shape out of the red for the wattle.
Once your painted cups are dry, it’s time to make a cut in the top of the cup. Adult assistance or supervision is highly recommended for this step.
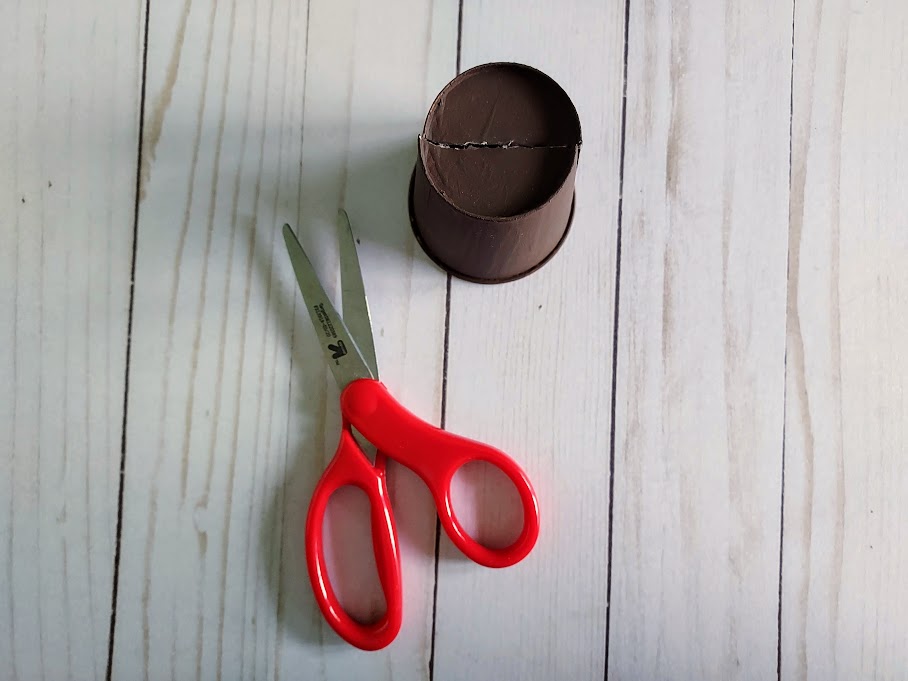

Poke a hole with one end of your scissors in the middle of the top of the cup and cut a line across the top. At the edges of your cut line, cut down the side of the cup about 1-1.5” on each side. This will be where you stick your coffee filter “feathers” in.
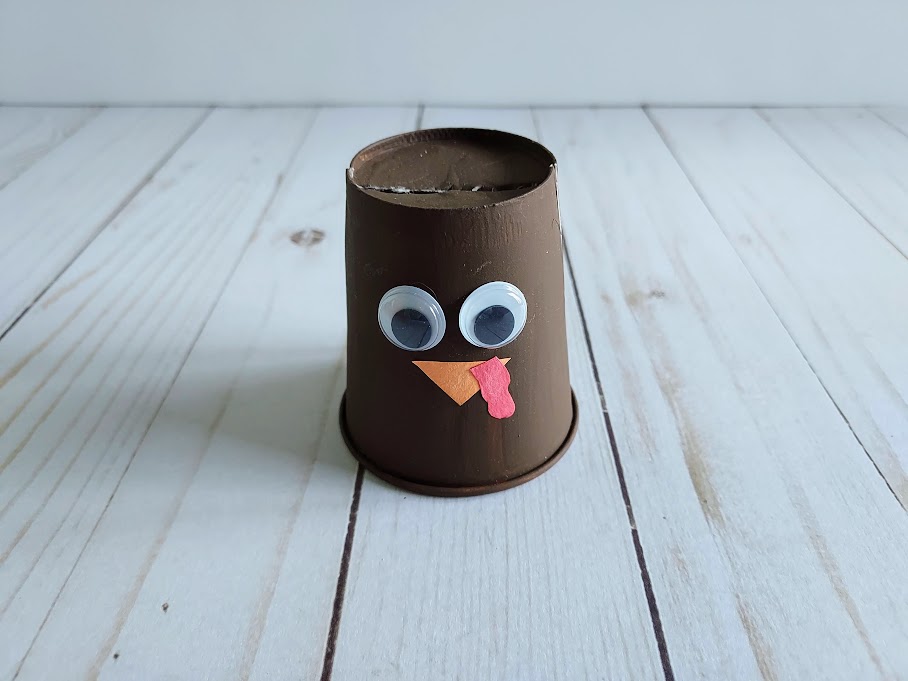

Next, glue the beak and wattle to one side of the cup. Align the turkey face with the cut line you just made.
If your wiggle eyes have a sticky back, peel this off and attach them to your cup. Otherwise, glue the eyes on as well.
Set aside to dry again.
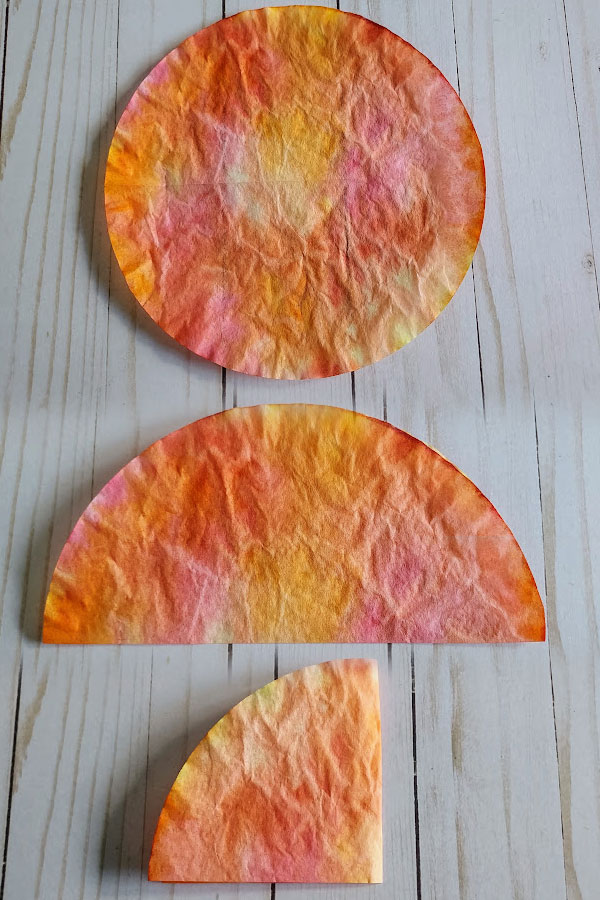

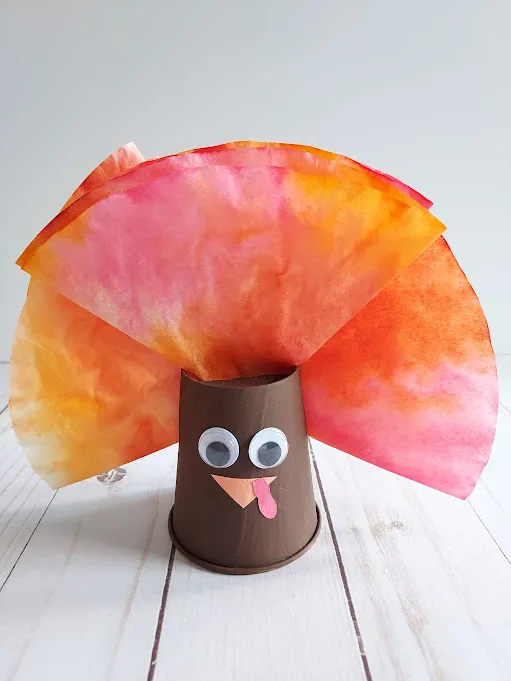
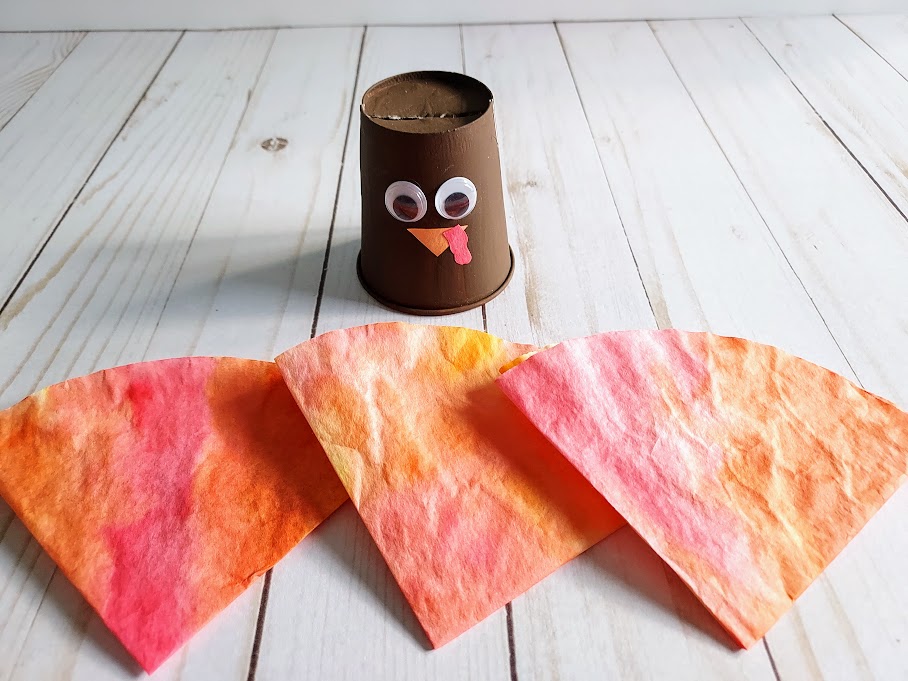
Once your coffee filters are dry, fold them in half, then in half again (2 total folds) that will make a triangle-like shape.

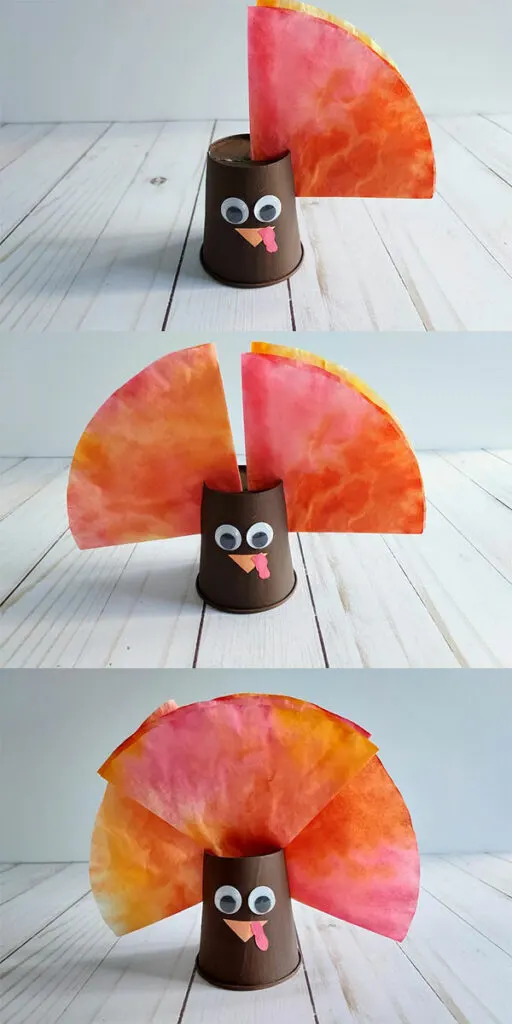
Finally stick your folded coffee filters into the slit you made in the top of your cup, arranging one on each side and one in the middle.

That’s it!

More Fall Craft Ideas:
- Coffee Filter Turkeys
- Turkey Pool Noodle Craft
- Tissue Paper Turkey Suncatcher Craft
- Turkey Popsicle Stick Craft
- Thankful Turkey Bucket Craft
- Fall Suncatchers
- Apple Popsicle Stick Craft
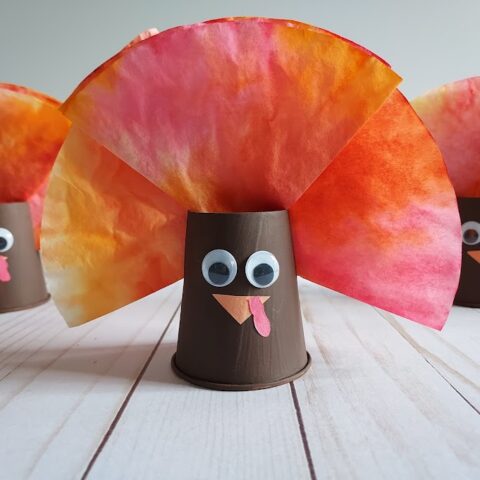

Coffee Filter Paper Cup Turkey Craft
Make these cute 3D coffee filter and paper cup turkeys for an easy fall craft for kids.
Materials
- 3 Round White Coffee Filters
- Washable Markers (Brown, Orange, Red, Yellow)
- Paper Cup
- Acrylic Paint (Brown)
- 2 Wiggle Eyes
- Construction paper
- Liquid Glue (white)
Tools
- Scissors
- Paintbrush
- Water Spray Bottle (for color blending)
- Paper Plate, parchment paper, ziploc bag or craft mat
Instructions
- Start by flattening out round coffee filters. I used three for one turkey.
- Draw on them with a combination of orange, yellow, red and brown washable markers. Lightly color the entire area.
- Place the colored coffee filters on a paper plate, sheet of parchment paper, craft mat or large zippered baggie and spray with water. Have fun watching the magic of the colors move and blend! Set aside to dry.
- These may require additional drying time depending on how much water is sprayed on the coffee filter during the blending stage.
- While your coffee filters are drying, paint your paper cup with brown acrylic paint. If you have a colored cup or prints on your cup, you may need multiple coats.
- Set aside to dry.
- With your construction paper, cut a small corner off the orange paper for the beak and a small wiggly shape out of the red for the wattle.
- Once your painted cups are dry, it’s time to make a cut in the top of the cup. Adult assistance or supervision is highly recommended for this step.
- Poke a hole with one end of your scissors in the middle of the top of the cup and cut a line across the top. At the edges of your cut line, cut down the side of the cup about 1-1.5” on each side. This will be where you stick your coffee filter “feathers” in.
- Next, glue the beak and wattle to one side of the cup. Align the turkey face with the cut line you just made.
- If your wiggle eyes have a sticky back, peel this off and attach them to your cup. Otherwise, glue the eyes on as well.
- Set aside to dry again.
- Once your coffee filters are dry, fold them in half, then in half again (2 total folds) that will make a triangle-like shape.
- Finally stick your folded coffee filters into the slit you made in the top of your cup, arranging one on each side and one in the middle.
Notes
Coffee filters bleed color because they are so thin. Placing your coffee filter on top of a piece of construction or printer paper while coloring will help protect your work surface.
It is highly recommended that adults help with poking the hole in the top of the cup for cutting.
Also recommend wearing a smock or old shirt while painting as acrylic paint may stain clothing.
A. Hager is a lover of books and all things crafty. She enjoys puzzles, board games and puppy snuggling. She is constantly adapting new recipes so her two children with food allergies are able to experience a variety of delicious and fun foods.
Esmé Slabbert
Thursday 12th of October 2023
Thank you for sharing your links with us at #282 SSPS Linky. See you again next week.