
This tissue paper bookmark is the perfect easy Mother’s Day craft for kids!
It also makes a great Teacher Appreciation, Father’s Day or Grandparent’s Day gift.
It’s an easy, inexpensive gift that is also quick enough for last-minute homemade gift ideas.
I love this project because it is fun to do, looks great and is also incredibly useful. Plus, any book lover will thoroughly enjoy the beautiful new bookmark!

Looking for more Mother’s Day projects like this? Don’t miss our felt flower bookmark craft, “I Love You To Pieces” printable card and craft and tissue paper mod podge picture frames!
Easy Colorful Laminated Bookmarks
These tissue paper bookmarks use just a few common craft supplies and take less than 20 minutes to complete.
It’s a quick and easy craft to include at school, as part of an art center for Mother’s Day, or a quick project to complete at home as a family.
This post contains affiliate links. As an Amazon Associate and a participant in other affiliate programs, we earn a commission on qualifying purchases.
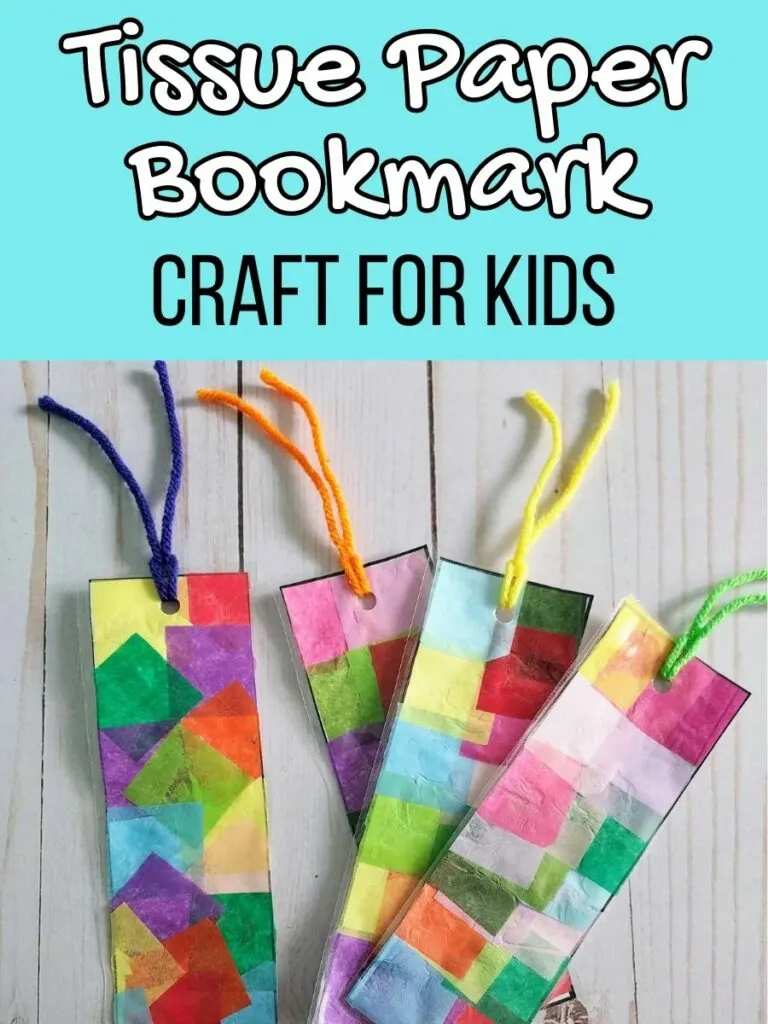
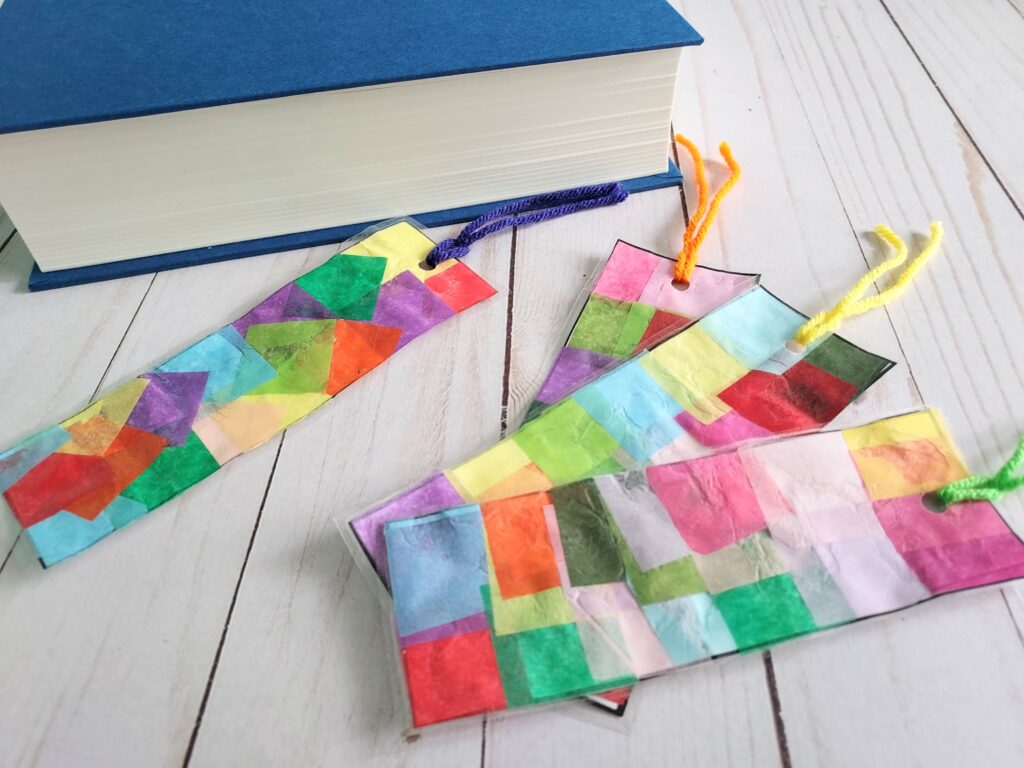
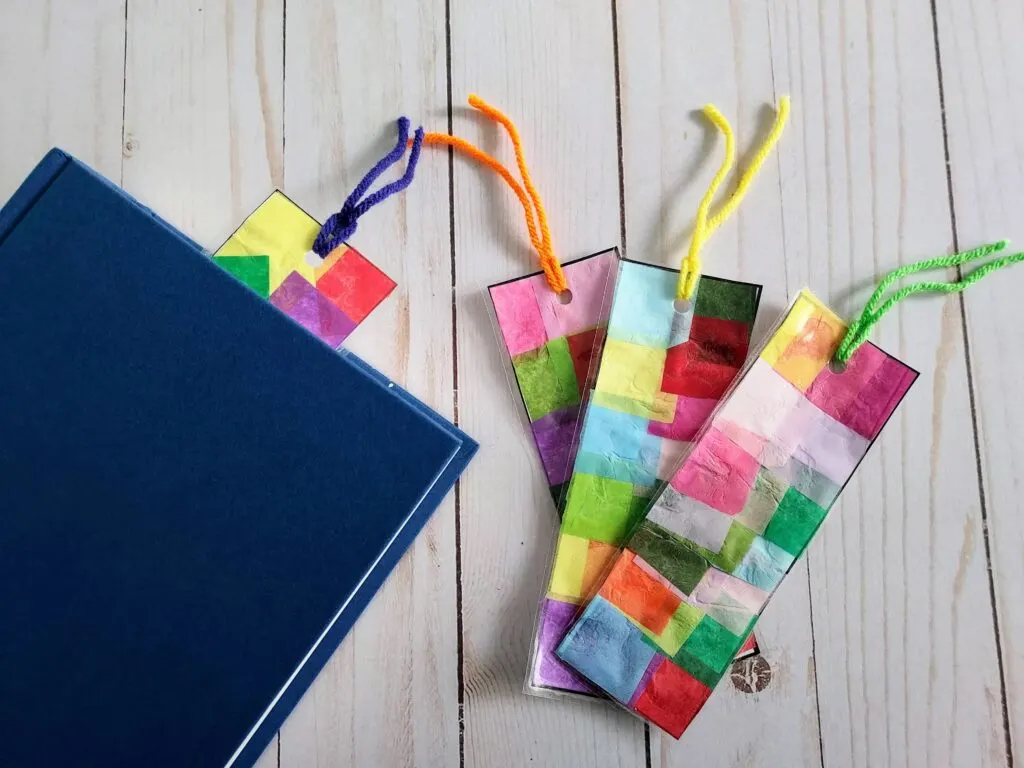
Just look at how lovely these look once laminated and finished off with a bit of colorful yarn! (If you don’t have a laminator, don’t worry, we will show you how to laminate them without a machine.)
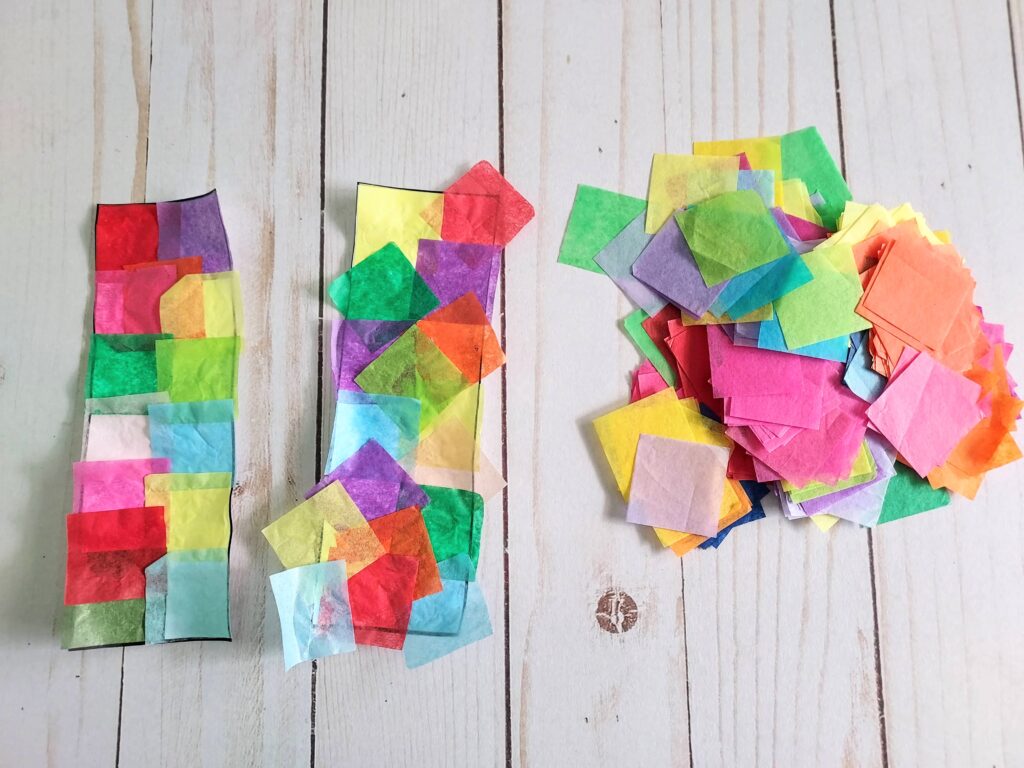
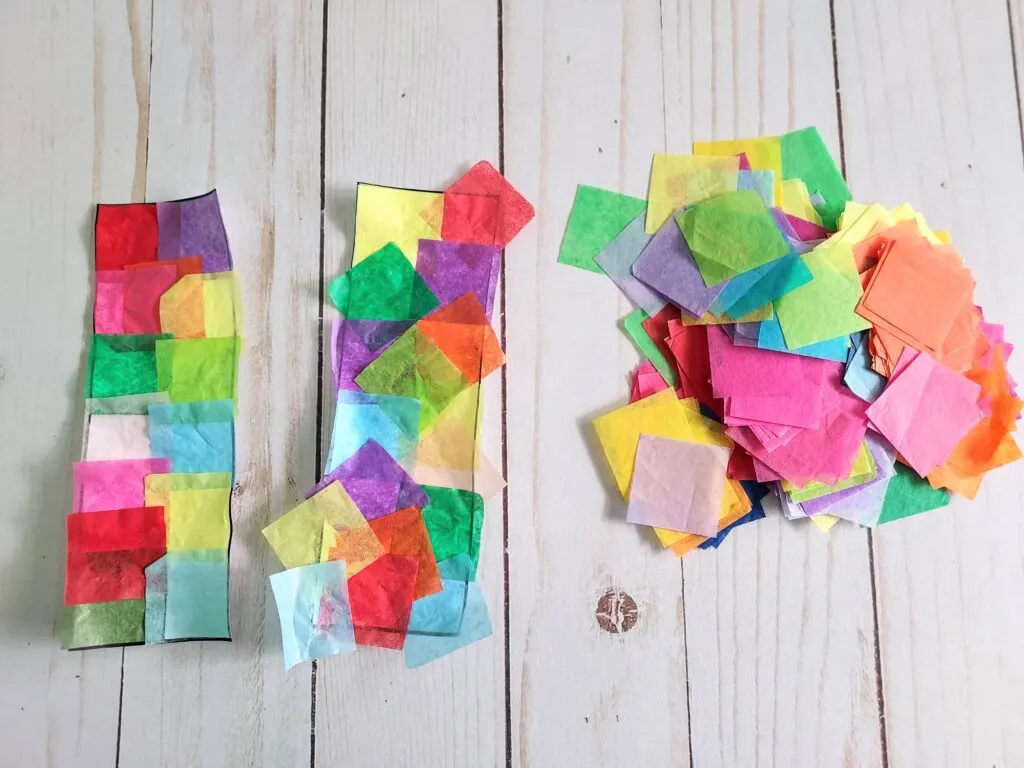
The tissue paper gives the bookmarks a faux stained glass look, which makes them so bright and pretty!

Making tissue paper bookmarks is a fun fine motor activity for preschool and kindergarten children that provides practice cutting out the bookmarks and gluing practice.
Older children will also enjoy this quick craft that they can complete on their own.
It’s also the perfect craft project if you want the kids to craft with minimal mess.
If you don’t have tissue paper on hand, you can still use the bookmark template for other projects.
For example, kids can paint or color the bookmarks with flowers, the words “I love Mom” or hearts before laminating and adding a colorful bit of yarn or ribbon.
Get even more ideas of what to do with all this colorful paper with our collection of tissue paper crafts for kids.
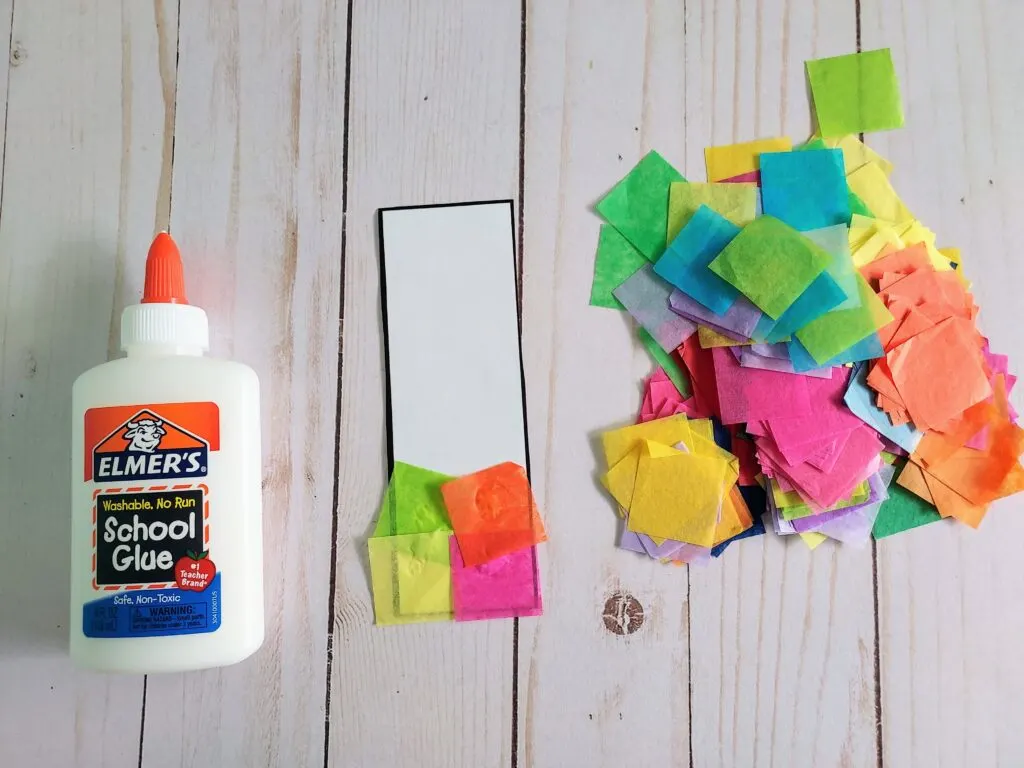
Tissue Paper Bookmark Craft Supplies:

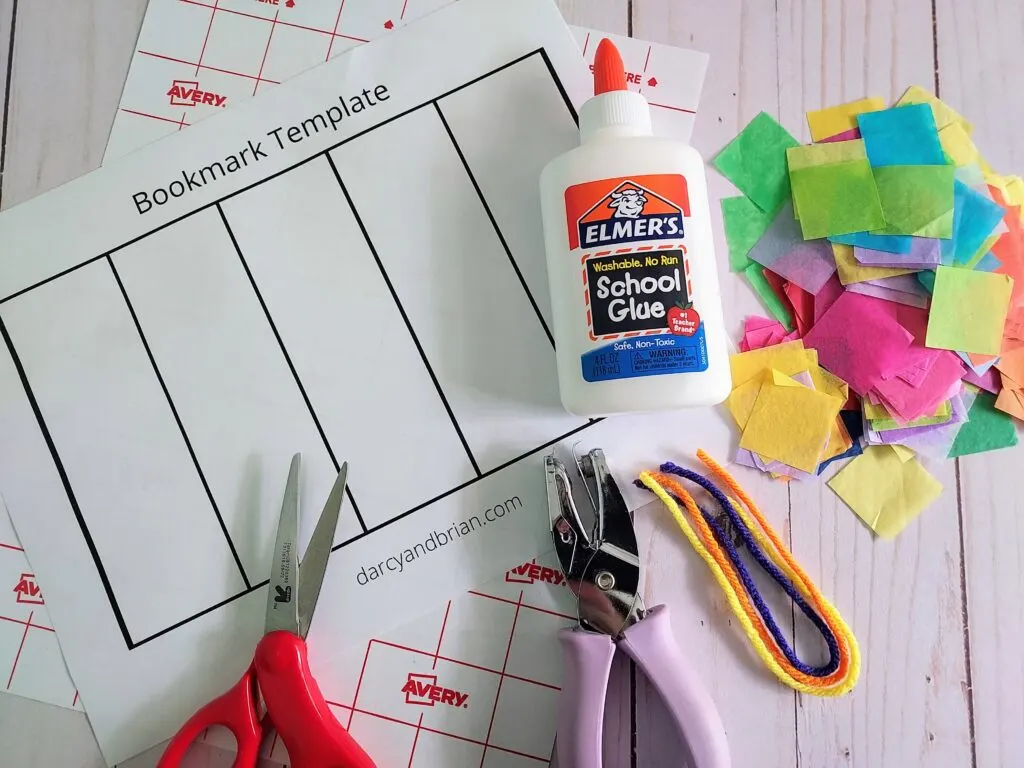
- Bookmark Template (available by filling out the form at the bottom of this post)
- Tissue paper in a variety of colors
- Scissors
- Glue
- 8” length of Yarn or Ribbon
- ¼” Hole Punch
- Self-Adhesive Laminating Sheets
How to Make a Tissue Paper Bookmark:
First you will need to download and print out our printable bookmark craft template.
I recommend using regular printer paper for this project. The lamination sheets seal better with the thinner paper. Cut out bookmarks from the template.
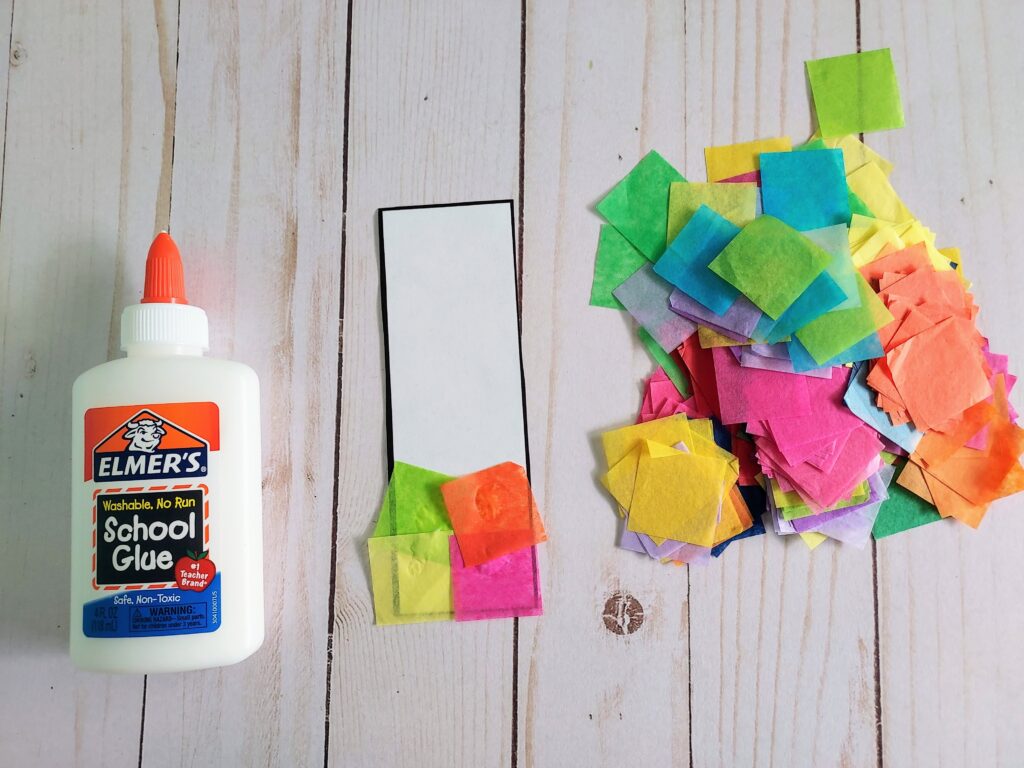
Next you will need to cut your tissue paper into small one inch squares in a variety of colors. You can also buy pre-cut tissue paper squares for a quick and easy project.
Younger children could also rip the tissue paper into smaller pieces and older children could cut their own. Then it is time to start gluing! Use regular liquid glue or glue sticks to cover the entire rectangle shape with tissue paper.

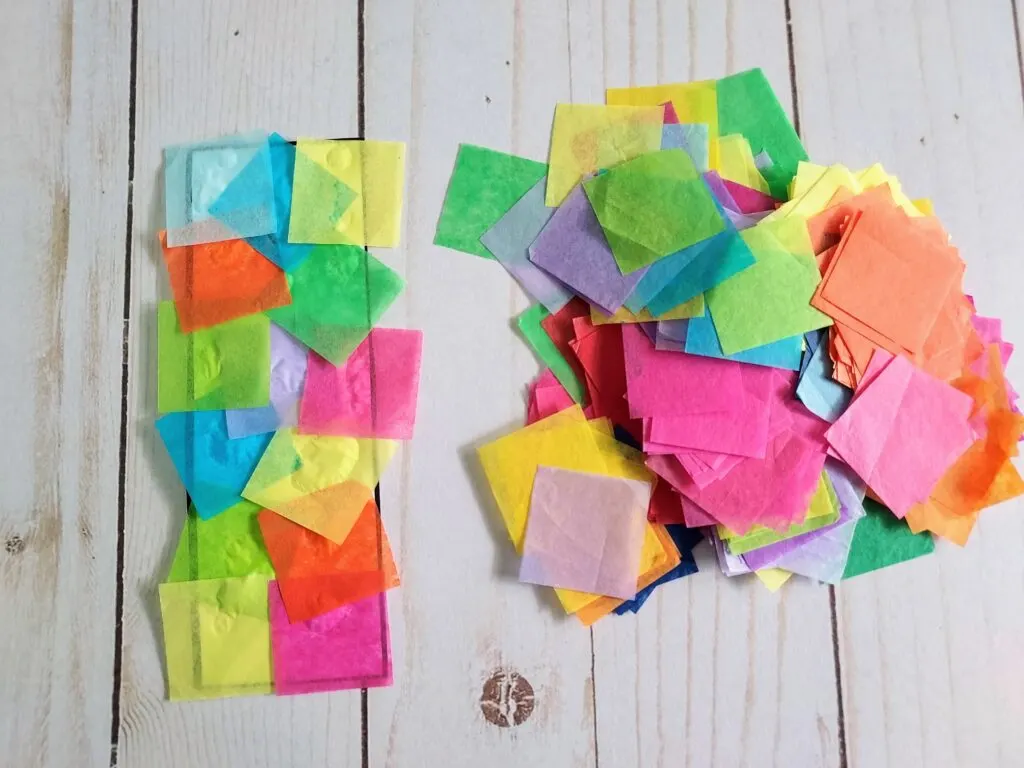
It’s okay if the tissue paper overlaps or goes over the edges. Set aside to dry.
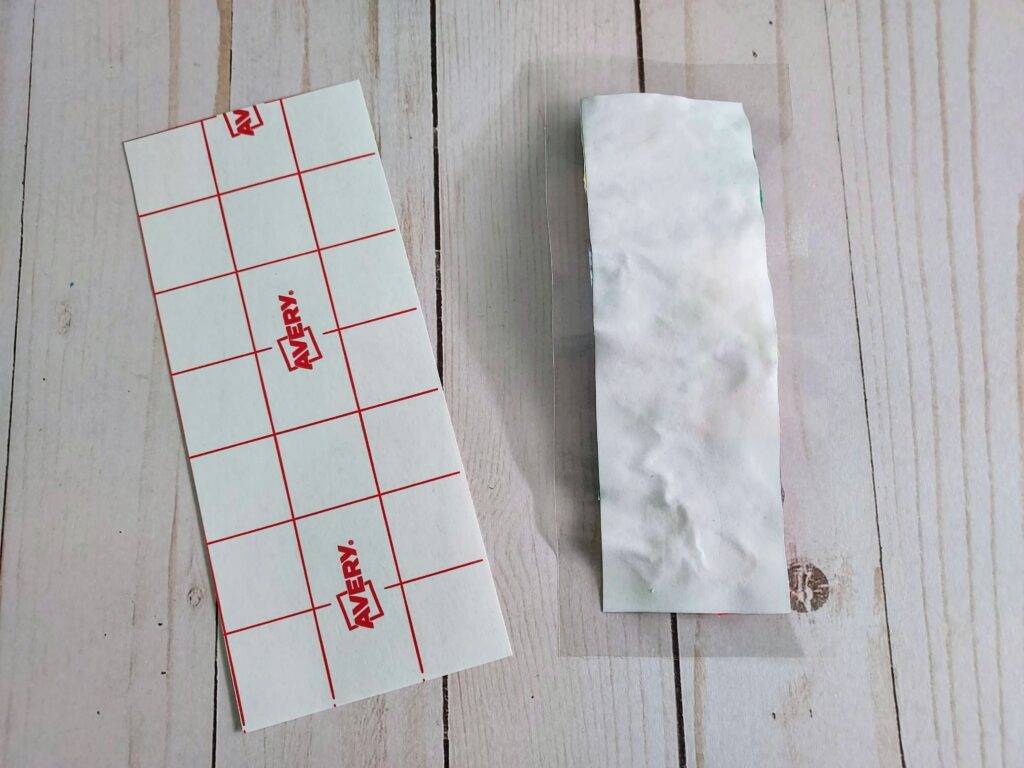
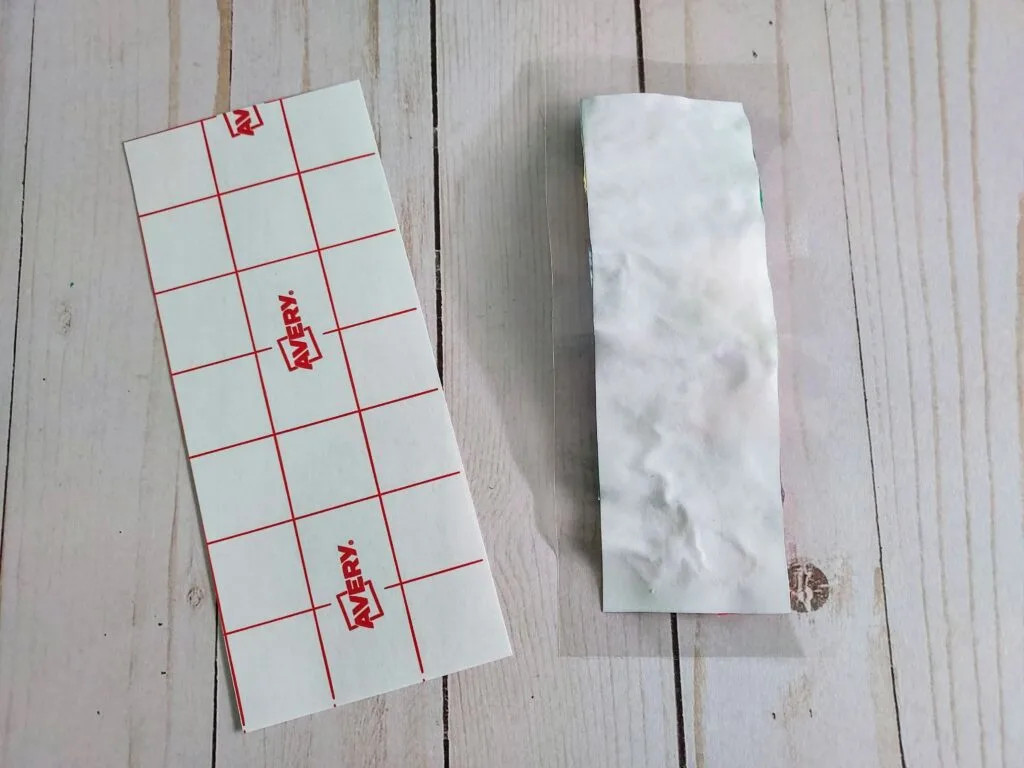
While the bookmark is drying, prep your other materials. Using the grid on the back of the Avery self-laminating paper, cut 2 pieces that are 3 squares x 7 squares.
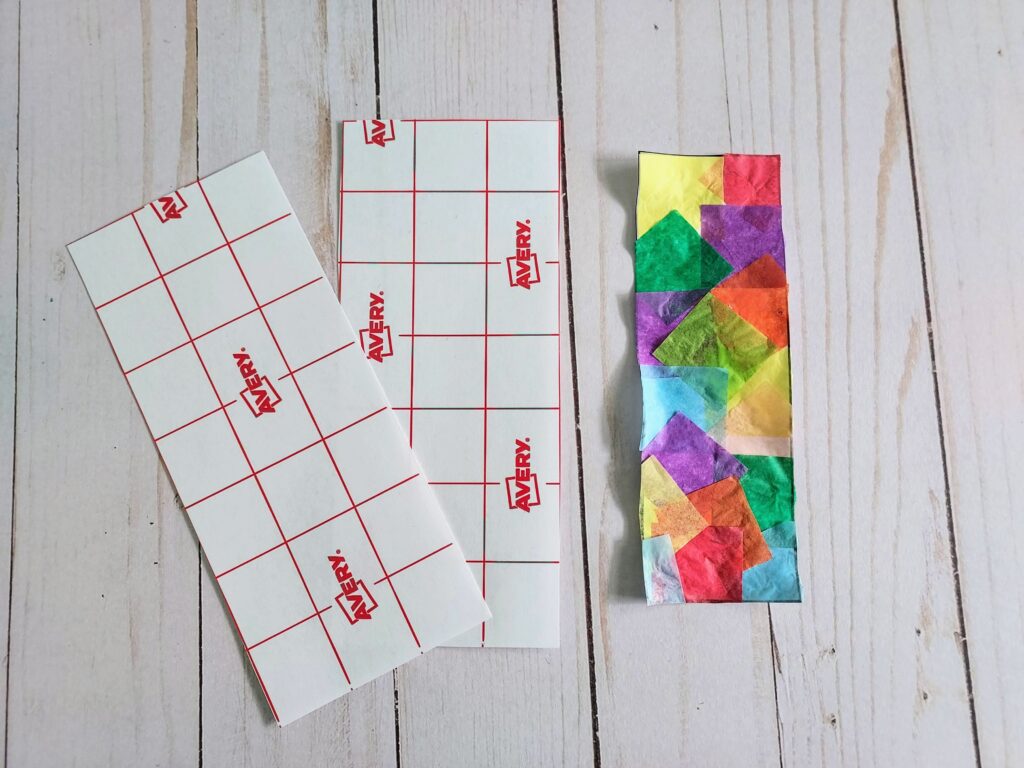

Also, measure and cut an 8” piece of yarn or ribbon. Once the glue is dry, cut any overhanging pieces of tissue paper from the bookmark.
When you are ready to laminate, place one lamination sheet glossy-side down and peel back the grid backing.
Gently place your bookmark, tissue paper side down, onto the sticky side of the lamination paper. Press and smooth out until thoroughly adhered.
Place your second lamination sheet on the table and peel back the grid backing.
Now, slowly and gently align with your other sheet of lamination paper, before pressing together.
Smooth out until no air bubbles remain and the bookmark is completely adhered to both sides.

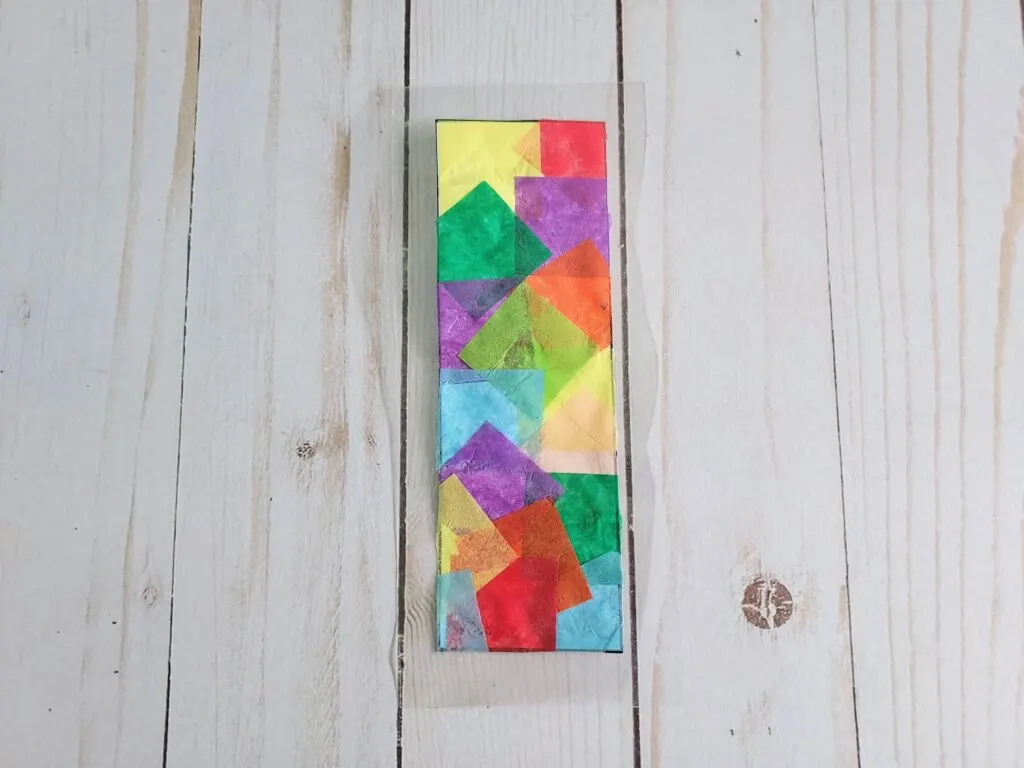
Trim the excess lamination paper, leaving at least ⅛” to ensure the lamination papers stay adhered together.
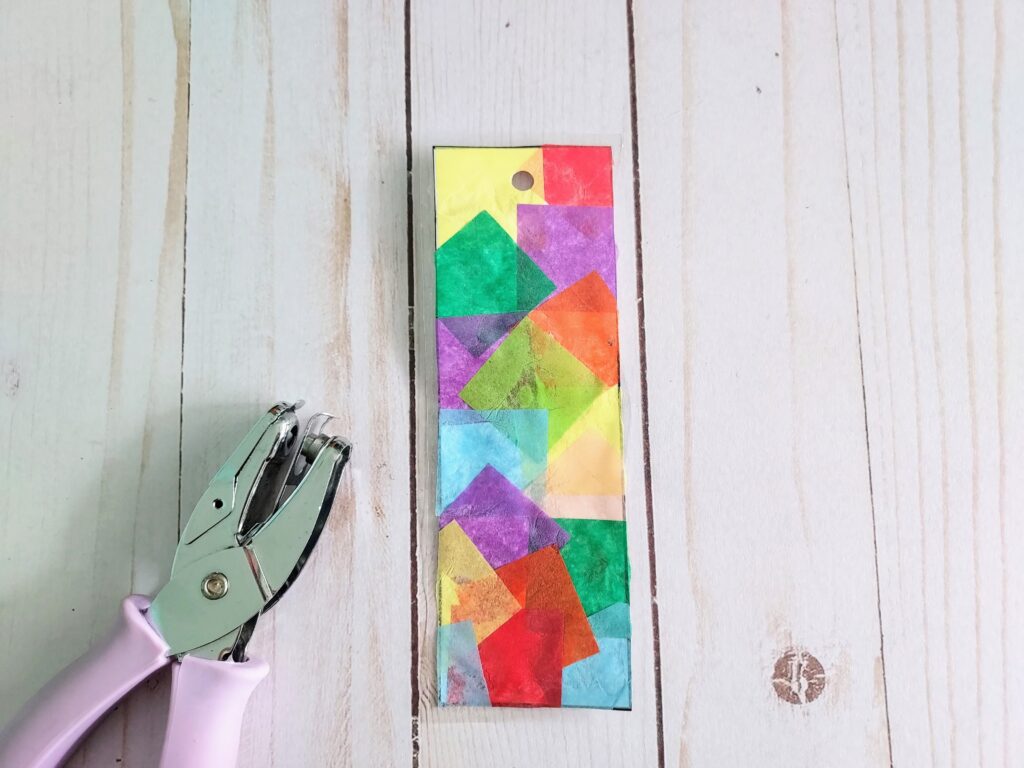
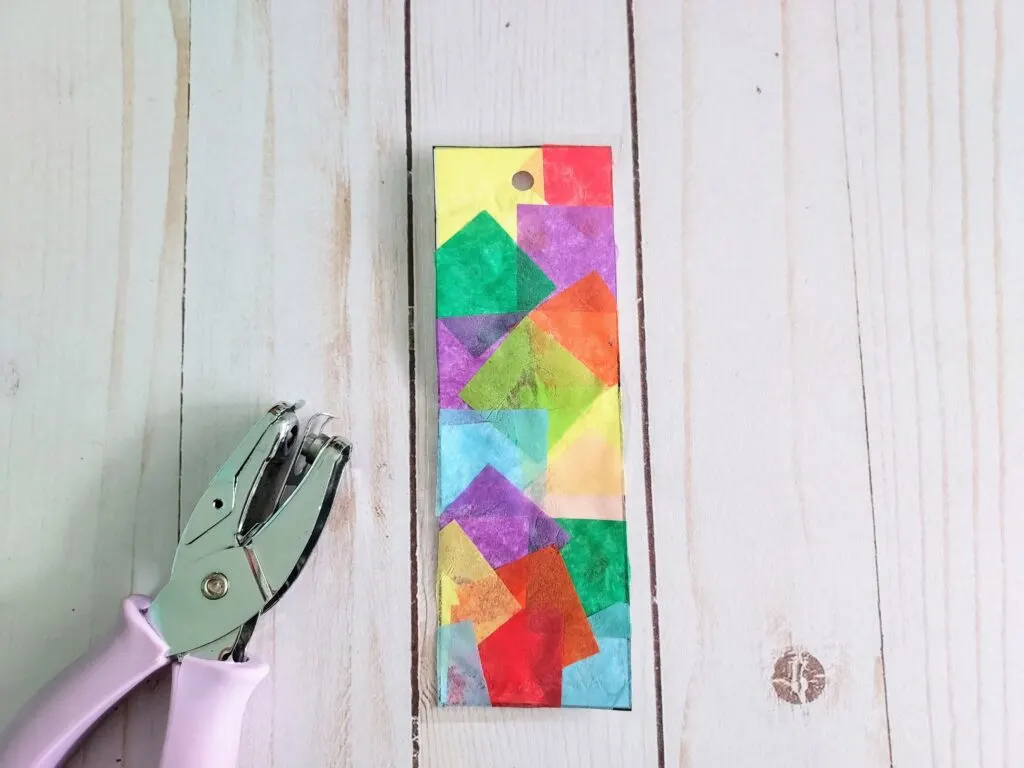
Using the hole punch, add one punch ¼-½” down from the top.
Be careful not to punch a hole too close to the edge or it might end up tearing over time.
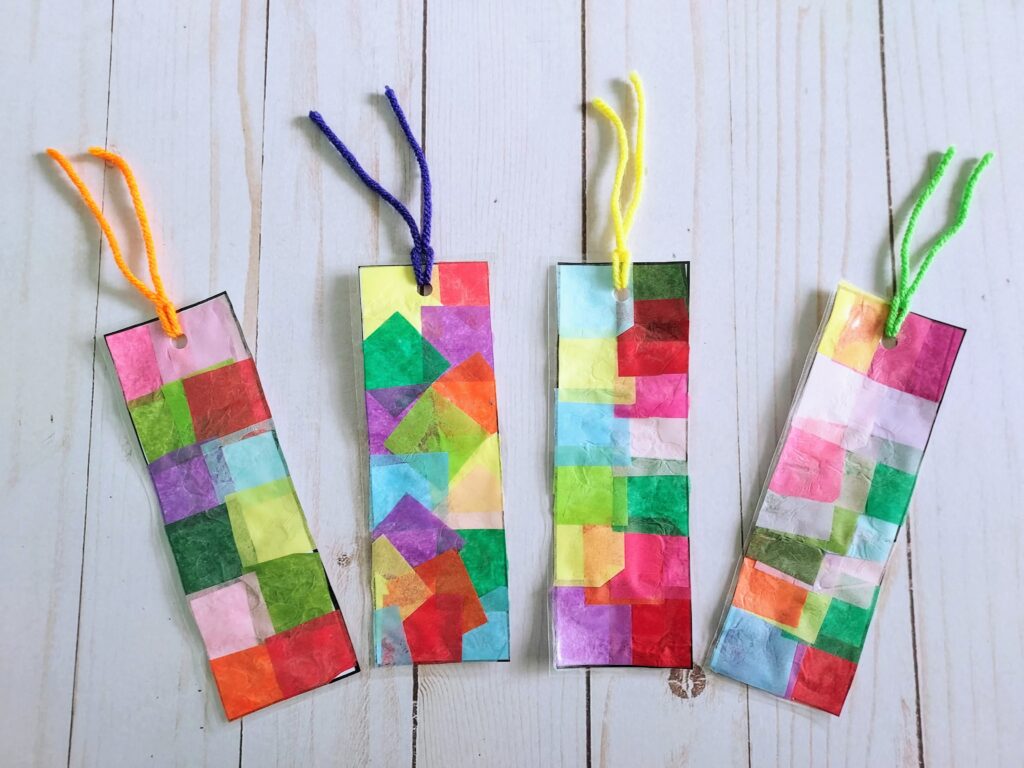

Finally, add your yarn or ribbon by folding the piece in half, inserting the middle loop through the hole and then pulling both ends through the loop. Tighten to secure.
Now you have a cute bookmark to give as a gift or to keep and enjoy!

More Bookmark Crafts:
More Tissue Paper Crafts:
- Heart Tissue Paper Suncatcher Craft
- Easy Tissue Paper Earth Day Craft
- Bunny Tissue Paper Suncatcher Craft
- Hatching Chick Tissue Paper Suncatcher Craft
- Turkey Tissue Paper Suncatcher Craft
- Christmas Tree Tissue Paper Suncatcher Craft
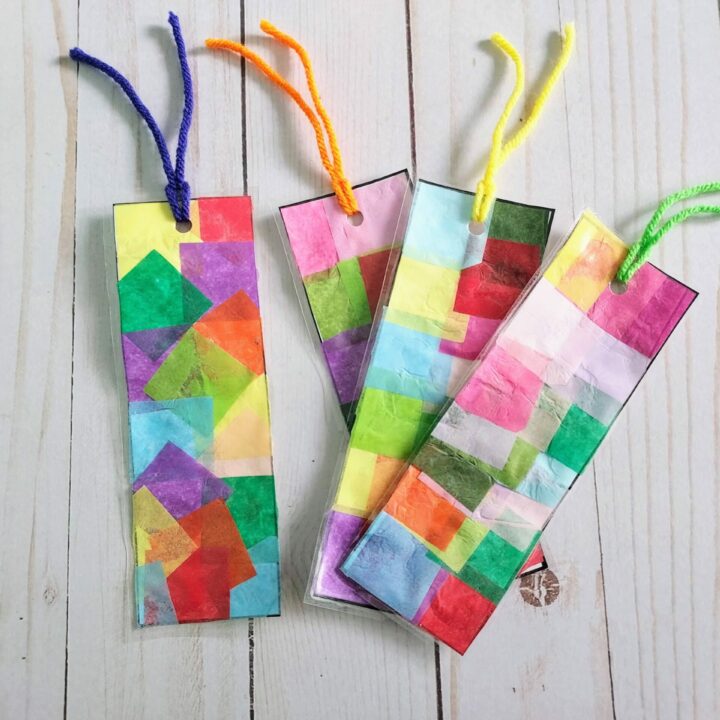

Tissue Paper Stained Glass Bookmarks
Easy, colorful bookmark craft for kids of all ages to make at home or school. Great homemade gift for Mother's Day, Father's Day, Teacher Appreciation, and Grandparent's Day.
Materials
- Bookmark Template
- Tissue paper in a variety of colors
- Glue
- 8” length of Yarn or Ribbon
- Self-Adhesive Laminating Sheets
Tools
- Scissors
- ¼” Hole Punch
Instructions
- First you will need to download and print out our printable bookmark craft template.
- Cut out bookmarks from the template.
- Cut tissue paper into small one inch squares in a variety of colors or use pre-cut squares.
- Use regular liquid glue or glue sticks to cover the entire rectangle shape with tissue paper. Set aside to dry.
- Using the grid on the back of the Avery self-laminating paper, cut 2 pieces that are 3 squares x 7 squares.
- Also, measure and cut an 8” piece of yarn or ribbon.
- Once the glue is dry, cut any overhanging pieces of tissue paper from the bookmark.
- When you are ready to laminate, place one lamination sheet glossy-side down and peel back the grid backing.
- Gently place your bookmark, tissue paper side down, onto the sticky side of the lamination paper. Press and smooth out until thoroughly adhered.
- Place your second lamination sheet on the table and repeat step 14.
- Now, slowly and gently align with your other sheet of lamination paper, before pressing together.
- Smooth out until no air bubbles remain and the bookmark is completely adhered to both sides.
- Trim the excess lamination paper, leaving at least ⅛” to ensure the lamination papers stay adhered together.
- Using the hole punch, add one punch ¼-½” down from the top.
- Add your yarn or ribbon by folding the piece in half, inserting the middle loop through the hole and then pulling both ends through the loop. Tighten to secure.
Notes
Drying time may vary.
A. Hager is a lover of books and all things crafty. She enjoys puzzles, board games and puppy snuggling. She is constantly adapting new recipes so her two children with food allergies are able to experience a variety of delicious and fun foods.
Mercedes
Tuesday 2nd of July 2024
I have used clear packing tape to "laminate" bookmarks. I work with children in afterschool and summer camps. When working with a lot of children a roll of clear packing tape is cheaper! Thank you for this idea...I have found plenty of successful crafting and games on your site!!
Darcy Zalewski
Tuesday 2nd of July 2024
That is a great tip! Thank you for sharing it with us, Mercedes. I am so happy that you are enjoying our crafts and games too!