
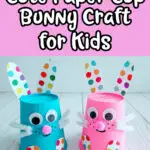
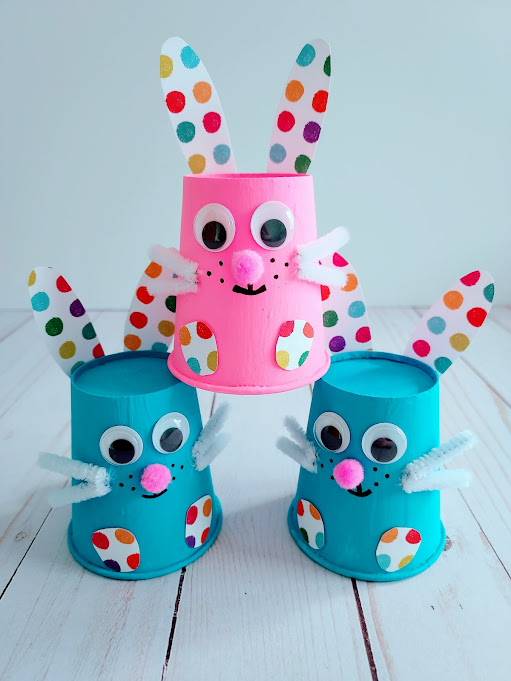
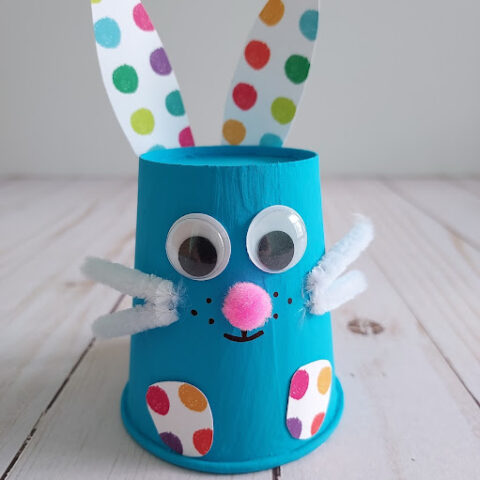
Are you looking for simple Easter crafts for kids to enjoy at home or in school? Check out this delightful paper cup bunny craft that adds a fun touch!
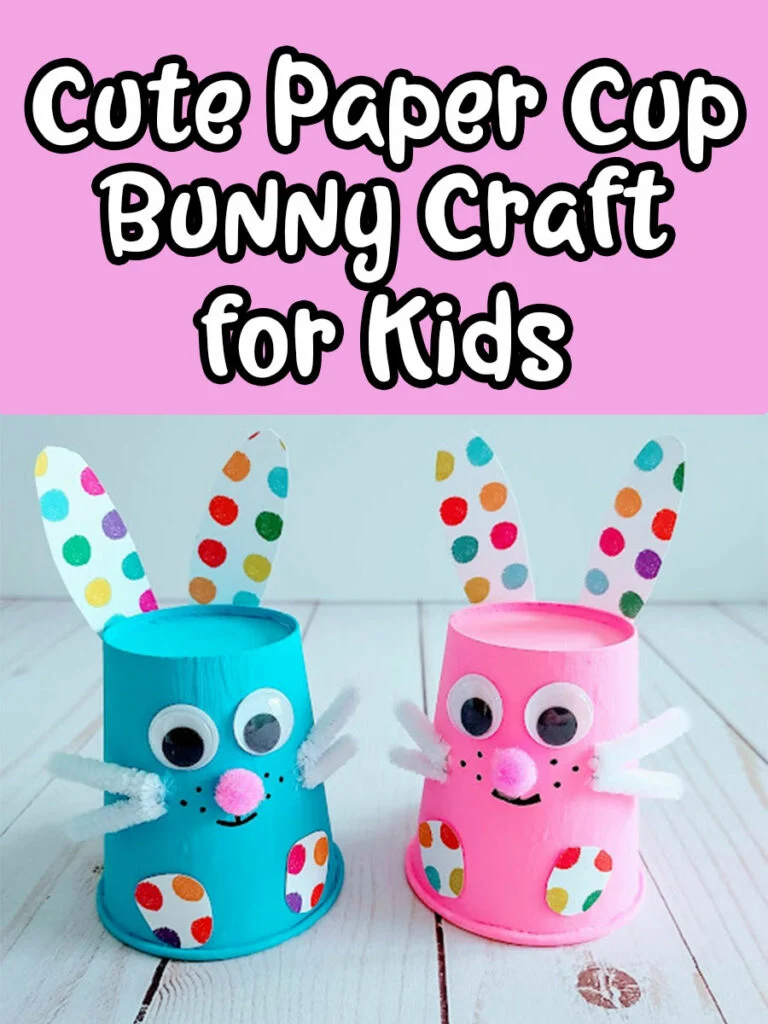
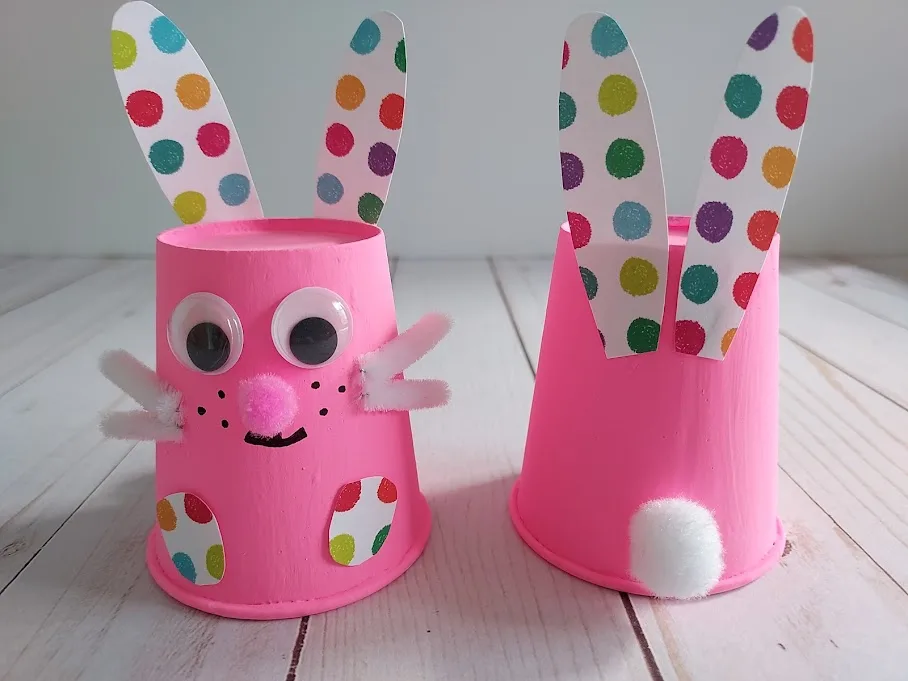
I adore how these three-dimensional bunny crafts can stand independently, making them perfect for decorating any space effortlessly.
These charming bunnies are wonderful for enhancing your home or classroom decor. Line them up along your mantelpiece, tables, or shelves at home. Alternatively, brighten up desks or window sills at school.
For an adorable Easter dinner centerpiece, stack these bunnies together. This craft project is suitable for kindergarten and elementary school kids. Preschoolers can also join in with a little help.

Dixie Cup Easter Bunny Craft Learning Benefits
This cute paper cup bunny craft uses just a few common craft supplies you likely already have and only takes about 30 minutes to complete (plus additional drying time).
Plan to create these adorable bunnies at home, as a family, or at a school for a special Easter craft art center activity.
Fine Motor Skills
These paper cup bunnies are just one of our craft ideas for kids that provide fine motor practice.
In particular, preschool and kindergarten children can strengthen their fine motor skills by painting, cutting, and gluing their projects together. Even older kids will benefit as those are important skills through elementary.
Younger hands may need help but it’s a great opportunity for practice, even if it’s not the final product the first time!
Painting smoothly and with enough coverage requires kids to hold a brush like a pencil (great practice for smaller hands!) and critical thinking skills to estimate how much paint they’ll need to complete the craft.
These may require additional drying time depending on how thickly the paint is applied during the painting stage.
Art and Creativity
Art composition comes into play with this paper cup rabbit craft as kids decide how to arrange the face.
Discuss what bunnies look like, show illustrations and photos, and ask questions to guide them before gluing.
You can provide a finished craft example for littler kids to base theirs on, and ask older kids to fiddle around with the various parts first to make the face on a practice piece of paper.
You can further the art education by asking kids why they picked the colors they did. Did they make more realistic, natural-colored bunnies like they’ve seen in real life? Or ones of different colors? Why? Challenge them to go beyond simple answers like “Because I like those colors.”

Math Skills
Although we’ve provided a template, kids can use their math skills at all ages to guess-estimate how big they’d like their bunny ears to be.
How can they adjust where they glue them to make them taller or shorter? Or maybe they want to ditch the template altogether and make mega or mini ears!
At school, they can also form groups based on rabbit color or other features to share their creations. Then, have them count!
- How many kids are in each group?
- How many blue bunnies are there?
- How many of a certain other color or feature?
- Don’t forget a group for ones that are totally unique!
A designated sharer can give their smaller group’s information to the larger group or individual kiddos can fill out a tally or number worksheet with their observations.
Younger kids can also make several sets of bunnies and practice matching them and sorting them by color or feature (white noses vs. pink noses, polka dot printed ears vs. hand-colored ears).
Older kids may fill out a Venn diagram of how their paper cup rabbits are alike, different, and the same as what real bunnies are like. Pair them in partners or small groups to compare answers and add to their work.
This post contains affiliate links. As an Amazon Associate and a participant in other affiliate programs, we earn a commission on qualifying purchases.
Max Fun 60PCS Easter Wood Cutouts for CraftsROCWOHO 36 PCS Mix and Match Make Your Own Stickers with Easter Egg, Bunny, Chicken, Sheep,Max Fun 208PCS Easter Foam Stickers SetCreative Roots Paint Your Own Bunny Garden StoneKlever Kits 18 Pcs Easter Suncatchers Crafts SetDan&Darci Egg Squishy Painting Kit


More Easter Crafts for Kids
If you’re eager to find even more creative projects, then you will love these engaging and easy-to-make crafts for children of all ages. These crafts are perfect for family bonding time or for giving an Easter-themed boost to any classroom activity.
- Bunny Tissue Paper Suncatcher Craft
- Felt Easter Egg Craft
- Hatching Chick Tissue Paper Suncatcher Craft
- Coffee Filter Easter Egg Craft
Paper Cup Bunny Craft Supplies
Here is a detailed list of all the materials and tools you’ll need to create these adorable paper cup rabbits:

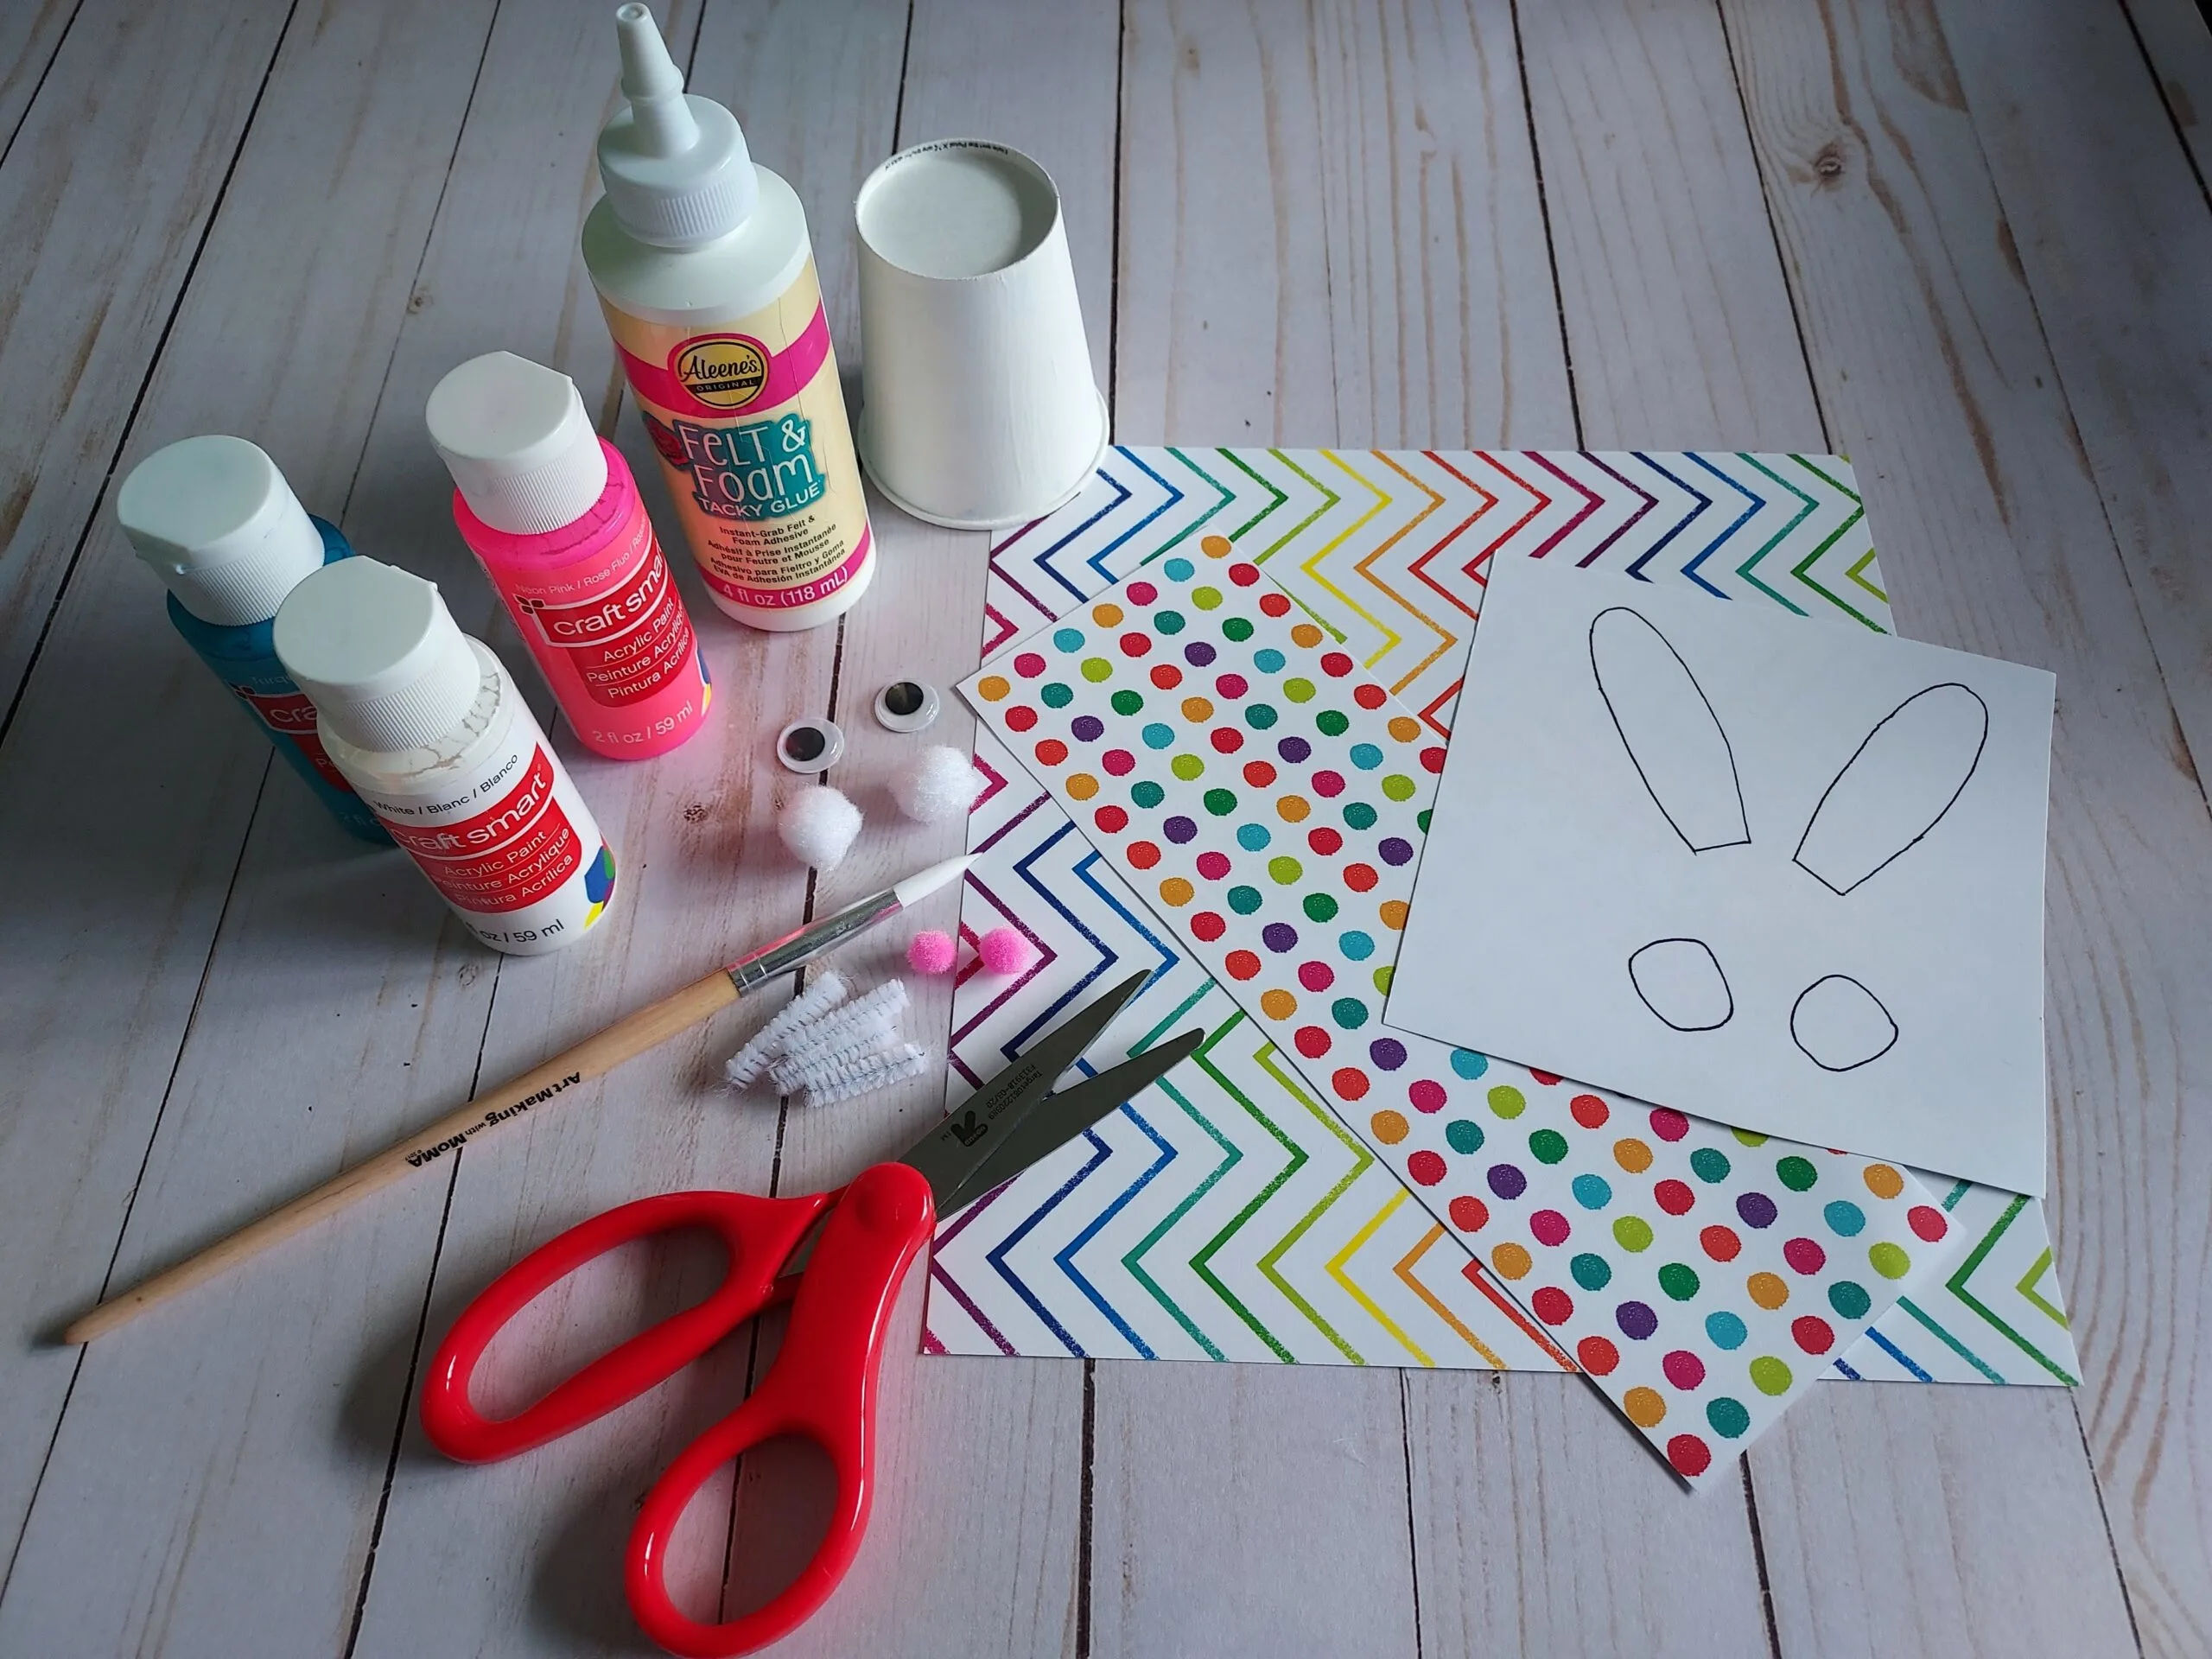
- Paper Cup Bunny Craft Template (available for free by filling out the form at the end of this post)
- Paper Cup
- Acrylic Paint (White, Pink, Blue, etc.)
- Patterned Cardstock
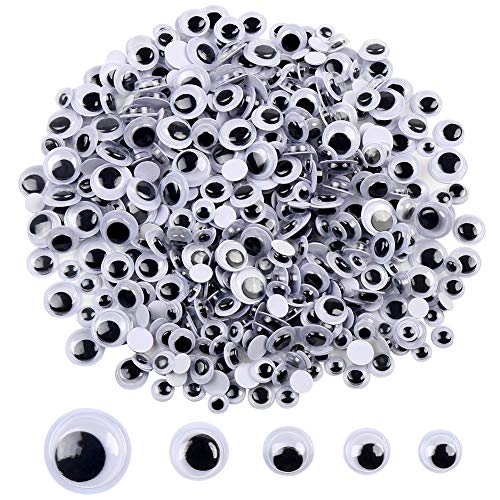
- 2 Wiggle Eyes
- ¼” Pink Pom Pom
- ½” White Pom Pom
- White Chenille Stem
- Aleene’s Felt & Foam Tacky Glue
- Scissors
- Paintbrush
- Black Marker (for mouth)
When painting, it’s a good idea to use a craft mat and wear an art smock or an old shirt to prevent staining from acrylic paint.
If you’re crafting with young kids, a large group, or just want a less messy option, consider using solid color party cups instead of painting.
Another alternative is to have kids color plain white paper cups with markers. Remember to adjust the template size if using larger cups as they are designed for 5 oz Dixie cups.
Shop some of my favorite craft supplies on Amazon!
How to Make Paper Cup Bunnies:
First you will need to download and print out our printable paper cup bunny craft template.
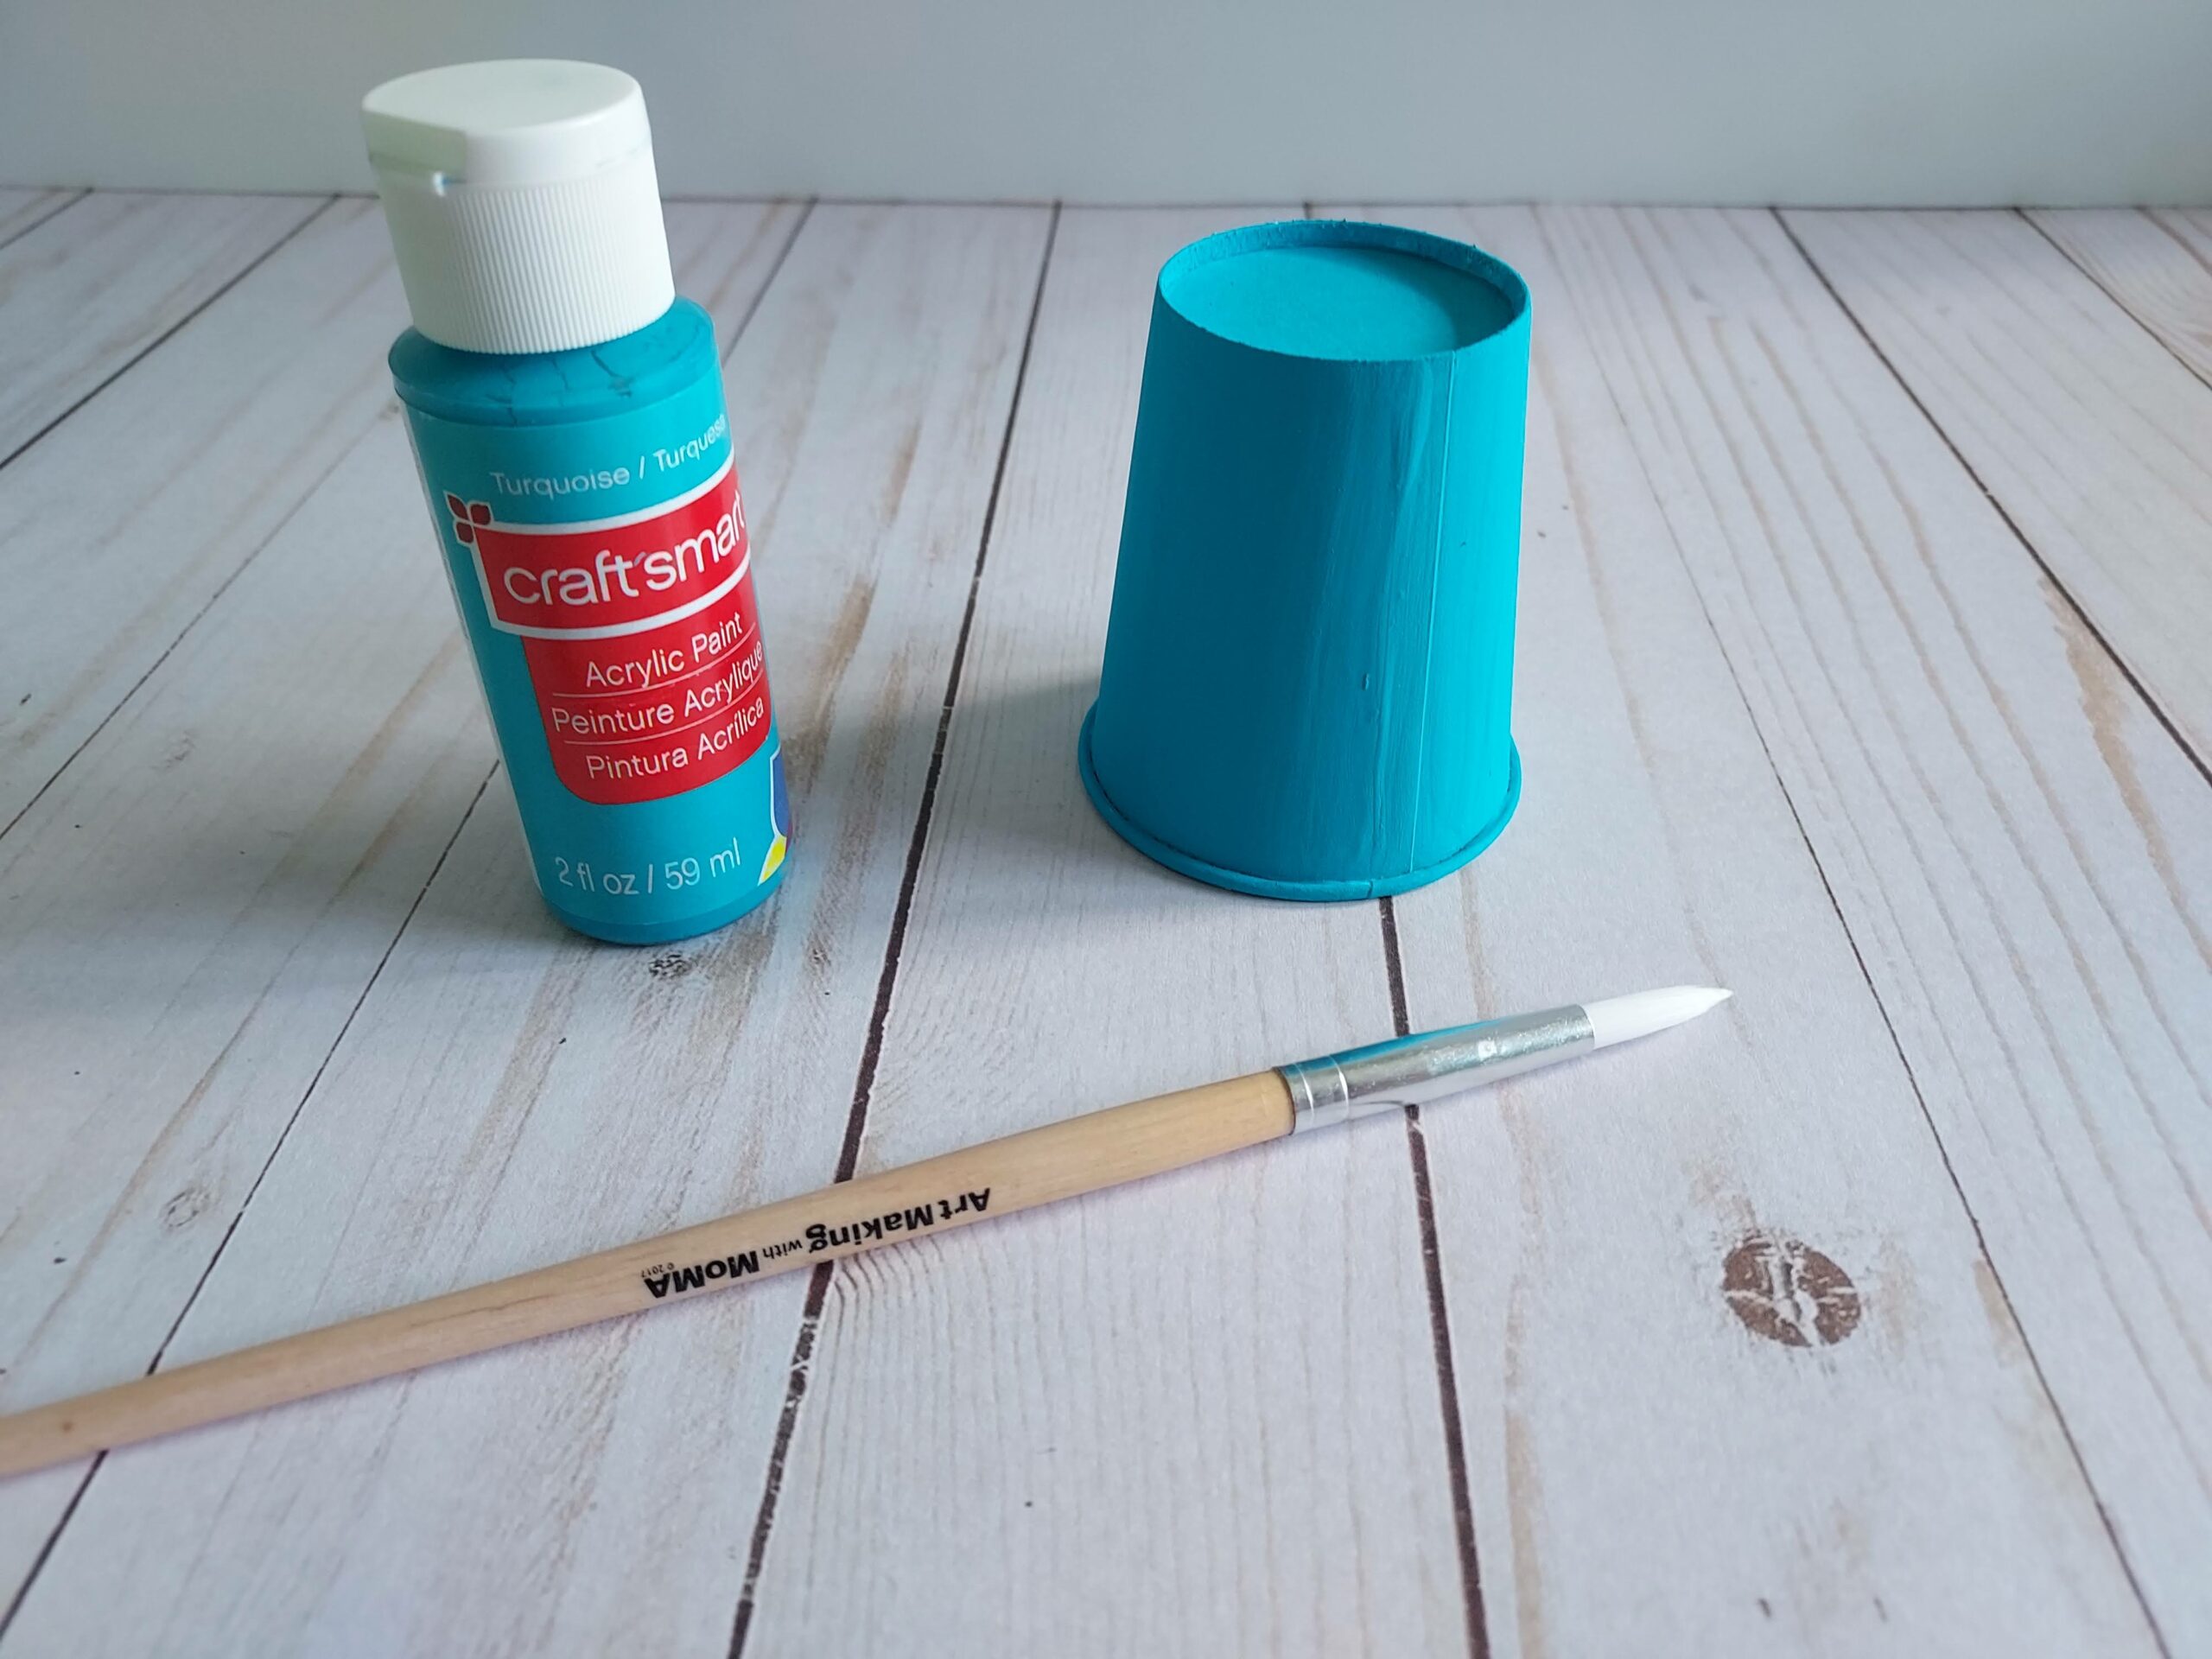
I suggest starting out by painting your Dixie cup white first, if it is not already solid white. This will help cover any patterns on the paper cup. Allow to dry.

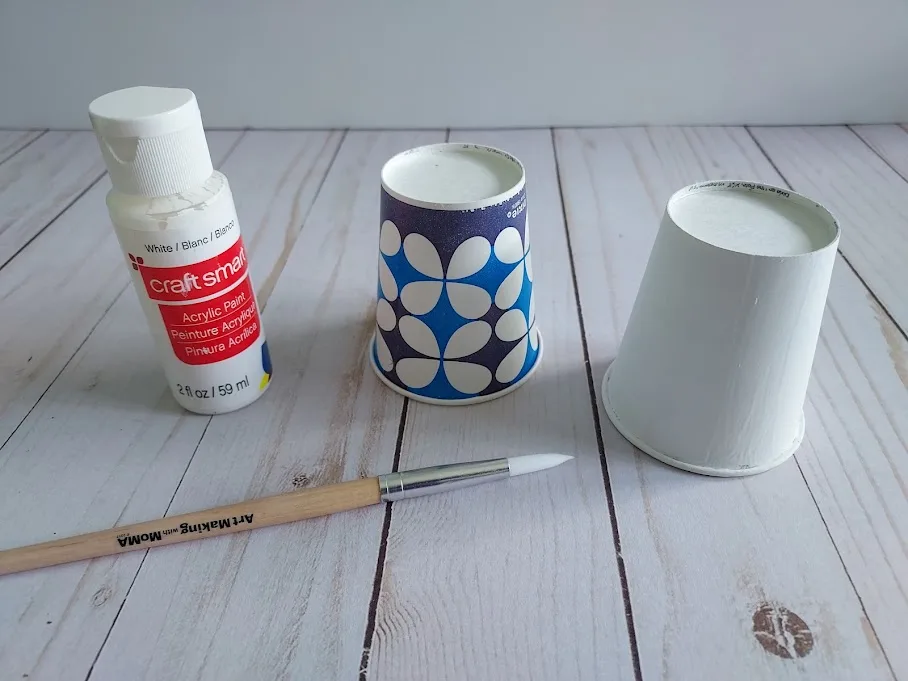
Next, paint the cup your choice of color on a protected surface. We used pink and blue. Multiple coats may be needed depending on how thickly the paint is applied and whether or not you painted it white first.
While your cup is drying is a good time to prep your other supplies.

Cut out and then trace the ears and feet onto patterned cardstock. I recommend tracing the back of the cardstock to hide any pencil lines. Kids of all ages can also color in their own designs.
With your chenille stem, cut four 1” sections for the whiskers. Ask kids preschool-5th grade to estimate the length of the pieces before they cut. Older kids may use a ruler to confirm.
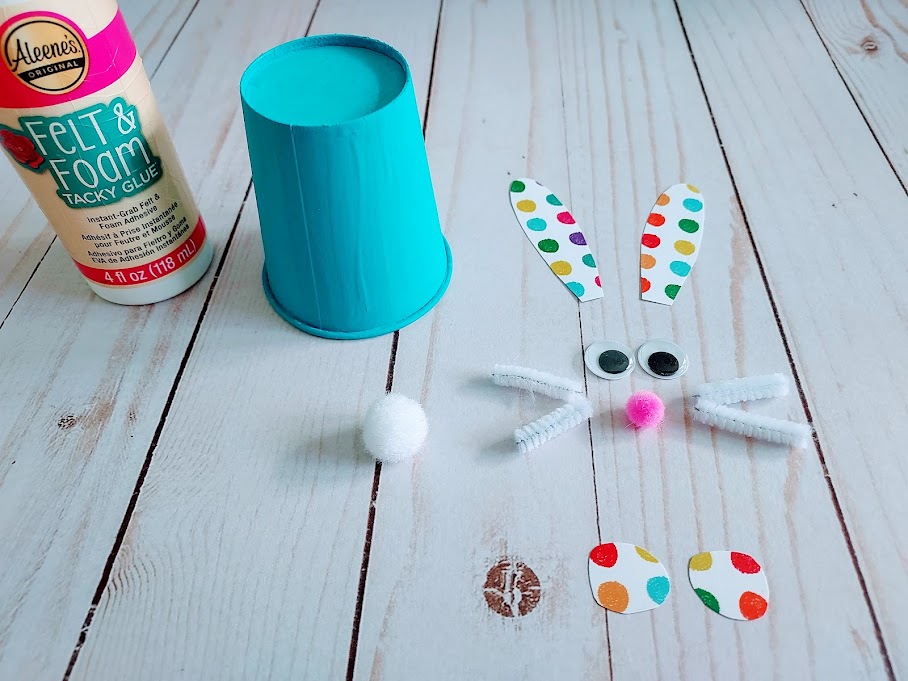

Once your cup is dry, it is time to assemble your bunny!
It may be easier to gather and then lay out all the supplies needed next to the cups to remind kids how to place the items on the cups when they work independently. This is a great memory exercise too for kids.
Ask them how they think the pieces should be placed, demonstrate as necessary, and then ask if they can do it again in order after mixing them up!
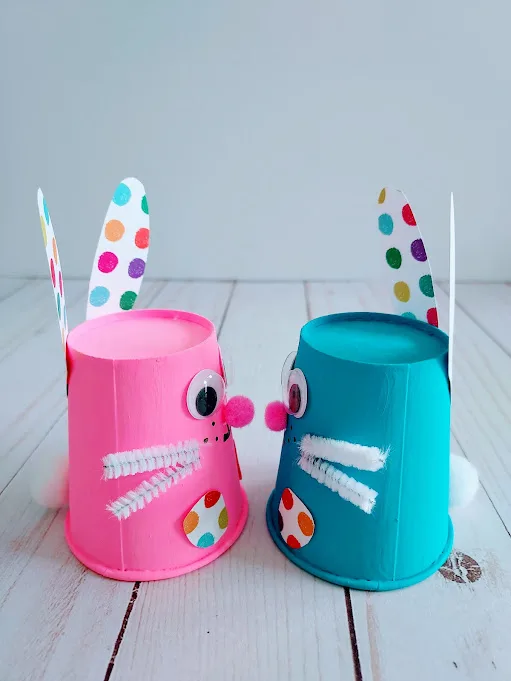
You can also flip your bunny and fill it with wrapped treats for a sweet Easter treat! This also challenges kids to look at the craft another way- upside down!
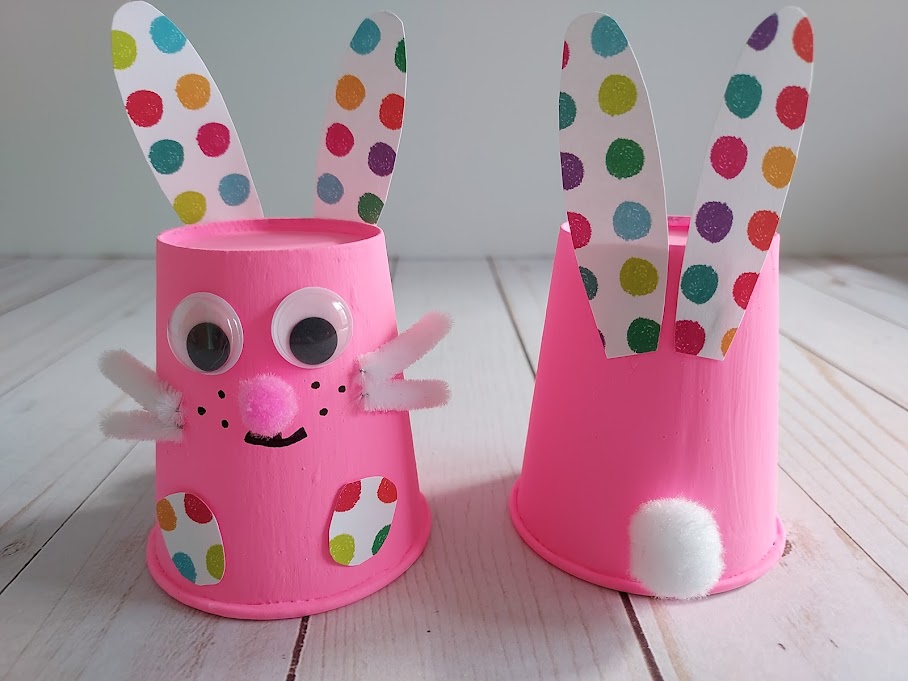
Start by gluing on the ears to the back side of the cup, pattern facing toward you. Next, glue the feet to the bottom of the cup.
I recommend using the tacky glue for all gluing. It seems to hold much better and stays in place better than liquid school glue.
Add the wiggle eyes, chenille stems for whiskers and pink pom pom nose. Then add a white pom pom tail to the back and bottom of the cup.


Kids may want to experiment with different pom poms in different places. Encourage exploration! Allow the glue to dry.
Finally using a black marker, add on a mouth. That’s it!
More Easter Activity Ideas for Kids
Discover a plethora of creative activities below that can be enjoyed either at home or in the classroom. From engaging scavenger hunts to printable games and Easter-themed worksheets, these ideas are sure to captivate kids and foster continuous learning during the holiday season.
- Printable Easter Scavenger Hunt Clues
- Easter Math Worksheets
- Color By Number Easter Basket Printable
- Reverse Easter Egg Hunt
- Free Easter Printables for Kids

Bunny Books for Kids
Extend your paper cup rabbit craft by incorporating books! Everything is better with a book! These are some of our favorite Easter and rabbit ones. These selections provide plenty of bunny illustrations and rabbit photos to help with the above activities.
How to Catch the Easter Bunny Nobody Likes the Easter Bunny: The Funny Easter Book for Kids!The Country Bunny and the Little Gold Shoes 75th Anniversary Edition: An Easter And Springtime Book For KidsMarshmallow: An Easter And Springtime Book For KidsAll Things Rabbits For Kids: Filled With Plenty of Facts, Photos, and Fun to Learn all About BunniesIt’s Better Being a Bunny: An Early Reader Book for Kids (Beginner Books(R))


More Spring Crafts for Kids
Springtime is a season of new beginnings and creativity, making it the ideal time to engage children in a variety of crafts that celebrate the use of vibrant colors.
- Easy Felt Flower Bookmark Craft
- Fluffy Chick Craft for Kids
- Easy Coffee Filter Butterfly Craft
- Handprint Flower Craft
- Soda Bottle Blossoms Flower Print Craft
These delightful spring craft ideas are perfect for children to showcase their creativity and for teachers to incorporate into their seasonal curriculum.
We hope you’re inspired to hippity hop on over to your craft area to make these cute paper cup bunnies with your kids!
Bunny Paper Cup Pattern Printable

Paper Cup Bunny Craft
Make these adorable paper cup bunnies for a fun Easter or spring craft for kids.
Materials
- Paper Cup Bunny Craft Template (available for free by filling out the form at the end of this post)
- Paper Cup
- Acrylic Paint (White, Pink, Blue, etc.)
- Patterned Cardstock
- 2 Wiggle Eyes
- ¼” Pink Pom Pom
- ½” White Pom Pom
- White Chenille Stem
- Aleene’s Felt & Foam Tacky Glue
- Black Marker (for mouth)
Tools
- Scissors
- Paintbrush
- Craft mat
Instructions
- First you will need to download and print out our printable paper cup bunny craft template. (or trace and cut your own)
- If the cup has a pattern on it, start by painting it white. This will help cover any patterns on the cup.
- Allow paint to dry between coats.
- Next, paint the cup your choice of color. We used pink and blue. Multiple coats may be needed depending on how thickly the paint is applied and whether or not you painted it white first.
- While your cup is drying, prep your other supplies.
- Cut out and then trace the ears and feet onto the patterned cardstock. I recommend tracing on the back of the cardstock to hide any trace lines.
- With your chenille stem, cut four 1” sections for the whiskers.
- Once your cup is dry, it is time to assemble your bunny!
- It may be easier to gather and then lay out all the supplies needed next to the cup to remind kids how to place the items on the cups when they work independently.
- I recommend using the tacky glue for all gluing. It seems to hold much better and stays in place better than liquid school glue.
- Start by gluing on the ears to the back side of the cup, pattern facing toward you.
- Next, glue the feet to the bottom of the cup.
- Add the wiggle eyes, chenille stems for whiskers and pink pom pom nose.
- Then add a white pom pom tail to the back and bottom of the cup.
- Allow the glue to dry completely.
- Finally using a black marker, add on a mouth.
Notes
These may require additional drying time depending on how thickly the paint is applied during the painting stage.
It’s important to protect your work surface by placing the cups on top of a craft mat or even a paper plate before painting.
I also recommend wearing a smock or old shirt while painting as acrylic paint may stain clothing.
Please keep in mind you may need to adjust the size of the ears and feet on the template if you use larger cups as these are formatted for 5 oz Dixie cups.
Recommended Products
As an Amazon Associate and member of other affiliate programs, I earn from qualifying purchases.


A. Hager is a lover of books and all things crafty. She enjoys puzzles, board games and puppy snuggling. She is constantly adapting new recipes so her two children with food allergies are able to experience a variety of delicious and fun foods.
Jerie Harrell
Wednesday 20th of March 2024
Adorable
Darcy Zalewski
Wednesday 20th of March 2024
Thank you, Jerie!
Lyndsey
Monday 4th of March 2024
These are super adorable! Thank you for linking up at Happy Hearts & Homes, I hope to see you again this week.
Darcy Zalewski
Tuesday 5th of March 2024
Thank you so much, Lyndsey!