
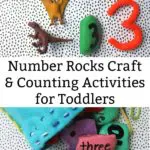
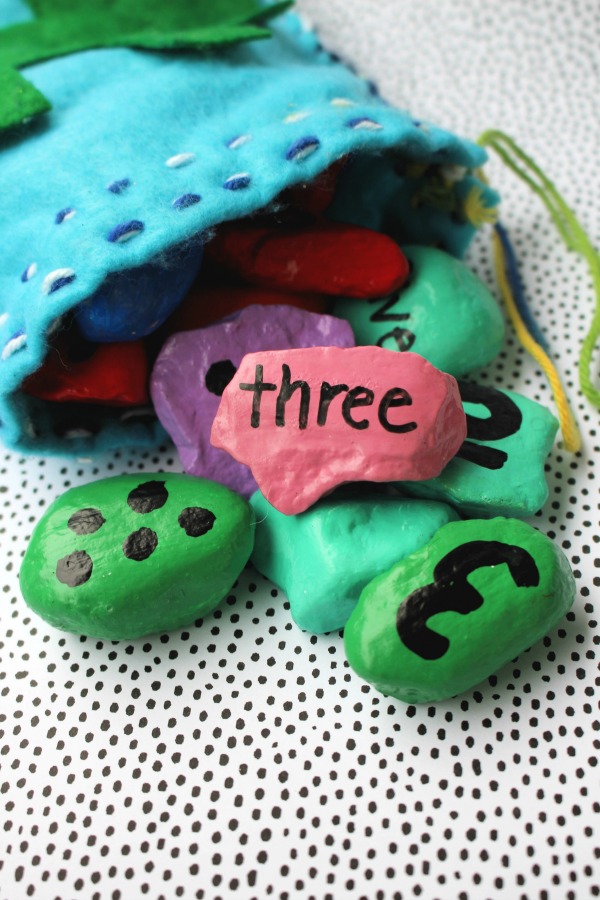
These homemade number rocks make a fun hands on math activity for toddlers and preschoolers to practice counting.
Use this craft tutorial to create your own number rocks plus a cute storage bag.
I also have a few activity suggestions for how to use the rocks to work on number recognition.

This post contains affiliate links. As an Amazon Associate and a participant in other affiliate programs, we earn a commission on qualifying purchases.
Wondering how do you introduce your toddler to numbers?
When my kids were little, I counted everything throughout the day and pointed out numbers whenever I could.
I’d count the steps we walked, toys, toes, fingers, eyes, ears – you name it!
It might feel funny at first, but after awhile you get used to it. Giving toddlers many different connections to what numbers mean helped their number learning.
RELATED: 21 Indoor Activities to Occupy Your Busy Toddler
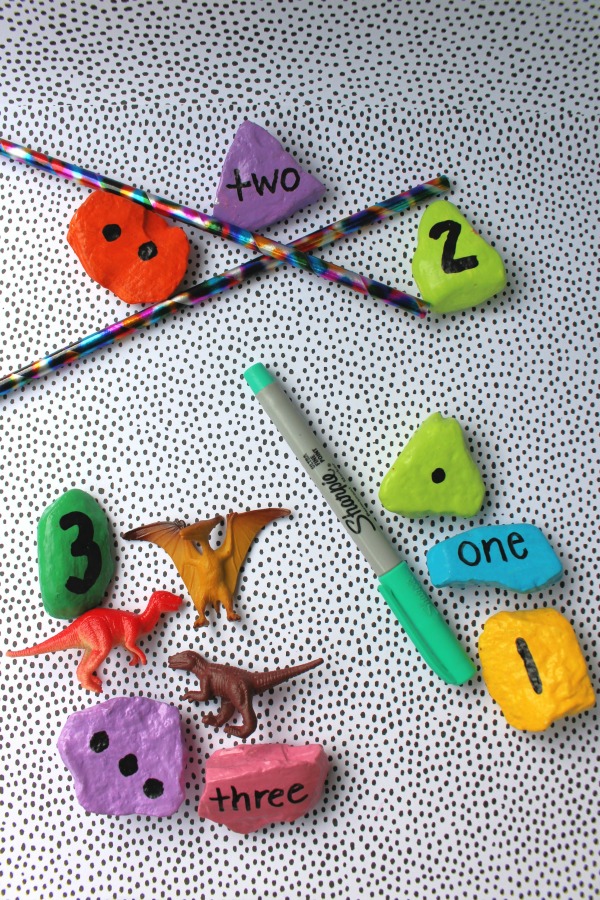
You want them to see all the different ways to make a number, such as 5. This includes writing the word out, seeing the number, and also seeing pips or dots.
It also means seeing different number compositions, like 2 blocks and 3 cars making a total of 5 toys.
Hands on counting games for toddlers make learning numbers lots of fun!
Homemade Number Rocks Craft Tutorial
Everything is more fun when you can pull out a surprise, including learning about your numbers. These number rocks are super durable and will last through loads of playtime!
Printable instructions are provided at the bottom of this post.
Number Rocks Craft Supplies
- 30 rocks
- White acrylic paint
- Acrylic paint in assorted colors
- Black Sharpie marker
- Mod Podge
- Paint brushes
- Yarn
- Thick upholstery style needle
- 2 pieces of felt
- Hot glue gun
How to make the number rocks:
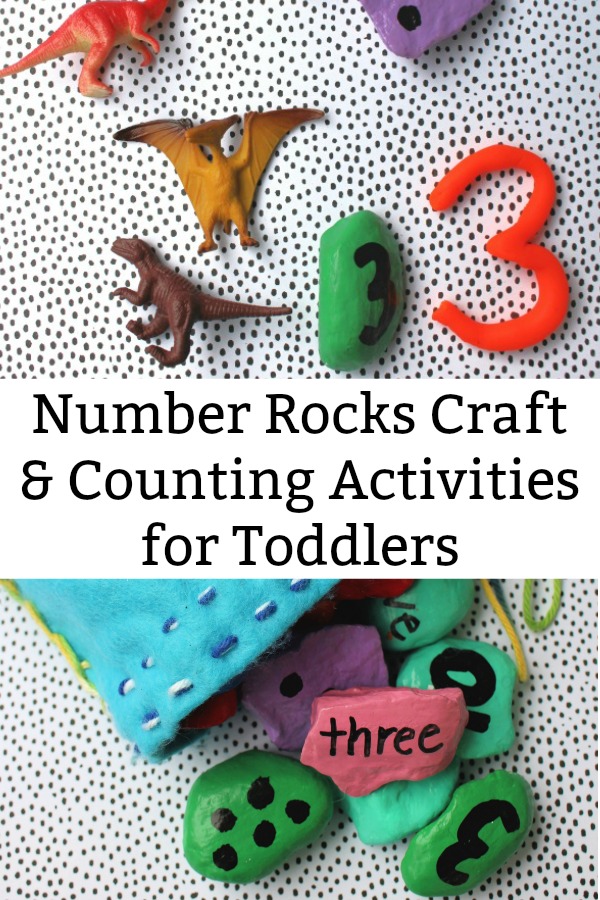
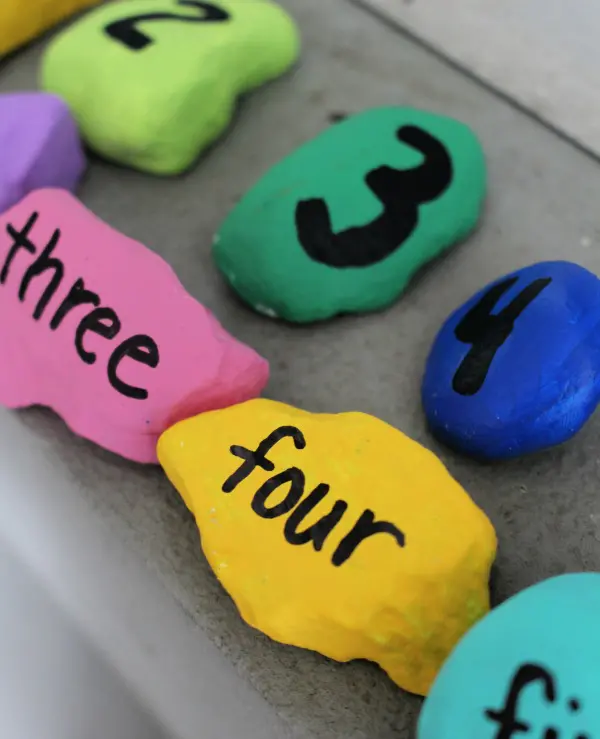
First, gather your rocks! You will need 30 rocks for this project to have the numbers 1-10 in dots, numbers and number words.

If you collect the rocks from outside, wash them and let them dry. Kids love to help with this! If you buy craft rocks for painting you may skip this step.
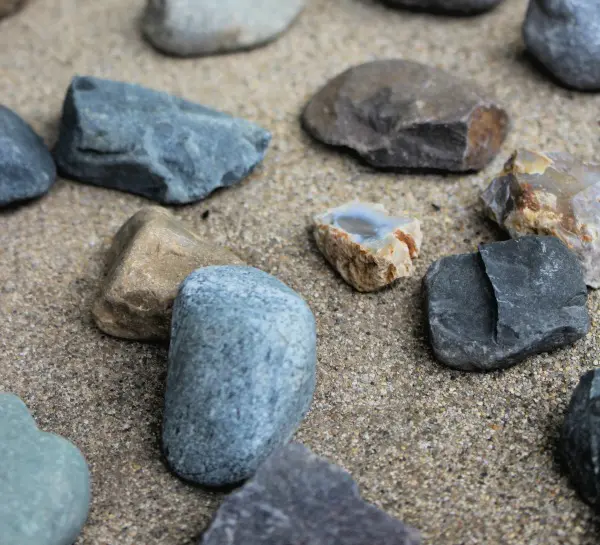
Once the rocks are dry, paint them white. Doing this first helps the colors look nice and bright.

Paint the rocks in your choice of colors. Mine are painted in a rainbow of colors, but if you want you can make all the 1’s the same color, 2’s the same color and so on. Let them dry then paint a second coat.
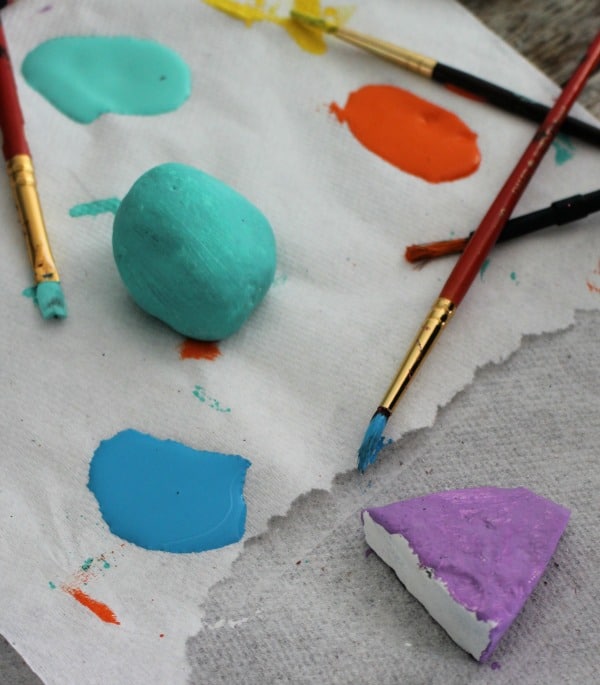
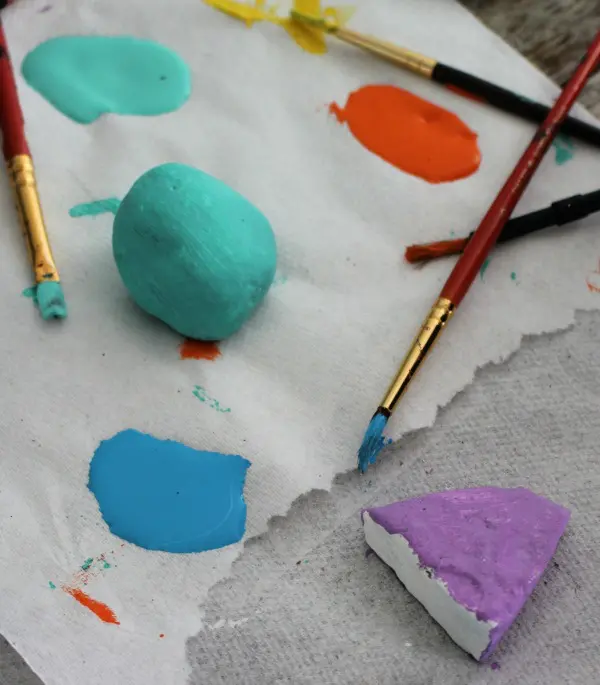
Once the rocks are dry, use a Sharpie to draw on the numbers, words, and dots.

Seal with a thin layer of Mod Podge. This will keep the paint from chipping and help to protect through lots of play. Plus, it gives them a nice shiny look.
Let the number rocks dry completely. Then they are ready to play!
Please note: The paint may need anywhere between 20 minutes to an hour of drying time between coats and before writing on them. After adding the sealant, it is best to let them dry overnight to ensure they are completely dry.
RELATED: 60 Gift Ideas for Crafty Kids
How to make the bag:
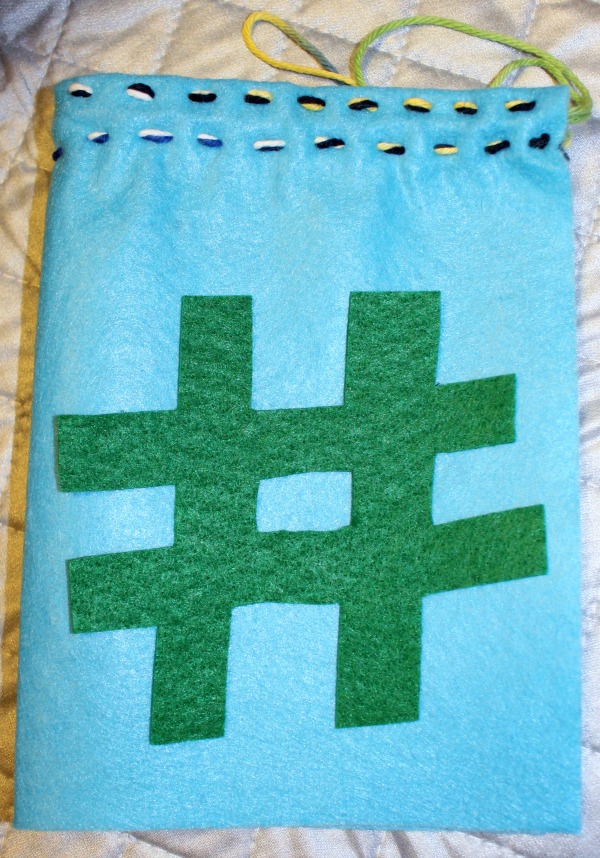

- Choose a color of felt for the bag and one for your decoration.
- Lay your bag color felt landscape ways (hamburger) on your table. Fold the top part down about 1 ½ inches. Pin it into place.
- Using yarn (or you can use embroidery floss or regular thread) sew across the top creating a little flap.
- Cut a long piece of yarn about 1 ½ times the length of your bag. Tie the ends together to make one long loop.
- Slide the loop of yarn inside the flap, folding the felt over the yarn.
- Stitch the flap down making sure not to stitch the yarn into place. The yarn will be your drawstring.
- Fold the piece of felt together (hotdog style)
- On your second piece of felt, draw and cut out a pound sign (or hashtag sign). Hot glue it to the front of your bag.
- Starting inside the bag, just underneath the drawstring area that you stitched, stitch around the sides and bottom of the bag leaving the top open. I did a blanket stitch, but you can use any stitch.
- Now put your rocks inside!
Number Activities for Toddlers and Preschoolers
There are several creative ideas using these rocks for counting activities. The best part is you can easily make up your own little number games to play!

Here are a few suggestions to get you started:
Play a Number Matching Game
Pull out two rocks. Do they both have the same number? If so, keep them. If not, put them back in the bag and try again.
Number Scavenger Hunt
Pull out a rock and look at the number. Now search around your home, park or classroom to find that many items. For example, pull out a rock with 3 on it then find 3 dinosaurs or 3 pencils.

Counting Simon Says Game
Pull out a rock and pick a gross motor activity like jumping jacks. Then use it to play Simon Says.
For example: Simon Says 4 jumping jacks!
If the picker doesn’t say Simon says, everyone who did the activity is out. Take turns doing this until all of the rocks have been picked.
Make Numbers With Playdough
Pull out a rock. What does it say? If it has dots, count the dots and then make that many little balls with playdough.

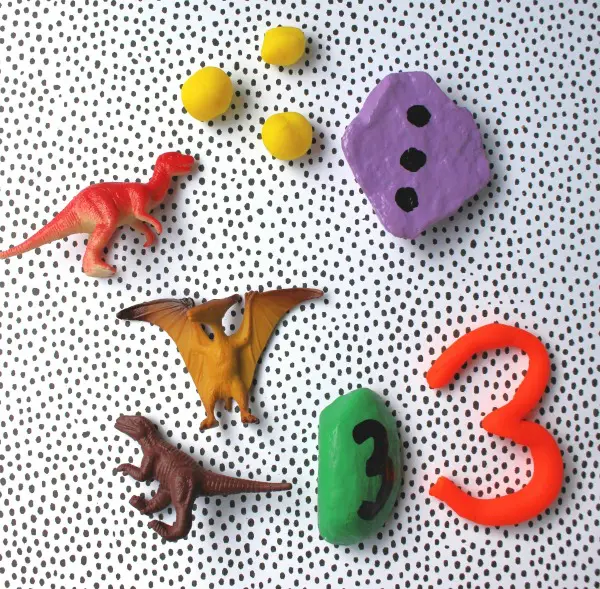
If the rock has a number, can you make that number with Playdoh?
If it has the number word, roll out your Playdoh to make a long snake. Then try making the letters with Playdoh.
RELATED: How to Make Bouncing Playdough
Blind Bag Math Equations
This would be a great hands on math activity for preschoolers. Have them pull two rocks out of the bag. Now have them add or subtract the two numbers. They can also use pom poms or mini erasers to help them figure it out.
As your kids get more confident with adding and subtracting numbers 1 through 10, you can make more number rocks with higher values.
I hope you enjoy making these homemade number rocks and doing these number activities with your toddler or preschooler!
More Counting and Number Activities You May Like:
- Dinosaur Counting Game
- Counting with Rainbows: Fine Motor Counting Activity
- Counting Unicorns: Counting Game for Kids
- Mini Eraser Robot Counting Mat Activity for Preschoolers
- Fruit Loops Counting and Matching Game
- Snowman Button Counting Activity


Numbered Rocks With Storage Bag Craft
These homemade numbered rocks and cute storage bag are easy to make for fun hands on math activities for toddlers and preschoolers.
Materials
- 30 rocks
- White acrylic paint
- Acrylic paint in assorted colors
- Black Sharpie marker
- Mod Podge
- Paint brushes
- Yarn
- Thick upholstery style needle
- 2 pieces of felt
- Hot glue gun
Instructions
Numbered Rocks Craft Instructions:
- First, gather your rocks! You will need 30 rocks for this project to have the numbers 1-10 in dots, numbers and number words.
- If you collect the rocks from outside, wash them and let them dry. Kids love to help with this! If you buy craft rocks for painting you may skip this step.
- Once the rocks are dry, paint them white. Doing this first helps the colors look nice and bright.
- Paint the rocks in your choice of colors. Mine are painted in a rainbow of colors, but if you want you can make all the 1’s the same color, 2’s the same color and so on. Let them dry then paint a second coat.
- Once the rocks are dry, use a Sharpie to draw on the numbers, words, and dots.
- Seal with a thin layer of Mod Podge. This will keep the paint from chipping and help to protect through lots of play. Plus, it gives them a nice shiny look.
- Let the number rocks dry completely. Then they are ready to play!
Felt Bag Instructions:
- Choose a color of felt for the bag and one for your decoration.
- Lay your bag color felt landscape ways (hamburger) on your table. Fold the top part down about 1 ½ inches. Pin into place.
- Using yarn (or you can use embroidery floss or regular thread) sew across the top creating a little flap.
- Cut a long piece of yarn about 1 ½ times the length of your bag. Tie the ends together to make one long loop.
- Slide the loop of yarn inside the flap, folding the felt over the yarn.
- Stitch the flap down making sure not to stitch the yarn into place. The yarn will be your drawstring.
- Fold the piece of felt together (hotdog style)
- On your second piece of felt, draw and cut out a pound sign (or hashtag sign). Hot glue it to the front of your bag.
- Starting inside the bag, just underneath the drawstring area that you stitched, stitch around the sides and bottom of the bag leaving the top open. I did a blanket stitch, but you can use any stitch.
- Now put your rocks inside!
Notes
The paint may need anywhere between 20 minutes to an hour of drying time between coats and before writing on them. After adding the sealant, it is best to let them dry overnight to ensure they are completely dry.


Darcy is the founder of “Life With Darcy and Brian,” where she combines her love for education, board games, and crafting to create engaging learning experiences for kids. Her creative projects and writing have been featured in outlets like The Toy Insider, CafeMom, Mom.com, Parents.com, Country Living, and The Pioneer Woman.