
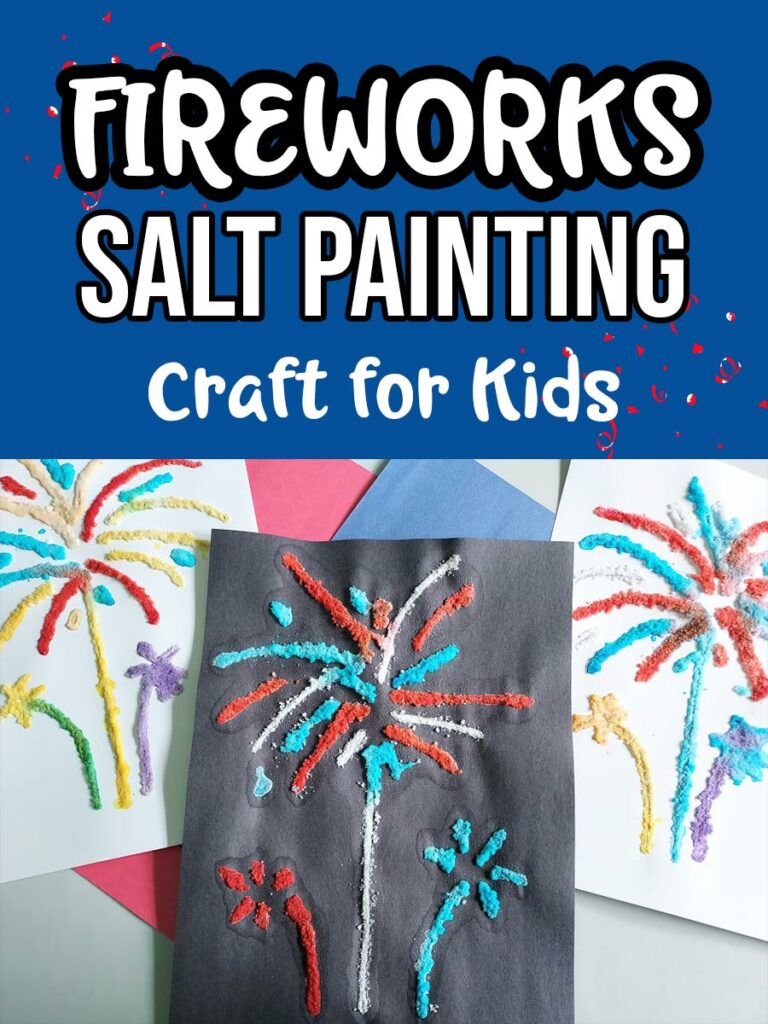
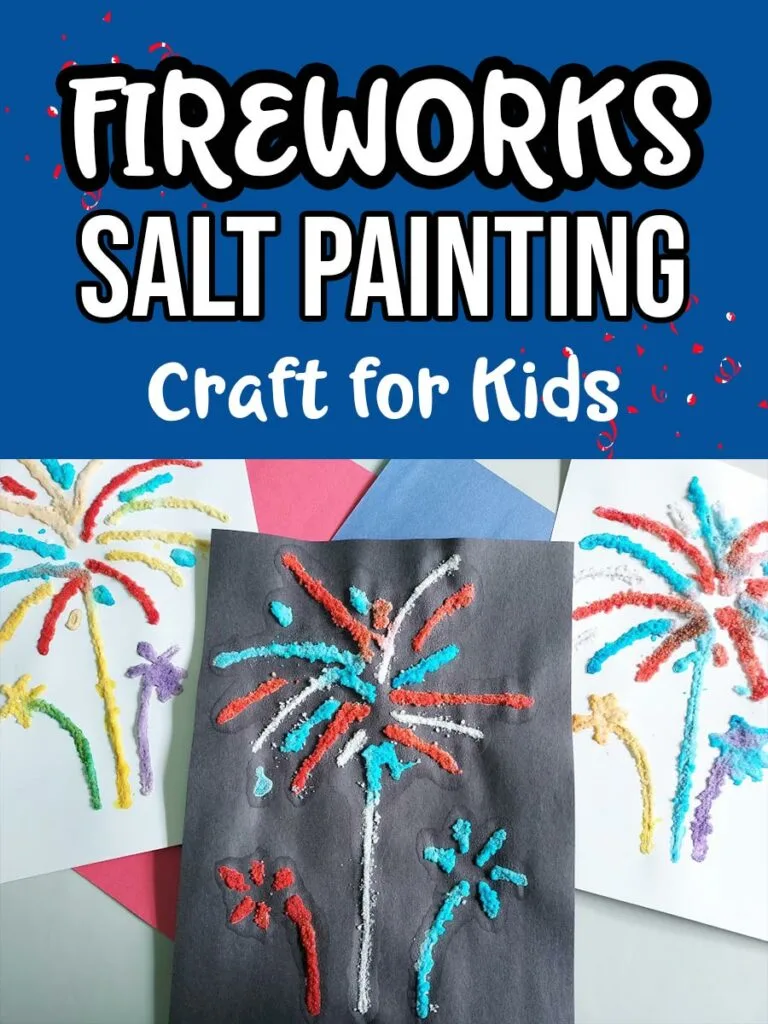
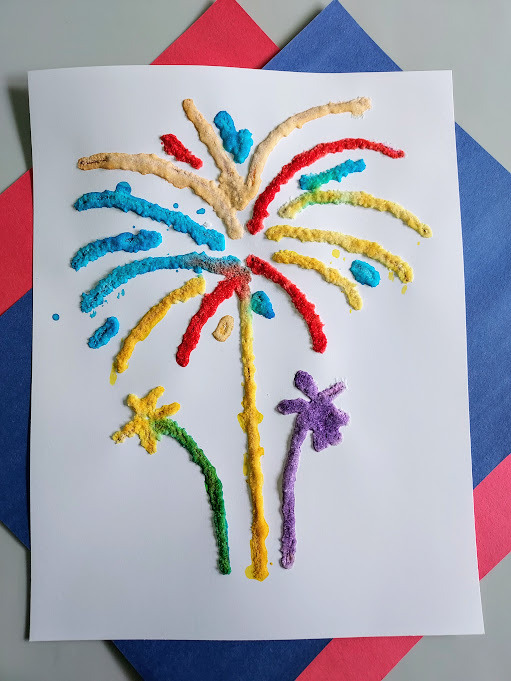
This fireworks salt painting craft is one of our popular craft ideas for kids. It’s a 4th of July craft that kids can make at home, daycare or camp this summer.
Salt painting is a super cute craft project that is ideal for kindergarten and elementary age children. Preschool age children can also complete this craft with some assistance.
This fireworks craft is easy to make, inexpensive and a lot of fun!
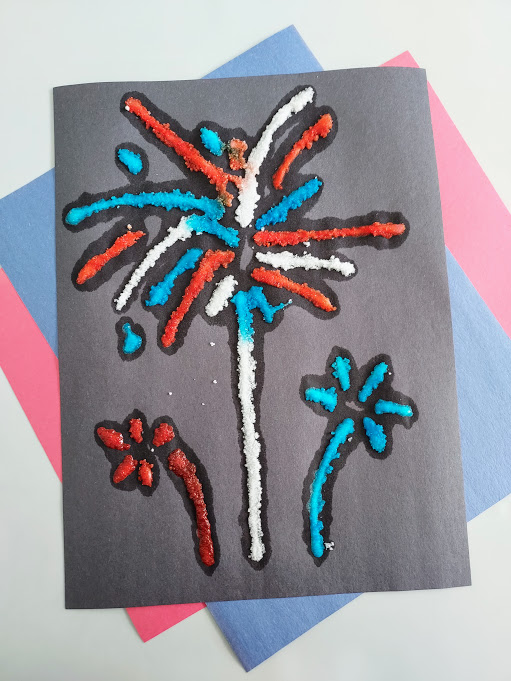
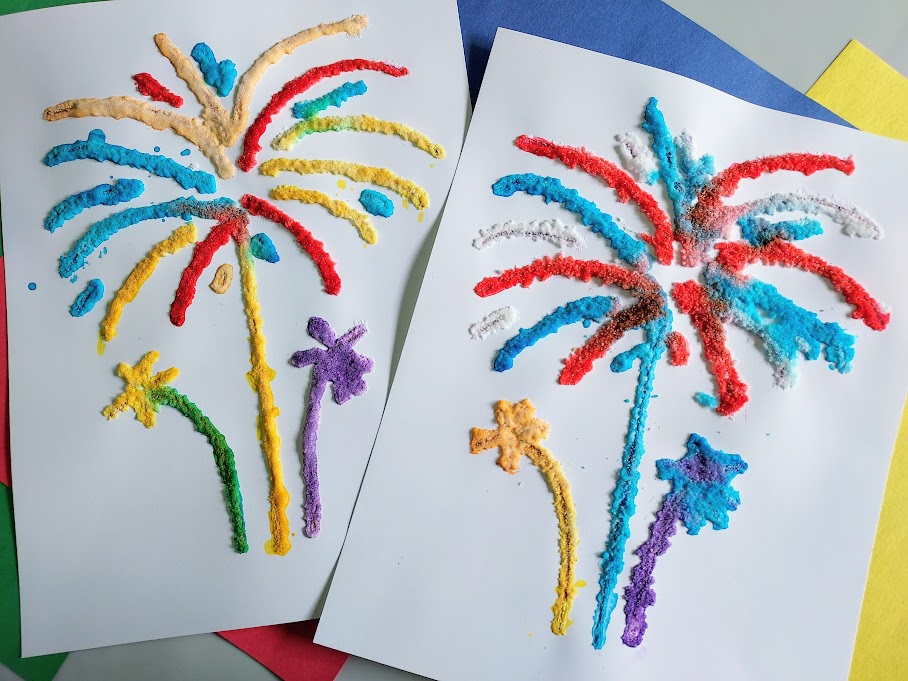
Kids will love watching the paint spread through the salt granules and seeing how the colors blend. It has such a neat texture to it. I love how it looks like painted crystals!
Looking for more fireworks craft? Don’t miss our coffee filter fireworks!
Printable Fireworks Salt Painting Fourth of July Craft
While this is intended to be a printable craft, the instructions can be used to salt paint fireworks on construction paper as well. Just be mindful that more color may seep through with a thinner paper.
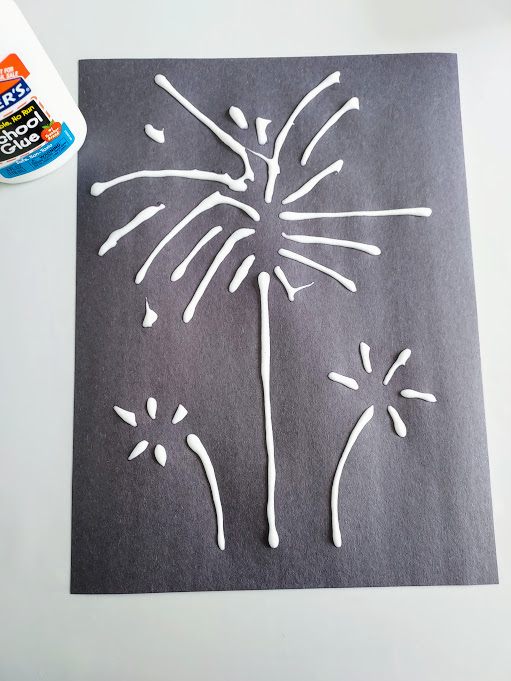
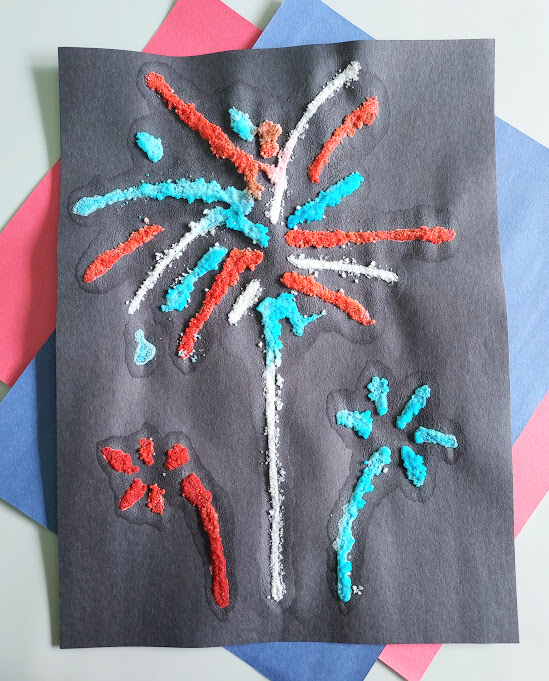
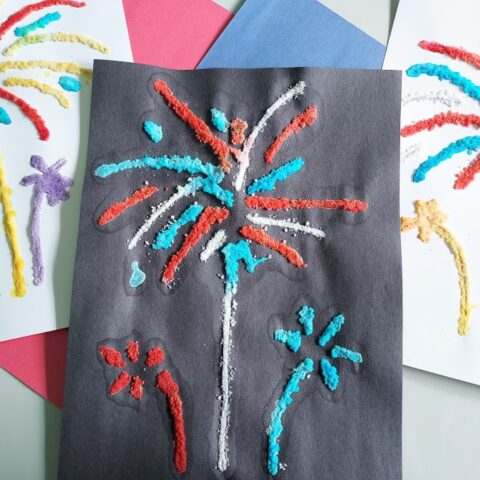
If using construction paper, you can use a pencil to hand draw firework lines for easy tracing over with the liquid glue. Use black construction paper to make it look like fireworks in the night’s sky!

This salt painting fireworks craft uses just a few common craft and kitchen supplies and only takes about 20 minutes to complete (plus additional drying time).
Do this craft at home, as a family, or at a school or summer camp. It’s a quick and easy craft to include in an art center.
Making these salt painting fireworks is a fun fine motor activity for preschool and kindergarten children that provides gluing, pouring, and painting practice.
Older children will also enjoy this craft that they can complete mostly independently.

This post contains affiliate links. As an Amazon Associate and a participant in other affiliate programs, we earn a commission on qualifying purchases.
Fair warning: this is a fairly messy craft. Having an adult help with the salt pouring is recommended.
Placing this craft on an activity tray or baking sheet with a lip will help contain the mess.
I also recommend having a handheld vacuum or broom and dustpan nearby.
If you don’t have table salt on hand, or if you’d prefer a somewhat less messy art activity, you can still use the printable fireworks for other projects.
For example, kids can still use watercolor paint to color along the lines. They could also decorate them by tracing the lines with glitter glue.
Salt Painting Fireworks Craft Supplies:
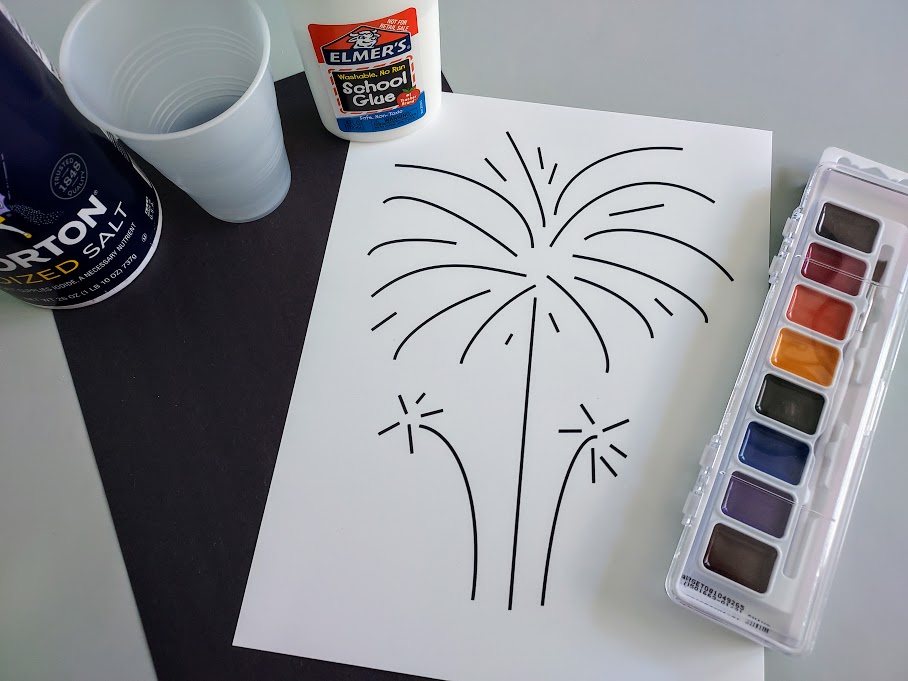

- Printable Fireworks Salt Painting Template
- Cardstock or construction paper
- Liquid school glue (white)
- Watercolor paint
- Paintbrush or pipette
- Table salt
- Cup (for water)
- Craft mat, activity tray or baking sheet (optional)
How to Make Fireworks Salt Painting Art:
First you will need to download and print out our printable Fireworks Salt Painting Template. (available using the form near the end of this post)
I recommend using cardstock for this project. The heavier weight paper holds up better to gluing and painting.

Tip: Protect your work space by putting a craft mat, activity tray or baking sheet under your paper before applying glue, salt or paint.
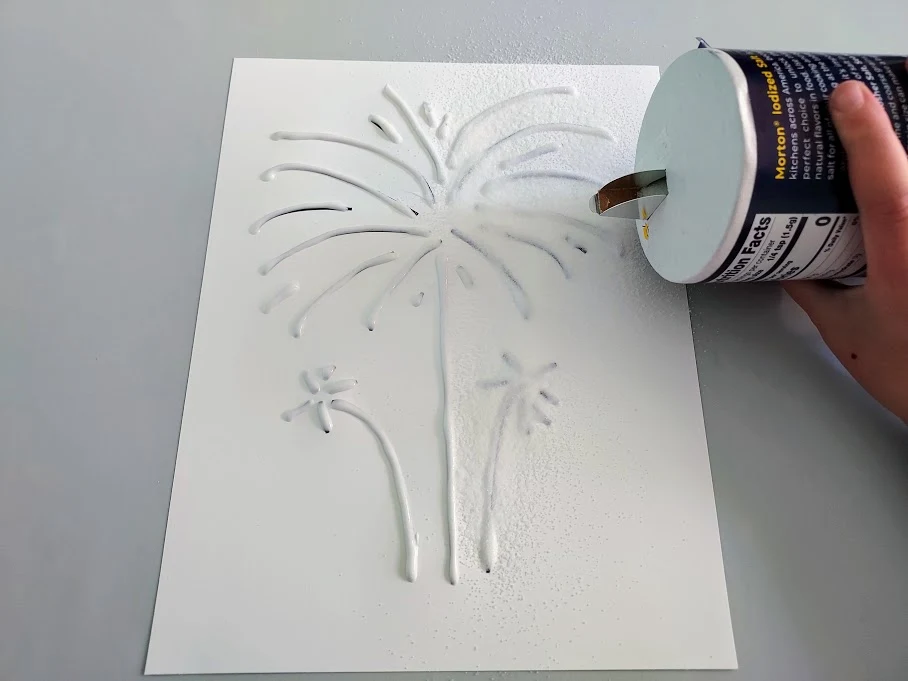
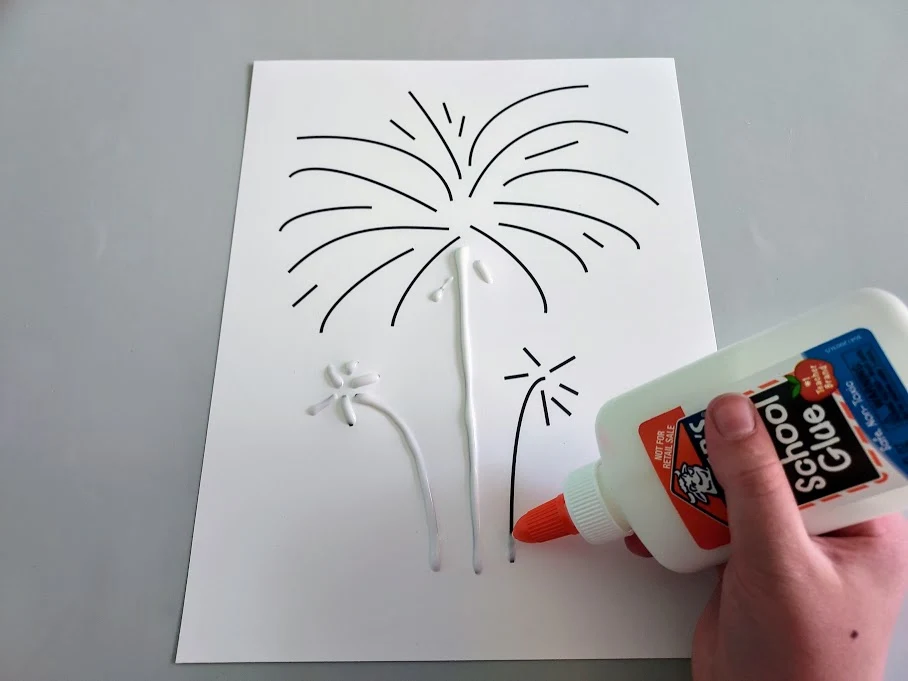
Next you will need to trace the lines with white liquid glue.

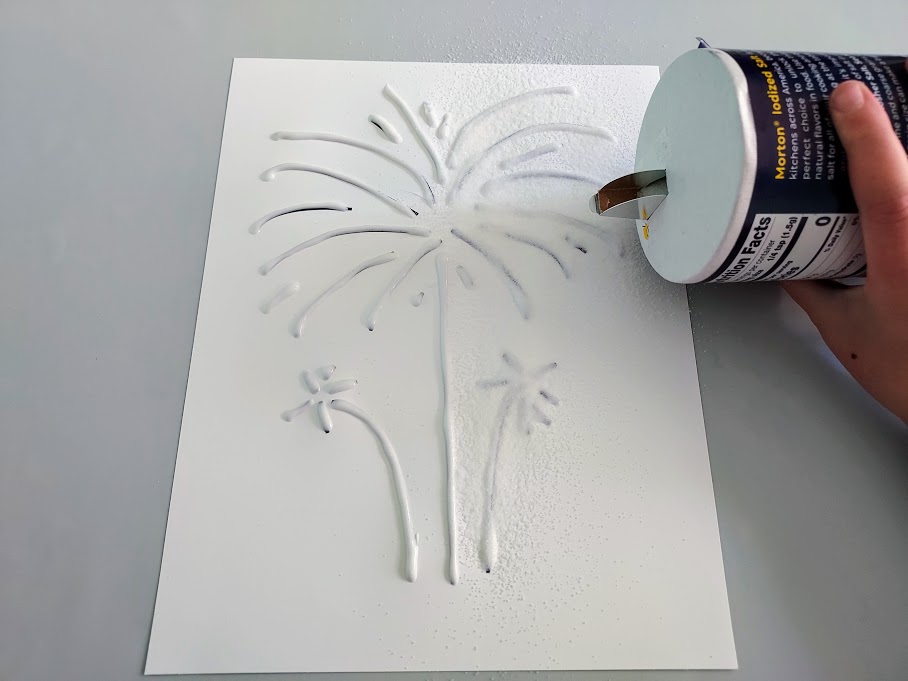
Once that is completed, pour salt over the glue.
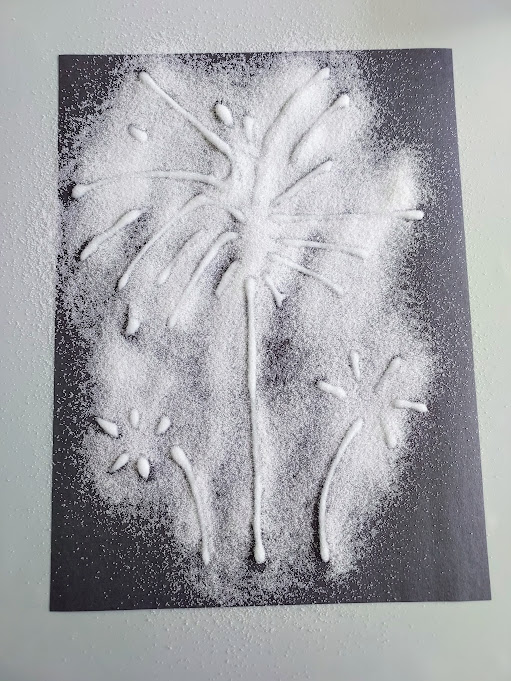
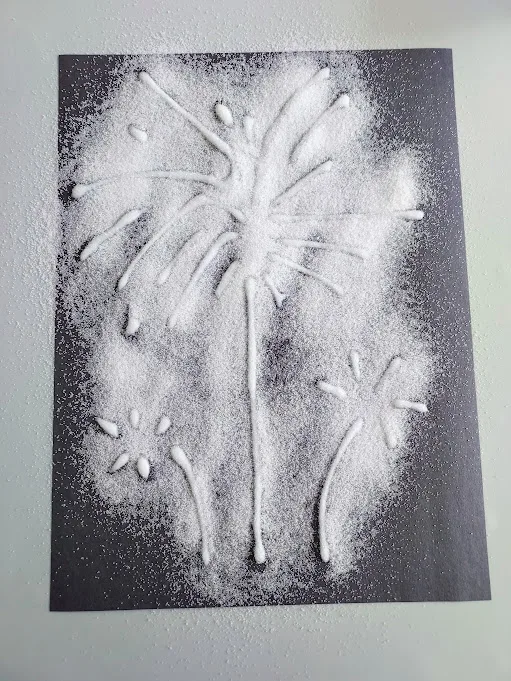
Gently tip the paper to let any excess salt fall off. Doing this over a trash bin will save on cleanup time later.
Next, it’s time to begin painting! It is not necessary to wait for the glue to dry before painting.
Using plenty of water, mix water into paint and lightly dab paint on to salt. It is important to dab so you don’t wipe away the salt.

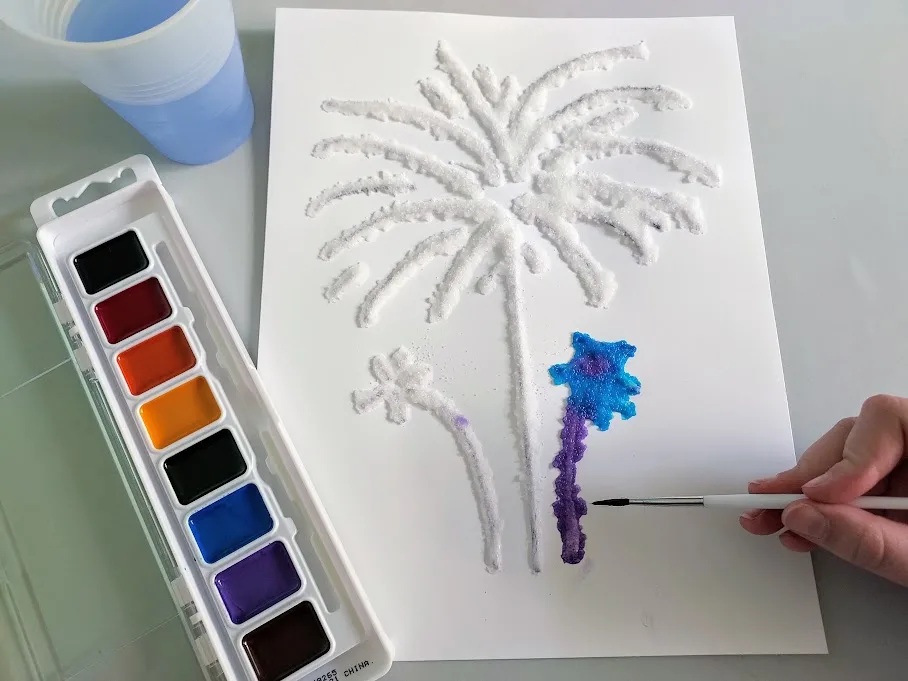
Alternatively, you can also apply paint using a pipette. I recommend having premixed watercolor water cups prepared if you use this method, especially for younger children.

Lastly, allow it to fully dry.
Now you have snazzy salt painted fireworks!

More Fourth of July Ideas:
- Uncle Sam Chip Can Craft
- No Sew Red, White, and Blue Felt Wreath
- Patriotic Stars Roll and Cover Printable Dice Game
- Red, White & Blue Pretzel M&M Brownies
- Star Wand Craft

Fireworks Salt Painting Craft
Make this fireworks salt painting art project for a fun and easy Fourth of July craft for kids.
Instructions
- First you will need to download and print out our printable Fireworks Salt Painting Template. (It is file #153 in our free printable resource library.)
- I recommend using cardstock for this project. The heavier weight paper holds up better to gluing and painting.
- Next you will need to trace the lines with white liquid glue.
- Once that is completed, pour salt over the glue.
- Gently tip the paper to let any excess salt fall off. Doing this over a trash bin will save on cleanup time later.
- Next, it’s time to begin painting! It is not necessary to wait for the glue to dry before painting.
- Using plenty of water, mix water into paint and lightly dab paint on to salt. It is important to dab so you don’t wipe away the salt.
- Alternatively, you can also apply paint using a pipette. I recommend having premixed watercolor water cups prepared if you use this method, especially for younger children.
- Lastly, allow it to fully dry.
Notes
Protect your work space and minimize the mess by putting a craft mat under your project or using an activity tray or baking sheet with a lip to help contain the salt when pouring over the glue.
A. Hager is a lover of books and all things crafty. She enjoys puzzles, board games and puppy snuggling. She is constantly adapting new recipes so her two children with food allergies are able to experience a variety of delicious and fun foods.
Paula
Thursday 27th of June 2024
Love this Darcy! This fireworks salt painting craft is really creative.
Thank You so much for sharing this awesome craft with Sweet Tea & Friend's this month. I'm so happy your here.
Beth
Sunday 9th of June 2024
LOVE how bright and vibrant this craft is on dark paper, Darcy! Thanks for sharing! Creatively, Beth
Darcy Zalewski
Sunday 16th of June 2024
Thanks, Beth! The kids had fun experimenting with different color backgrounds to see how the fireworks salt painting popped!