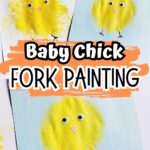

Chick fork painting is one of our many delightful spring crafts for kids. This project brings the joy of spring into the classroom or home, making it ideal for toddlers and preschoolers, though children of all ages can find enjoyment and creative expression in this simple activity.
This easy and fun project involves using forks instead of brushes, allowing little ones to create adorable baby chick paintings with unique and interesting textures. This method not only fosters creativity but also helps develop fine motor skills.

This painting activity is all about keeping things simple and easy to get ready, making it a perfect fit for any spring art center or a fun part of a farm animal preschool lesson plan.
It’s easy for busy parents or teachers to set up, needing just forks, paper, and paint. This means it’s a breeze to add to your plans or daily activities, letting kids get creative without needing a ton of prep or materials.
What is Fork Painting?
Fork painting is a unique and creative art technique that uses forks to apply paint to paper instead of traditional brushes.
This method allows children to experiment with various textures and patterns, producing unique lines and designs that cannot be achieved through traditional painting tools.
Ideal for young artists, fork painting encourages experimentation with color, shape, and spatial awareness while enhancing fine motor skills through handling and maneuvering the forks.
This method is particularly appealing for projects like this, where the texture of the fork’s tines can mimic the fluffy appearance of a baby chick’s feathers, adding depth and interest to the artwork.
This post contains affiliate links. As an Amazon Associate and a participant in other affiliate programs, we earn a commission on qualifying purchases.
Tru-Ray Construction Paper, 10 Vibrant ColorsDarice 1000 Pcs Popsicle StickMulti-Color Pom Poms, 1200pcs Assorted Size & ColorCrayola Mini Twistables Crayons (50ct), Crayons for Toddlers, 3+Elmer’s All Purpose Glue Sticks, WashableFiskars Training Scissors for Kids 3+ with Easy Grip (3-Pack) – Toddler Safety Scissors


What Are the Benefits of Fork Painting for Kids?
This super cool art activity has many benefits, especially for toddlers and preschoolers. It’s not just about having fun and getting creative; it also plays a role in developing fine motor skills and hand-eye coordination.
When kids grab forks and start creating art, they boost their hand dexterity and pencil control—super important stuff for kids their age. Plus, fork painting is all about diving into sensory exploration, letting kids get into the textures and patterns they make.

This hands-on approach makes art super fun and helps with their cognitive development, like understanding cause and effect from the incredible visuals they create. It’s also a playground for imagination, opening up a world where they can experiment with colors and patterns.
Because it’s so easy to set up and laid-back, fork painting is fantastic at drawing in young artists, making it a top pick for sparking their love for art in toddlers and preschoolers.
Fork Painting Ideas for Kids
Exploring fork painting unlocks endless creative possibilities for kids to express themselves and stretch their imaginations. This versatile method suits many artistic styles, from creating vibrant bird feathers to crafting abstract art and capturing nature’s textures.
The fork painting ideas below aim to inspire and excite young artists, leading them to explore color, texture, and pattern and showing how ordinary kitchen utensils can become tools for art.
Shop some of my favorite craft supplies on Amazon!
Chick Fork Painting Craft Supplies
These materials will help you and your little artists paint a charming baby chick masterpiece with ease and minimum prep.
- Orange Construction Paper
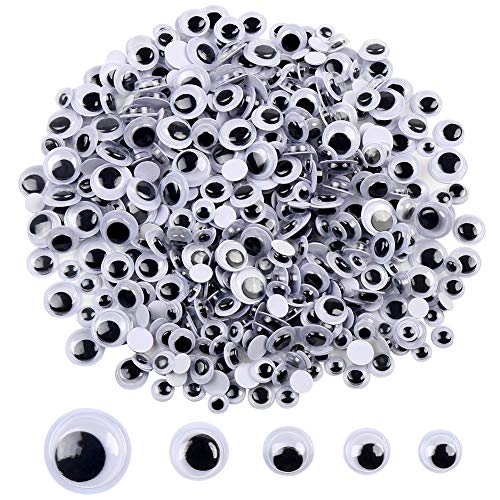
- Googly Eyes
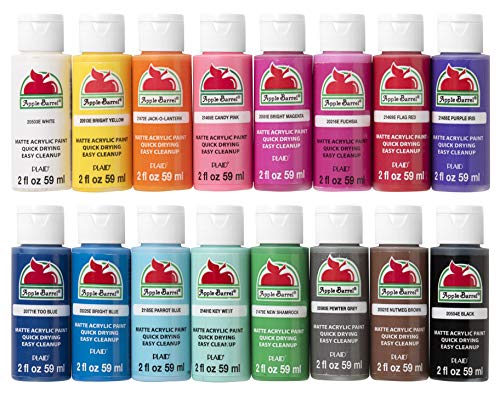
- Bright Yellow Paint
- Plastic Fork
- Black marker or crayon
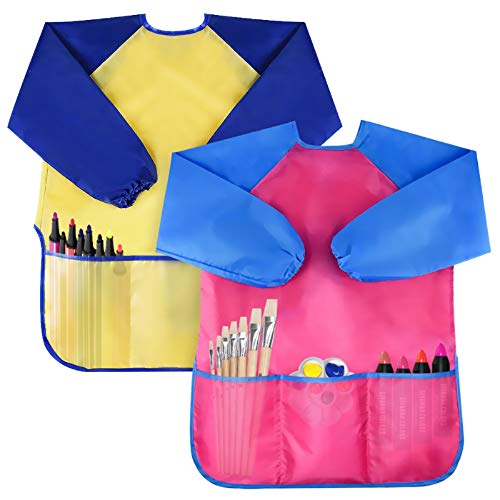
I recommend using art smocks and silicone craft mats when painting with young children. Art smocks shield the children’s clothes from paint splatters, and silicone mats offer a durable, easy-to-clean surface, streamlining the cleanup process.
Additionally, using a small paper plate for the paint allows easy access to dip the fork, ensuring a smoother painting process.
Apple Barrel Acrylic Paint Set, 16 Piece (2-Ounce), Best Colors Count Bassion Pack of 2 Kids Art Smocks, Children Waterproof Artist Painting Aprons Long Sleeve with 3 Pockets for Age 2-6 YearsAdTech Ultra Low-Temp Cool Tool | Mini Hot Glue Gun for Safe Crafting | Children and Kids | Item #05690 , WhiteAleene’s Turbo Tacky Glue, 4 FL OZ – 3 Pack, Multi
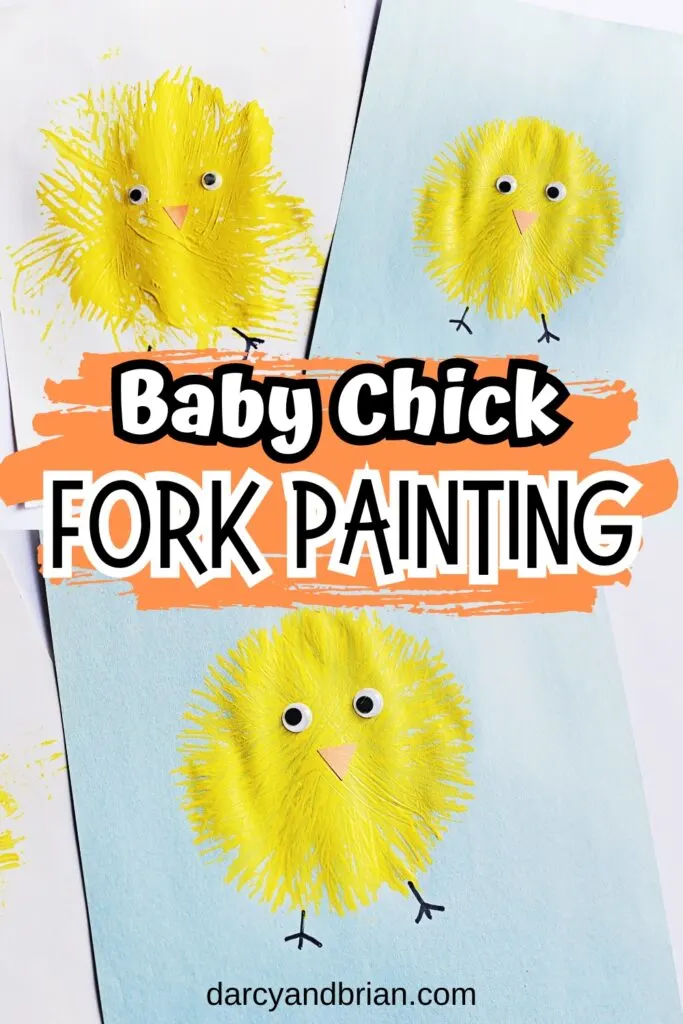
How to Make a Baby Chick Fork Painting
Creating a baby chick fork painting is simple and enjoyable, inviting young artists to explore their creativity with a few easy steps.
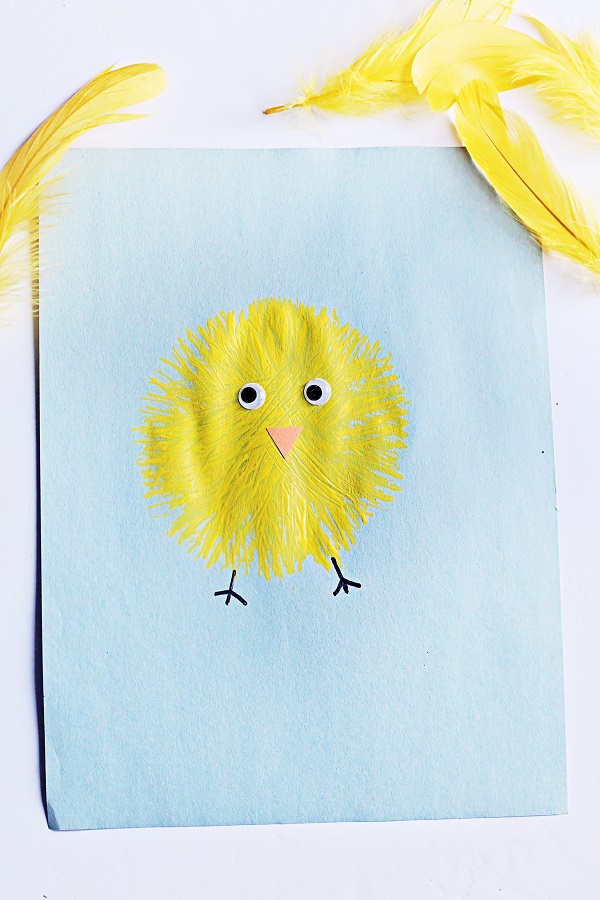
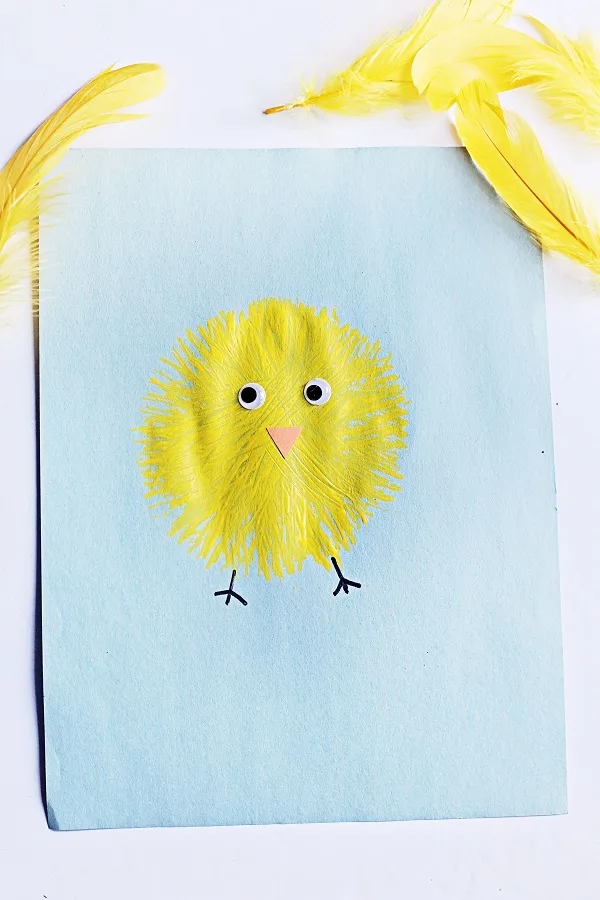
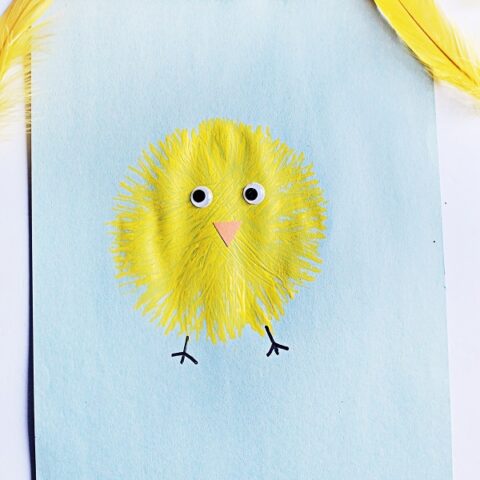
You can select any color piece of construction paper to serve as your background and canvas. I recommend a light blue or green to make the little chicken pop on the page.
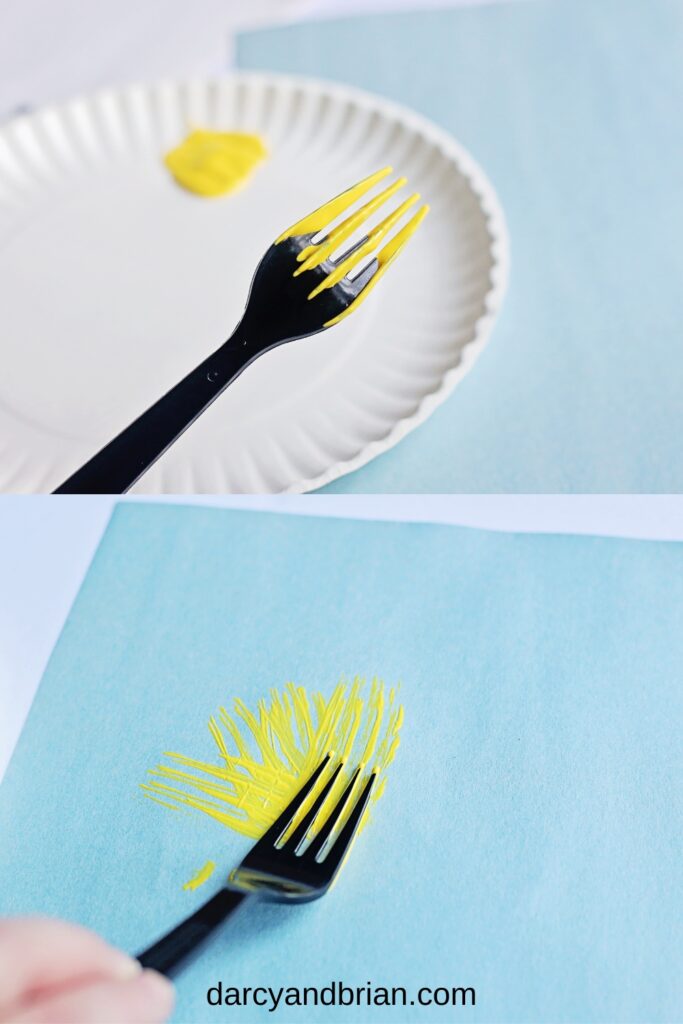

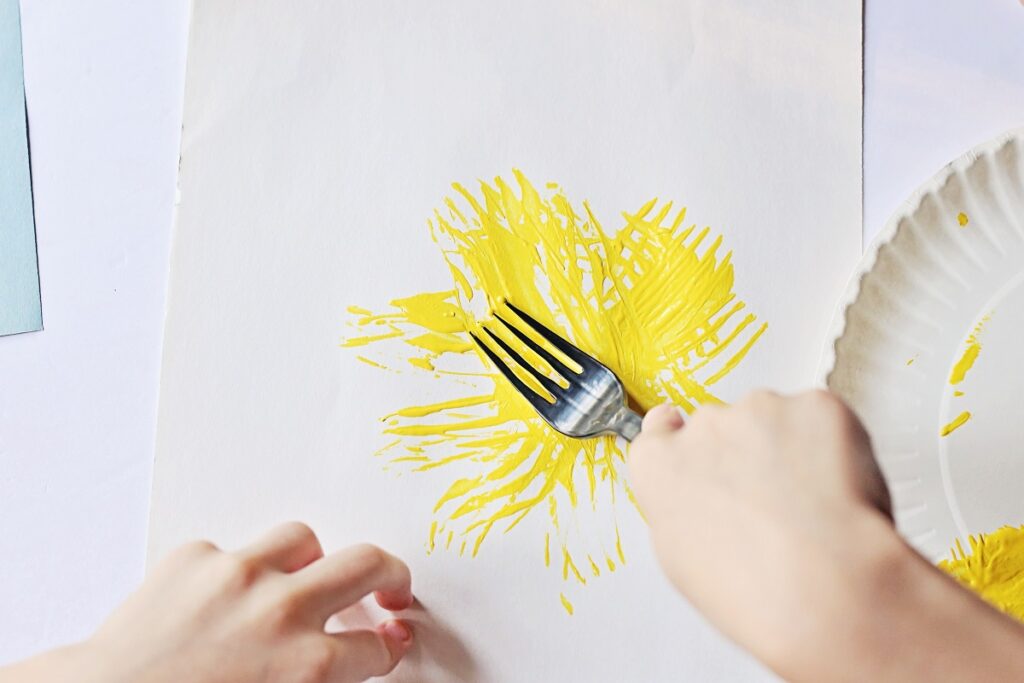
Begin by coating the back of a plastic fork in bright yellow paint, then gently press and apply it to your paper using short strokes to form the chicklet’s body. Aim to work in a circular pattern, gradually building the biddy’s shape.

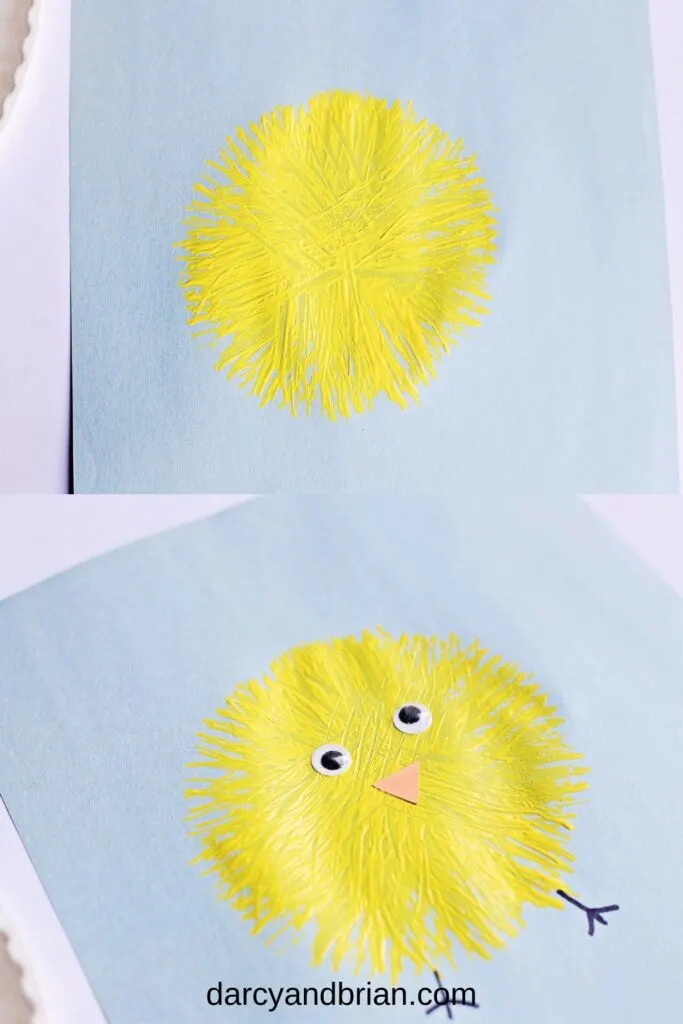
Next, fashion a small beak from orange construction paper, attaching it alongside googly eyes to the still-wet paint for immediate adhesion or affix with glue once the paint has dried. Use a black marker or crayon to sketch the legs and feet, adding character to your artwork.
For added texture and a lifelike fluffy appearance, overlap your fork prints, frequently reapplying the paint to ensure vibrant, full coverage.
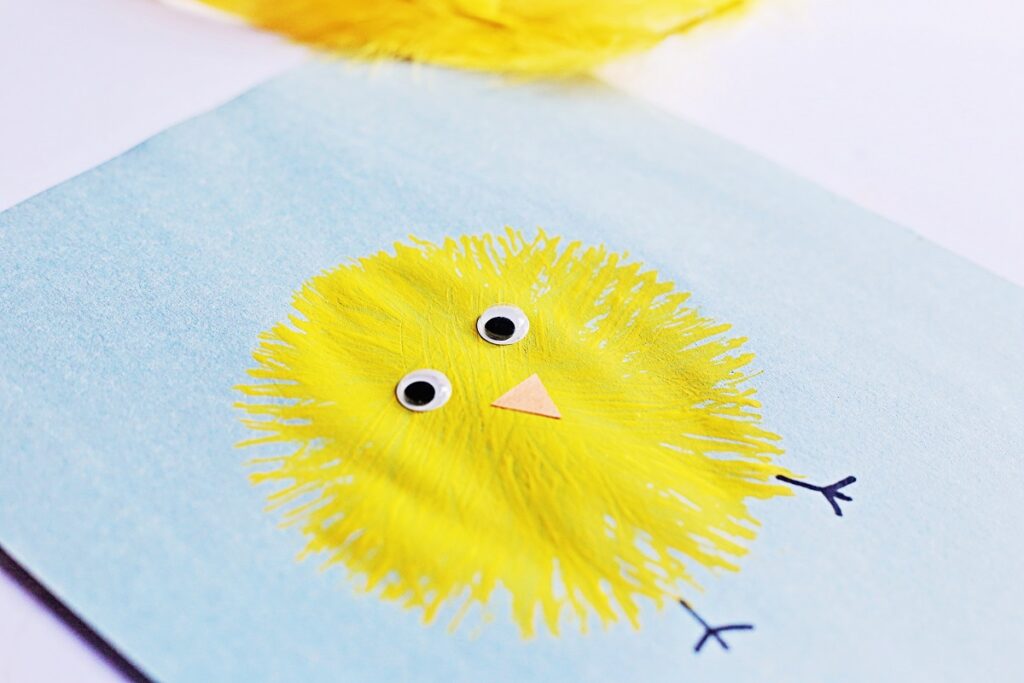

Rotating the paper as you work can also help shape your baby chick’s round, chubby form. This method imparts a unique texture that mimics the soft feathers of a hatchling, making each painting a delightful springtime creation.
More Spring Learning Activities
Incorporating the chick fork painting craft into a farm animal or chicken unit study complements the thematic exploration of baby animals. This subject captivates the curiosity of children, especially in the spring.
This craft not only enriches hands-on artistic experience but also serves as a creative gateway to discuss the life cycles of hens, their environment, and their role on a farm.
This activity naturally integrates with other spring learning activities, such as planting seeds to explore plant life cycles, studying bugs and insects and creating a butterfly life cycle craft, observing weather changes, and reading stories about farm life.
Together, these activities form a comprehensive lesson plan that touches on science, art, and literacy, providing a rich, multi-disciplinary learning experience centered around the vibrant season of spring and the fascinating world of farm animals.
Farm Animal Books for Kids
Reading farm animal books together is a beautiful way to turn art time into an enriching educational experience. These stories can breathe life into the animals children create on paper, offering insights into their behaviors, habitats, and roles within the farm ecosystem.
Whether it’s a factual book about chickens or a whimsical tale that features an adventure, incorporating reading into craft time helps children develop literacy skills while enhancing their understanding and appreciation of the subject matter.
How Does an Egg Hatch?: Life Cycles with The Very Hungry Caterpillar (The World of Eric Carle)National Geographic Readers: Farm Animals (Level 1 Coreader)Chicks! (Step into Reading)The Little Red Hen (Little Golden Book)Night Night Farm (Night Night Books)Louise, The Adventures of a Chicken


This storytelling approach deepens their knowledge and stimulates their imagination, inspiring them to think creatively about their artwork and the stories they can tell with it.
Easy Farm Animal Crafts for Kids
Crafting with themes of farm animals offers a delightful and educational way for children to connect with the agricultural world from the comfort of their homes or classrooms.
These crafts enhance fine motor skills and creativity and serve as a playful means to introduce kids to various animals they might find on a farm, enriching their understanding of where food comes from and the importance of each animal in the farm ecosystem.
The activities listed below are designed to spark imagination and provide fun, hands-on learning experiences that can complement any study unit related to farm life or baby spring animals.
- Hatching Chick Tissue Paper Suncatcher
- Craft Stick Farm Animals
- Printable Farm Animals Finger Puppets
- Easy Cow Craft
- Chicken Paper Plate Craft
This chick fork painting craft represents more than just a fun activity; it’s a bridge to broader learning opportunities and a unique way to engage young minds with the natural world.
Through this simple yet creative project, children can explore texture, color, and shape while subtly absorbing lessons on farm life and the cycles of nature.
We encourage you to integrate art into everyday learning, reinforcing the value of creativity and hands-on experiences in developing cognitive and fine motor skills.
This project, along with the suggested supplementary activities and books, offers a rich, multidisciplinary approach to education that can ignite children’s curiosity and enhance their understanding of the world around them.

Chick Fork Painting
Create adorable chick fork paintings with kids this spring. Easy to follow guide for a fun art project.
Materials
- Construction Paper for Background
- Orange Construction Paper
- Googly Eyes
- Bright Yellow Paint
- Black Marker or Crayon
Tools
- Plastic Fork
- Scissors
- Glue
Instructions
- Dip the back of the plastic fork in the yellow paint.
- Start applying the yellow paint to the paper with short strokes.
- Work in a circular pattern to achieve the shape of the chick.
- Cut out a small triangle from the orange construction paper.
- Apply the triangle beak and googly eyes while the paint is still wet. Or use glue after the paint is dried.
- Use a black marker or crayon to draw legs and feet.
Recommended Products
As an Amazon Associate and member of other affiliate programs, I earn from qualifying purchases.


Darcy is the founder of “Life With Darcy and Brian,” where she combines her love for education, board games, and crafting to create engaging learning experiences for kids. Her creative projects and writing have been featured in outlets like The Toy Insider, CafeMom, Mom.com, Parents.com, Country Living, and The Pioneer Woman.